The xTool F1 Ultra can engrave pretty much anything, from wood, slate, acrylic and leather to almost any metal. It achieves this with both a 20W fibre laser and a 20W diode laser, housed in a surprisingly compact, fully enclosed machine. And it can even cut a range of materials, including thin metal.
With several price reductions since its launch, it’s now a much more affordable option in xTool’s lineup. But could this be the sweet spot — a versatile, easy-to-use laser engraver that’s capable enough for serious hobby use or even starting a small business? That’s what I wanted to find out.
Overview

The machine comes beautifully packaged, with everything you need to get started.
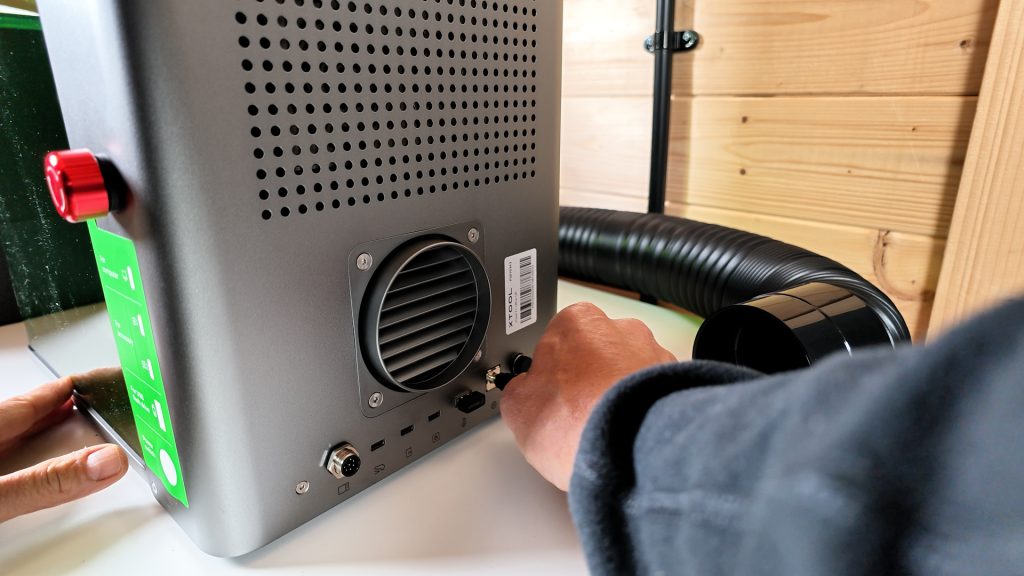
There’s no assembly. You just need to plug in the USB security key – the machine won’t work without it, the AC adapter, the touchscreen controller and the extraction hose.

I’ve vented mine outside through a window using a window vent kit. Venting outside is the preferred option, but if that’s not possible, you’ll need a fume extractor with proper filtration. Lasers can produce some nasty fumes, so you need to think about how you’re going to extract them before deciding where to put the machine.
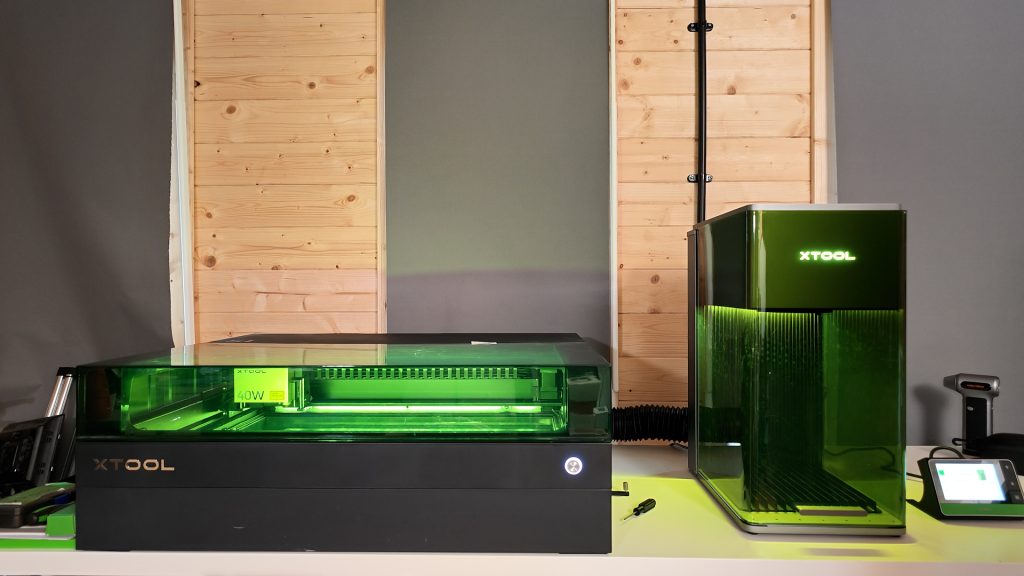
The F1 Ultra takes up much less desk space than my xTool S1, although it also has a smaller working area.
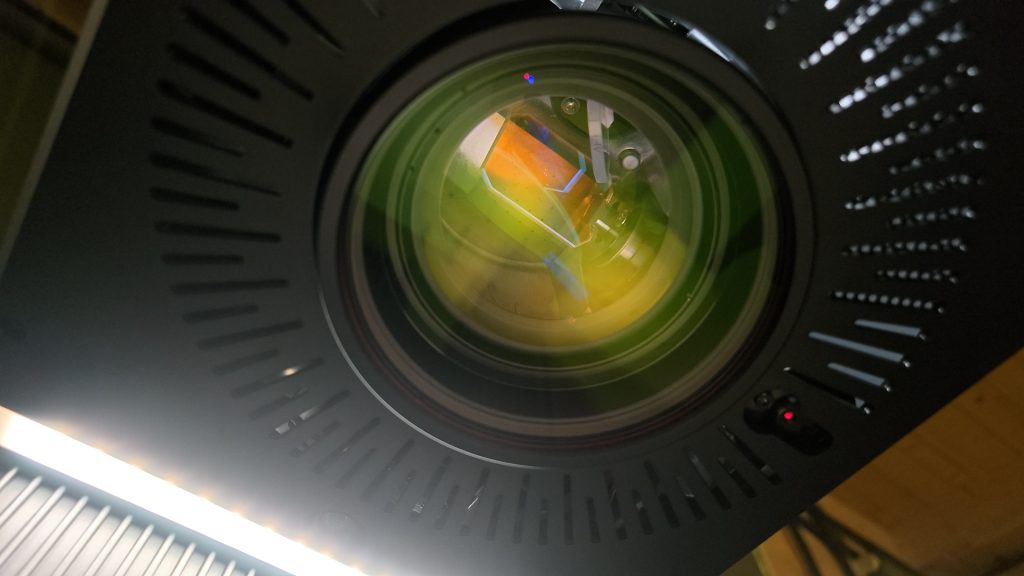
It’s a so-called galvo laser, using fast-moving mirrors to steer the beam instead of moving the head around on a gantry like on the S1. This makes engraving incredibly fast, as I’ll demonstrate shortly.
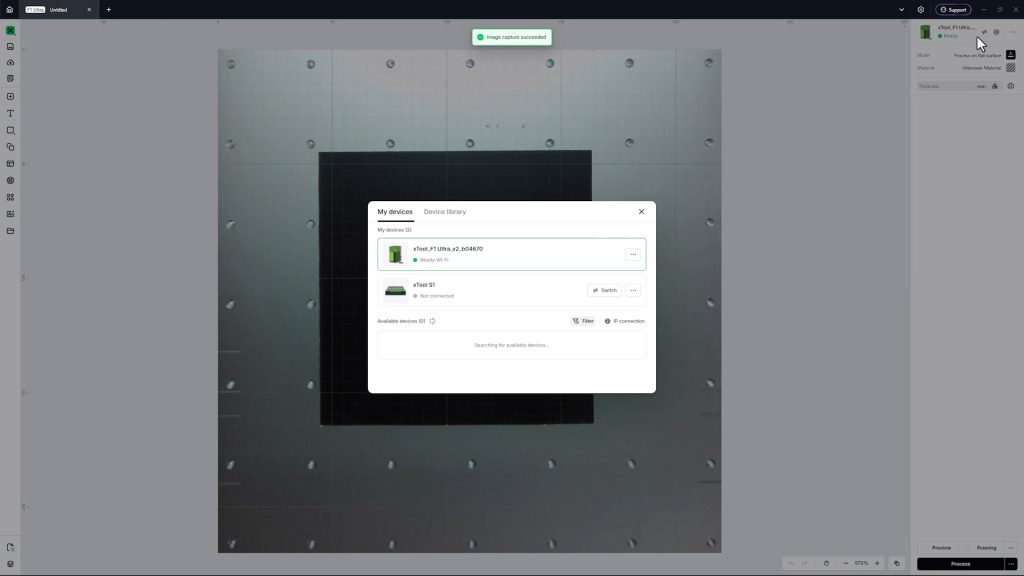
You can operate the machine entirely from the xTool app on your smartphone over Wi-Fi, but I prefer to use xTool Studio on my PC. You can connect with a USB cable if the machine is beside your computer, but mine’s a little further away, so I’m using Wi-Fi.
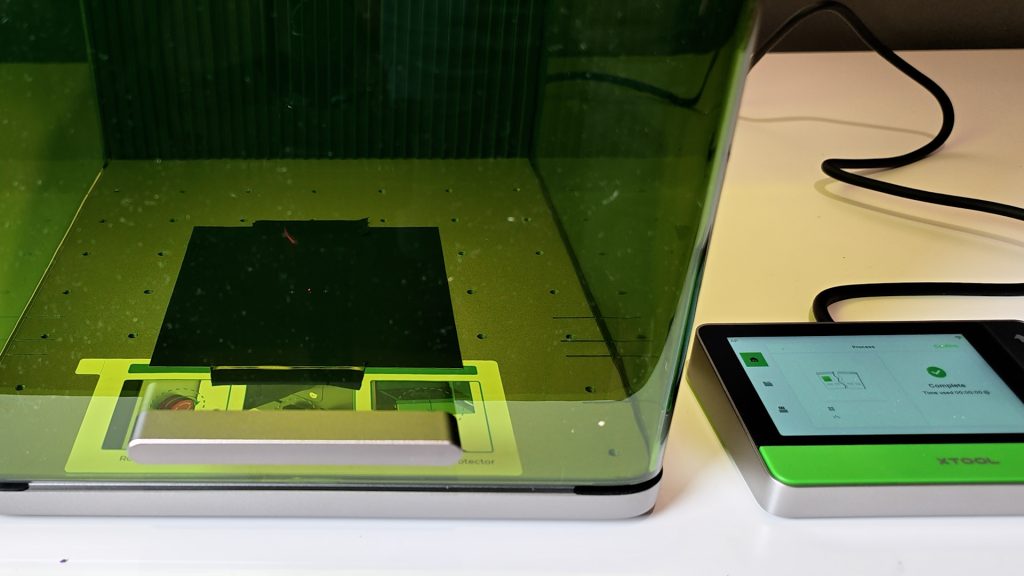
During setup, the software guides you through calibration using the included black scratch paper. I also needed to adjust the red indicator dot manually so it lined up with the blue one.
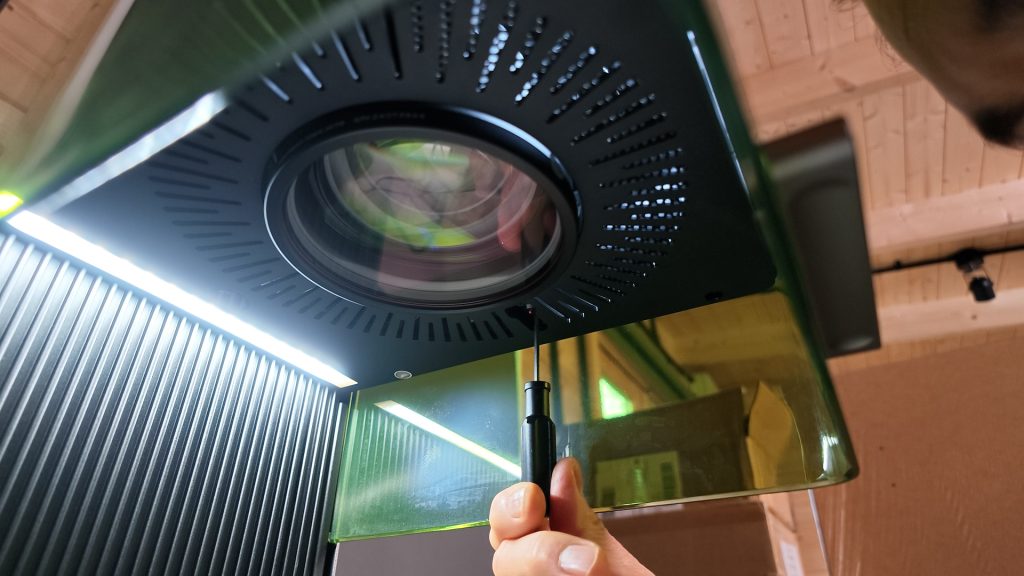
That was a little fiddly, but it didn’t take too long.
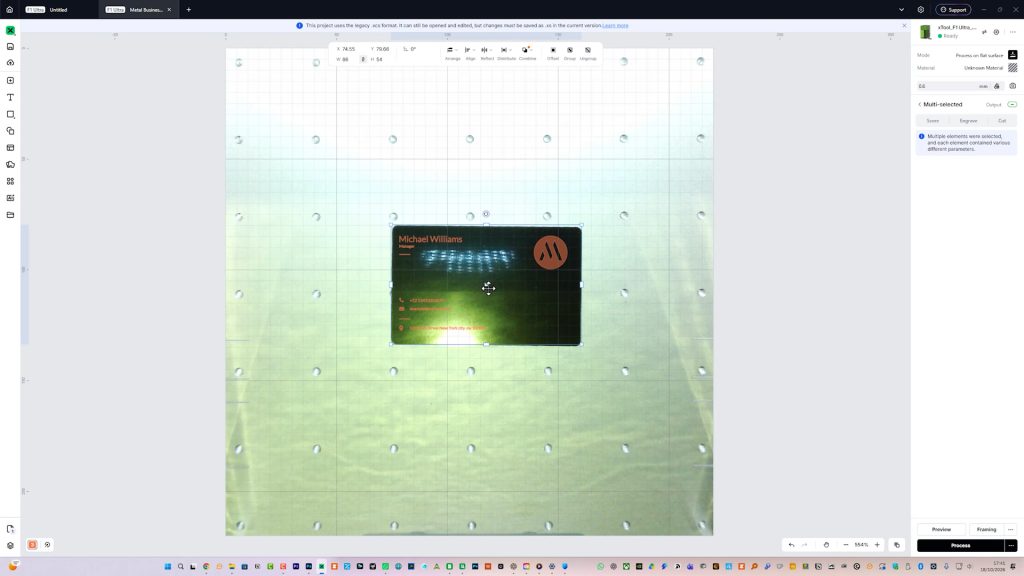
The supplied business card project is a useful way to get familiar with the workflow. Place the black aluminium card under the blue dot and click Auto-Measure. This measures the material’s thickness by moving the laser head to focus—the red and blue dots should now overlap. You can also focus manually using the controller’s physical up and down buttons.
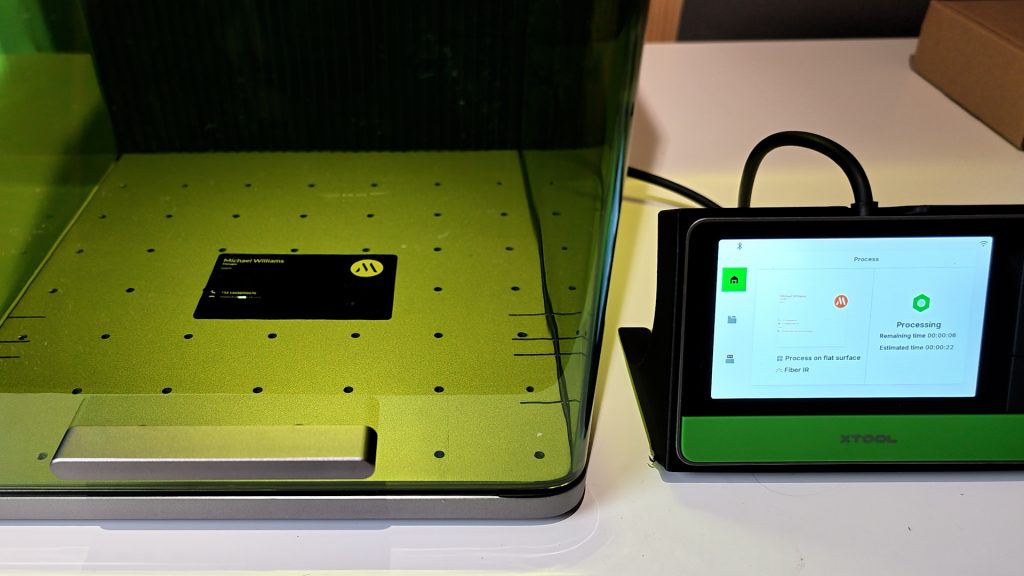
Then use the camera preview to position your design, and run the framing for a more precise check of where it’ll engrave. Adjust the position until it’s exactly where you want it, then close the enclosure. The lid doesn’t always seat properly, so you sometimes need to give it a push at the back to make sure it’s fully seated. Click Start in the software and press the Start/Stop button on the controller itself to begin engraving.
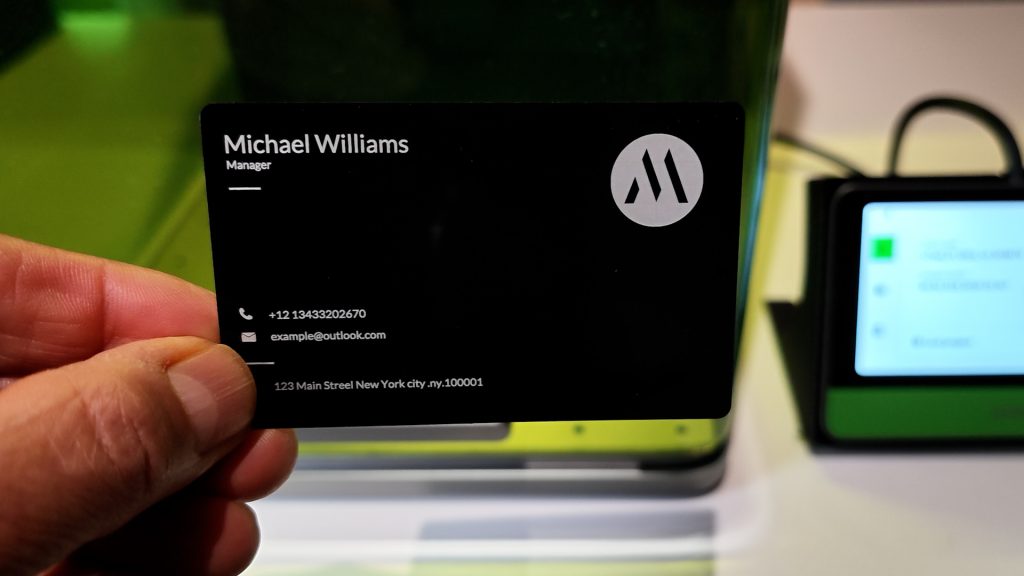
This business card took just 21 seconds, and the result looks super crisp.
Performance
A big reason for getting a fibre laser is for metal engraving, so let’s start there.

I had two projects in mind. First off, a stainless steel dog bowl engraved with a picture of my sister’s dog. I converted a photo of her dog into a black-and-white image and added the dog’s name underneath.
I experimented with the settings on a cheap stainless steel ruler. xTool provides useful settings to get you started, but I often find them a little conservative. I also found that defocusing the laser by around 10 mm gives a darker engraving, which is exactly what I wanted. I’ll put the settings for each project on-screen as a useful starting point if you want to try something similar.
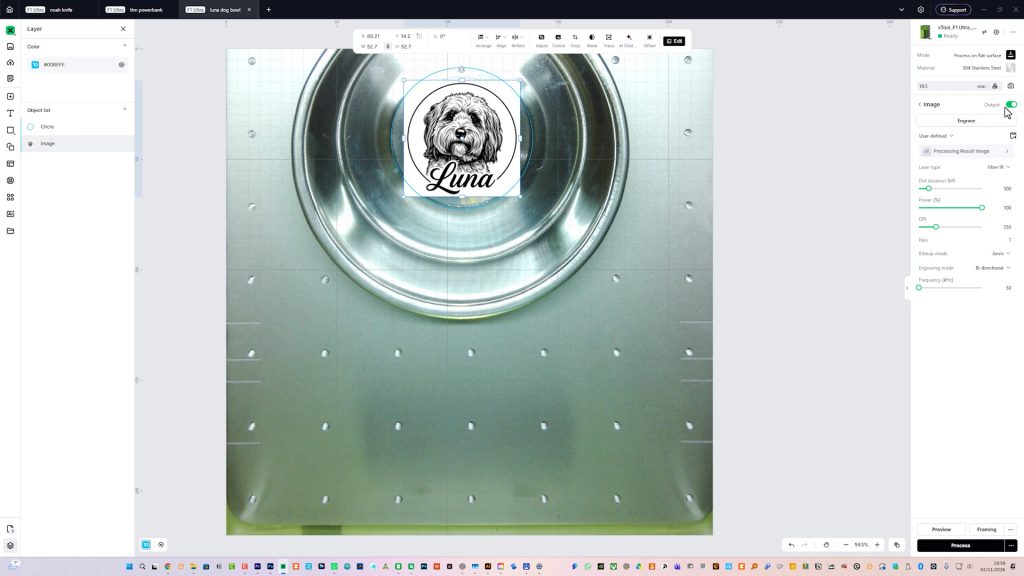
I positioned the bowl underneath the blue dot and used auto-measure, then added 10mm to the measured value.
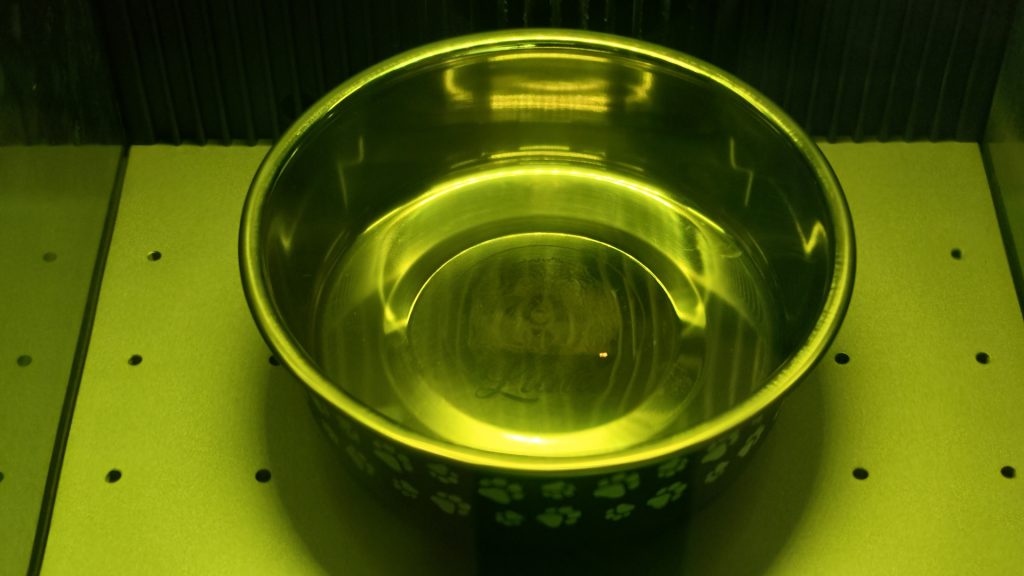
With highly reflective materials like this, you need to be careful about reflections back into the laser lens, which could damage it. So after focusing, I moved the bowl towards the back of the machine to reduce the risk of the beam reflecting directly back into the lens.
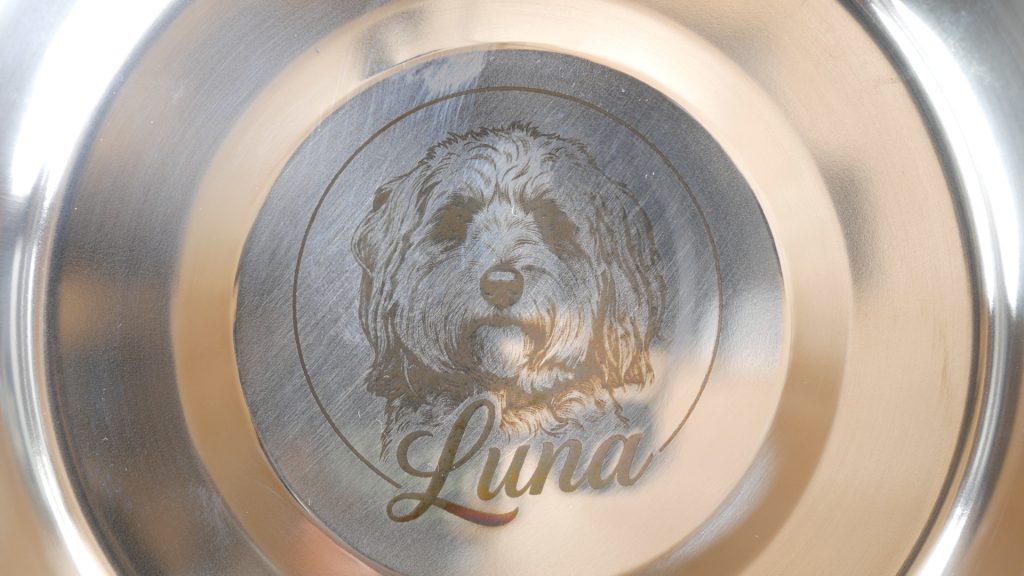
The camera is super useful for initial setup, but I always use framing to get the most accurate results. And with the laser defocused, the capture is off anyway. I’d centred the image in a circle around the centre of the bowl. I used this for framing and then turned its output off for the actual engraving.
It didn’t look as dark as I wanted, so I adjusted the settings slightly and did another pass. The result looks good and is pretty much what I was after.
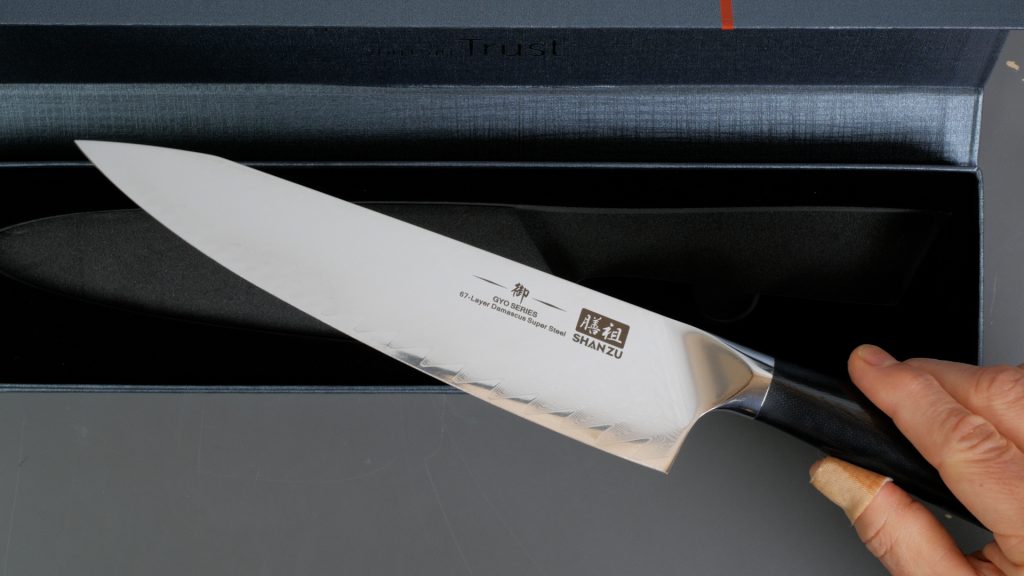
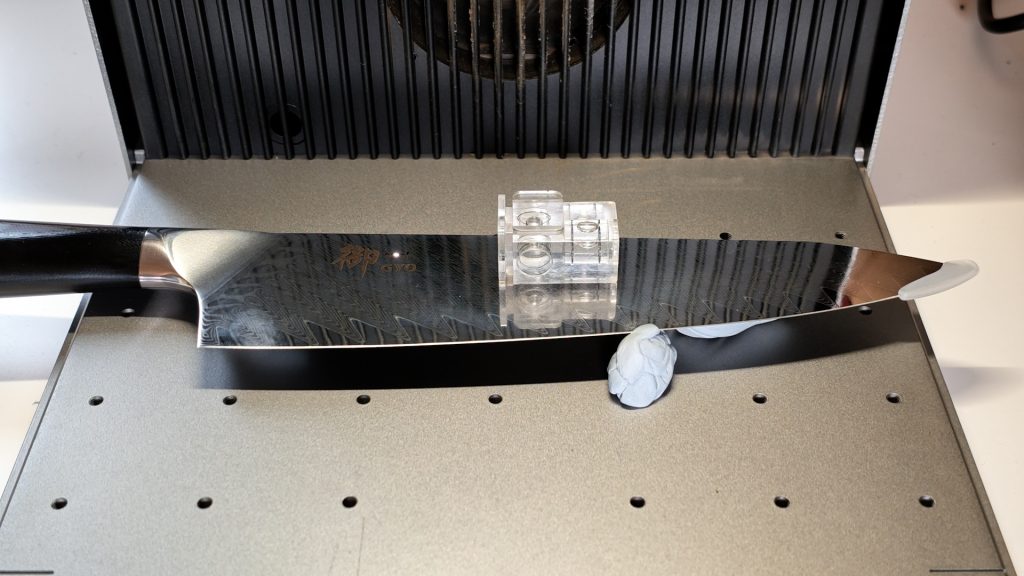
Next I wanted to engrave a chef’s knife I got for my son’s birthday. It’s always a little nerve-wracking doing something like this that’s fairly expensive – you only get one shot! I again positioned the knife towards the back of the machine and tried to get it as flat and stable as possible with some Blu Tack. A little bubble level is handy here – even if it’s slightly off, the engraving won’t be consistent.
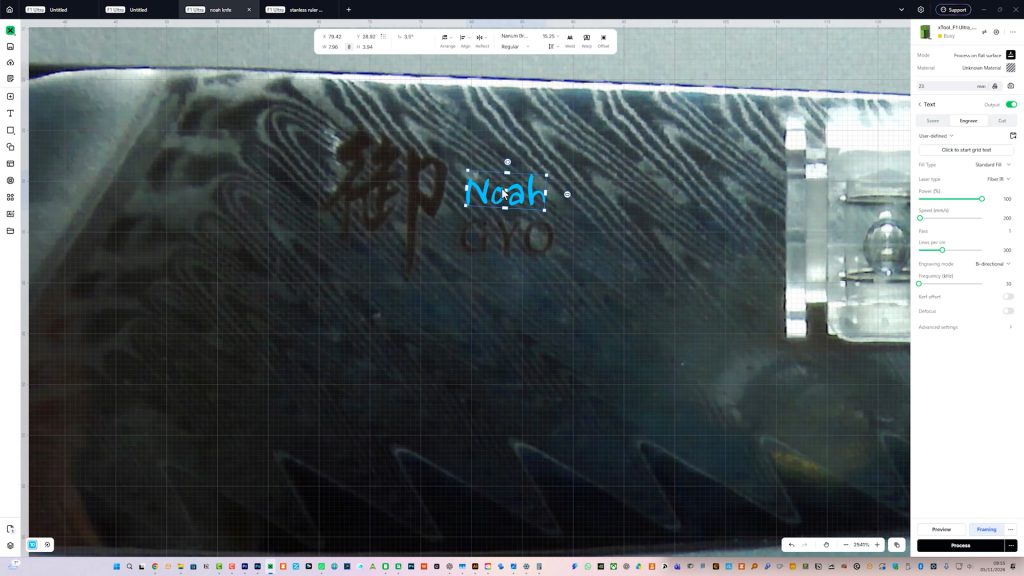
The live framing here is absolutely crucial – it’s hard to pick up on camera, but you can see exactly where you’re going to engrave. Since the image capture is off again with the laser defocused, I can nudge the text around on the computer with the cursor keys to get it exactly where I want.
I wanted something quite subtle, but I think it came out pretty well.
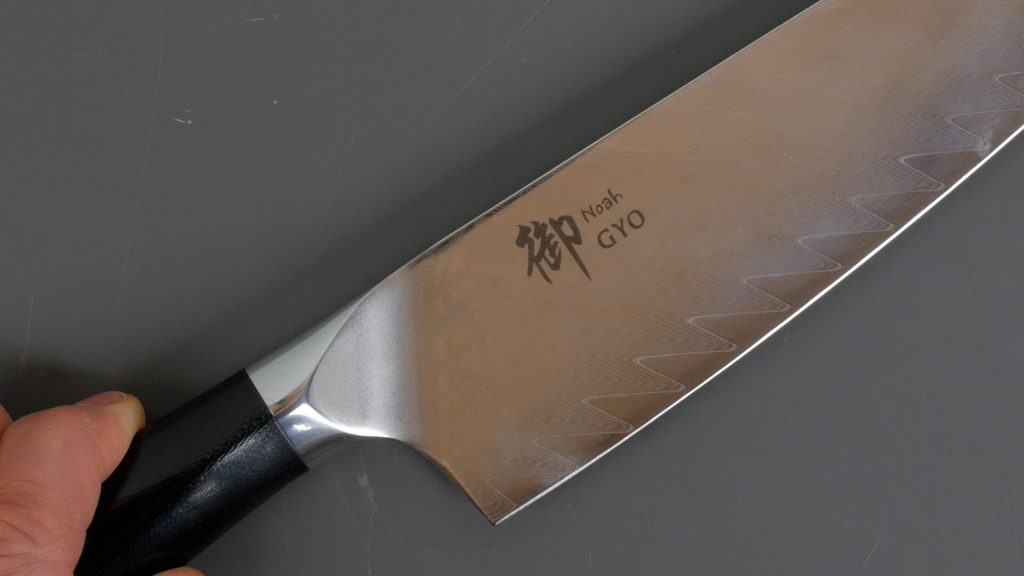
The defocusing not only makes the text darker, it also helps blend the individual laser lines together, giving a smoother, more even finish.
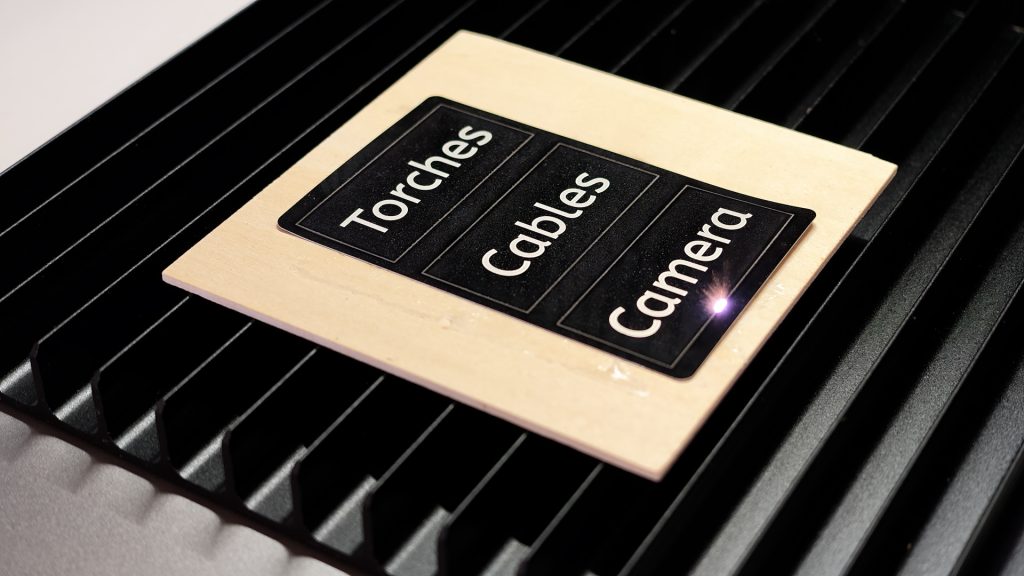
One of the capabilities of a fibre laser I was most keen to try out was cutting metal. It has limited capabilities on this front, but I tried cutting one of those 0.2mm aluminium business cards I engraved earlier. You could use it to make washers or shims, but I thought I’d try engraving and then cutting some nameplates for my metal filing cabinet.
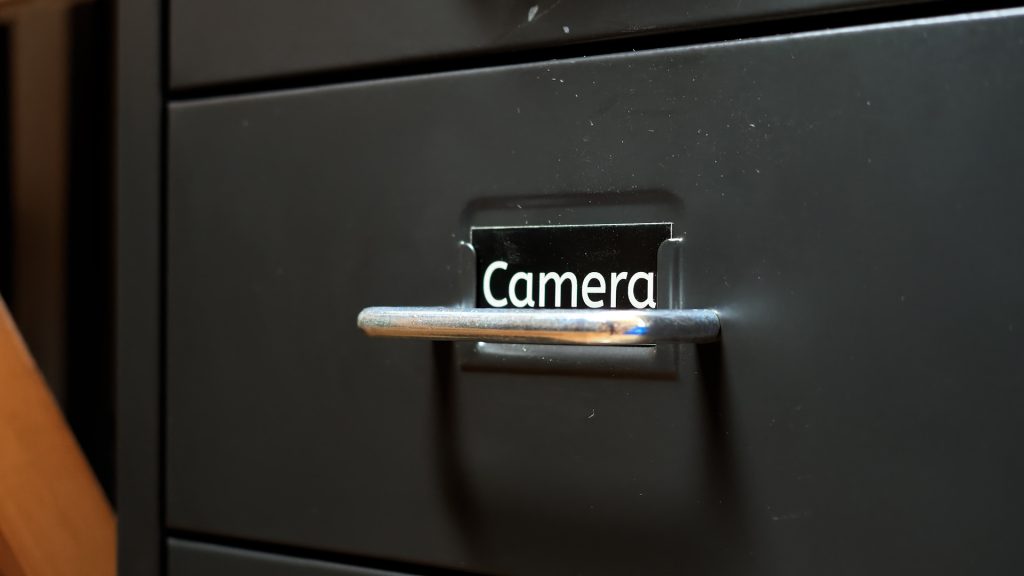
After a little experimentation, I got the best results by using double-sided tape to stick the thin cards to some sacrificial wood. You need some way to keep them flat, otherwise they’ll curl from the heat. I think they turned out very well.
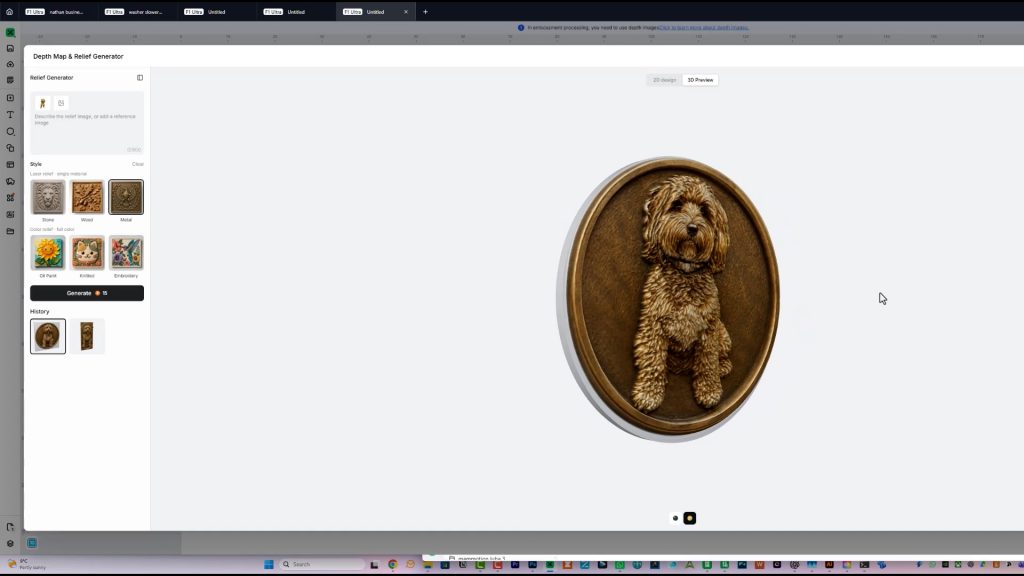
While we’re on metal, a highly marketed feature of the F1 Ultra is 3D embossing in metal. You convert your image into a depth map, either in xTool Studio or other software including Imag-R, and then set the processing mode to Embossment. I again used an image of Luna and tried engraving it on a brass coin that came with a material pack from xTool. With the default settings, the machine engraves 256 layers, slightly lowering the laser focus as it does so to get a true 3D engraving.

This is super slow – this 40mm coin took well over four hours. Leaving a 3D print for over four hours is fine, but you shouldn’t leave a laser machine unattended, and having to be in the same room while it’s doing its thing is not only tedious, I’m also concerned about whether all those tiny metal particles are being extracted out of my window.

That said, compared to a lot of fibre lasers, the enclosed design of the F1 Ultra provides much better protection from exposure to the laser beam and also makes fume and particle extraction much more effective.
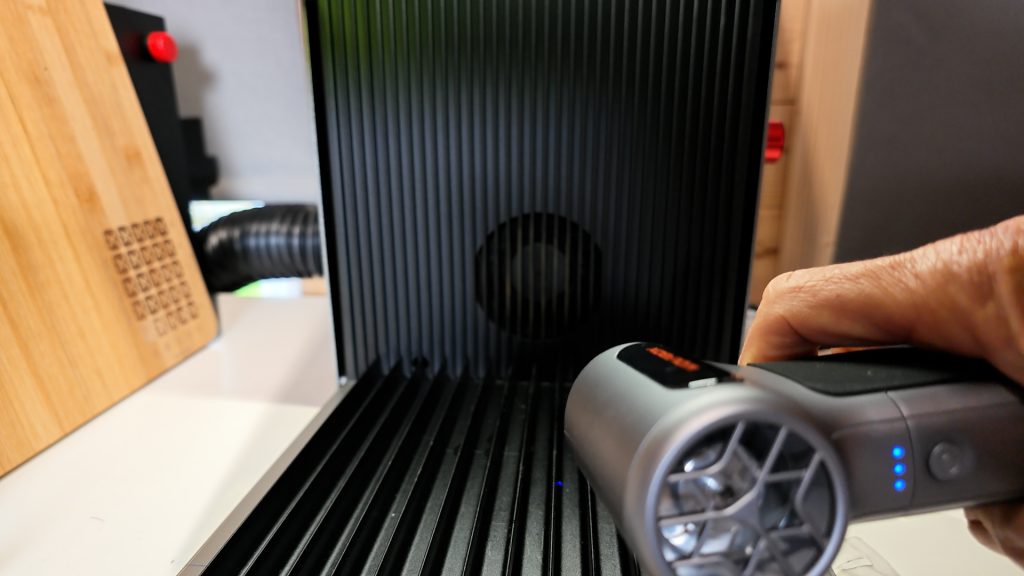
The built-in extraction works pretty well, particularly with the lid fully closed, although even venting outside through a window, I can still smell some fumes in the room.
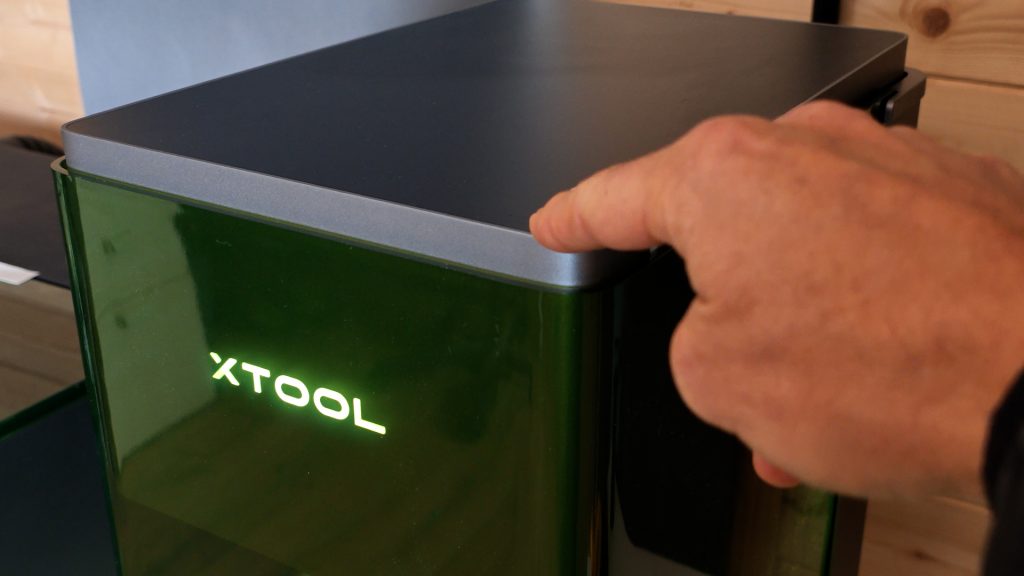
There’s also some noticeable flex in the laser head, so you really need to avoid knocking the table during a long job.
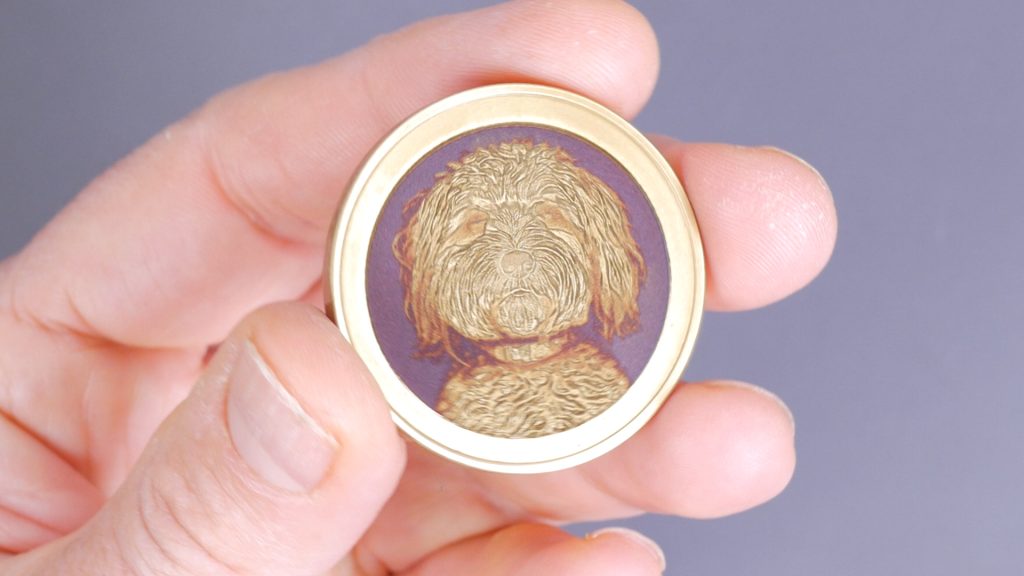
The result is okay, but I’d have liked a much deeper engraving.

I could probably improve it by experimenting further with the depth map and settings, but that would likely mean even longer processing times.
For me, that’s the biggest limitation. The F1 Ultra can do 3D embossing in metal, but I’m not convinced it’s particularly practical for regular use. For the occasional special project, perhaps, but if this is something you’re planning to do frequently, I’d be looking at a more powerful fibre laser. And even then you’d want an enclosed one like this with extraction.
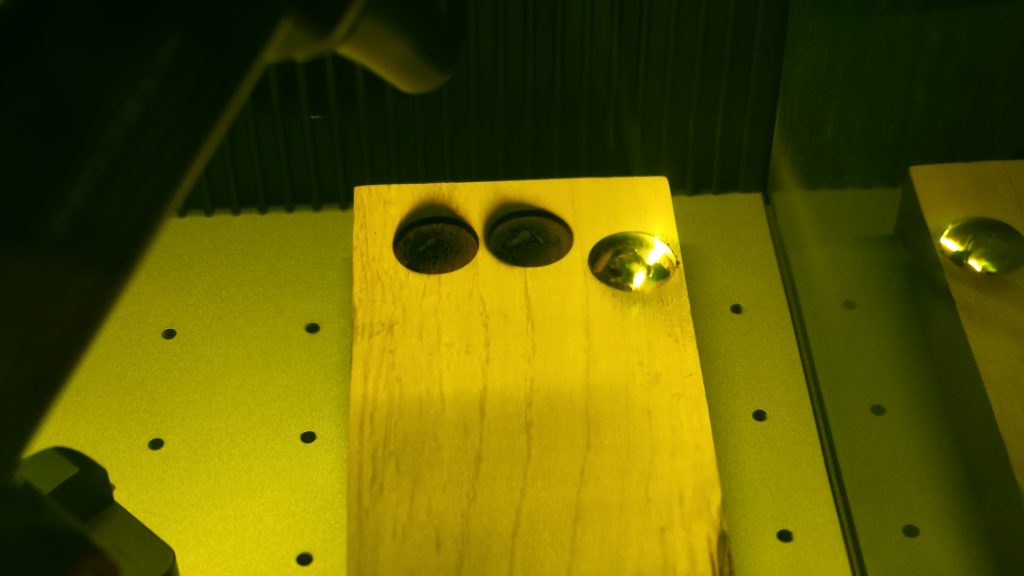
I did try 3D emboss in some wood too using the diode laser – this piece of hard maple. This looks like it has more potential to me – but you need to get the settings just right so you don’t scorch the wood or worse still – set it alight! I did get some better results directing this small air duster as a sort of makeshift air assist which I’ll come back to.
Still using the diode laser, I tried engraving an image onto a bamboo chopping board. Bamboo isn’t the best wood for engraving because of the variation in its grain and density.

I started with a material test to find the most suitable settings. xTool’s recommended settings for bamboo were actually pretty close.
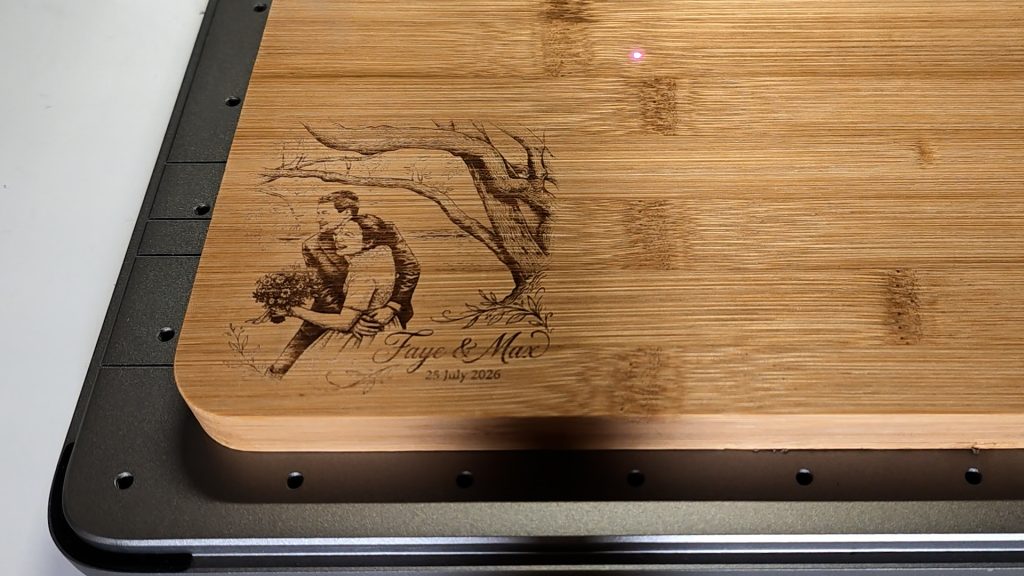
I tried two engravings on this test chopping board. First, an image I’d prepared in Photoshop based on a photo, with some text added. The final plan is to make a personalised chopping board as a present for my cousin’s wedding. It came out OK, although perhaps a little lighter than I’d have liked.
I also tried engraving the original image directly. xTool Studio has various built-in tools for preparing photos for engraving, or you can process them using something like Image-R or DithX and then enable passthrough in xTool Studio.
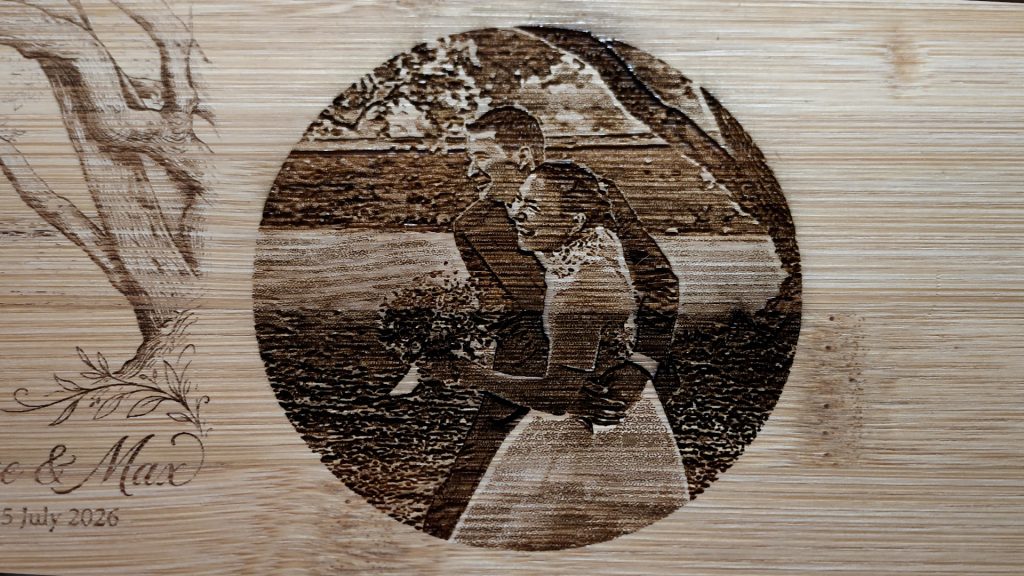
This came out OK too, provided you don’t mind the variation in darkness caused by the bamboo. I’ll probably make my own chopping board from some maple I have, which should give a cleaner, more consistent engraving. Denser, more uniform woods generally engrave more consistently, although it depends on the effect you’re after.
As I alluded to earlier, cutting wood and other materials on the F1 Ultra isn’t ideal. The 20W diode laser is powerful enough to cut wood, leather and acrylic, but there are two main issues.
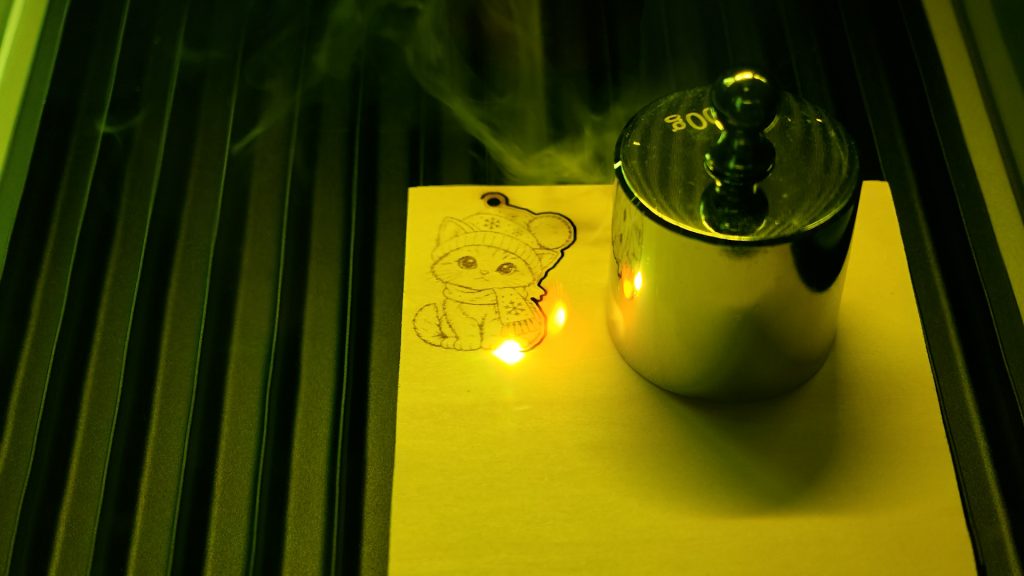
Firstly, there’s no air assist, which would normally blow smoke and debris away from the cutting area, helping to reduce charring and extinguish any small flames that develop during cutting.
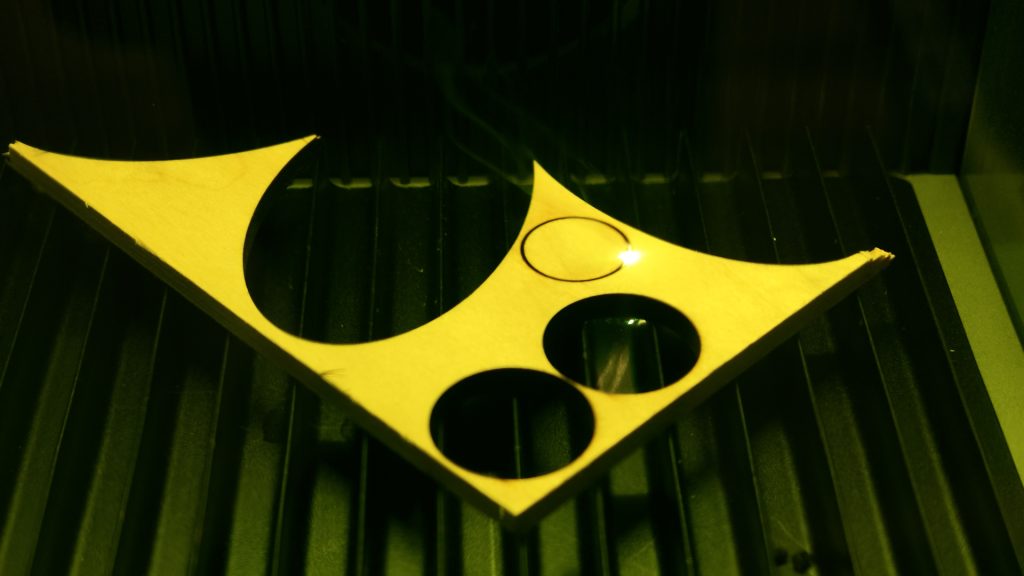
Secondly, because the laser beam is directed by the galvo system, it hits the material at an increasing angle the further you move from the centre of the working area.
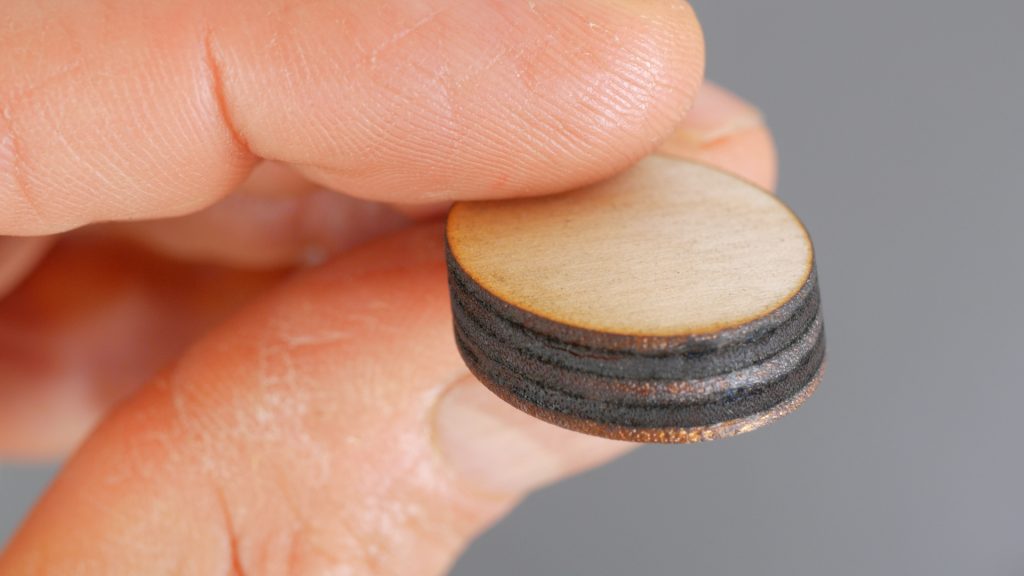
This can result in angled rather than perfectly vertical cuts, particularly noticeable in thicker materials.
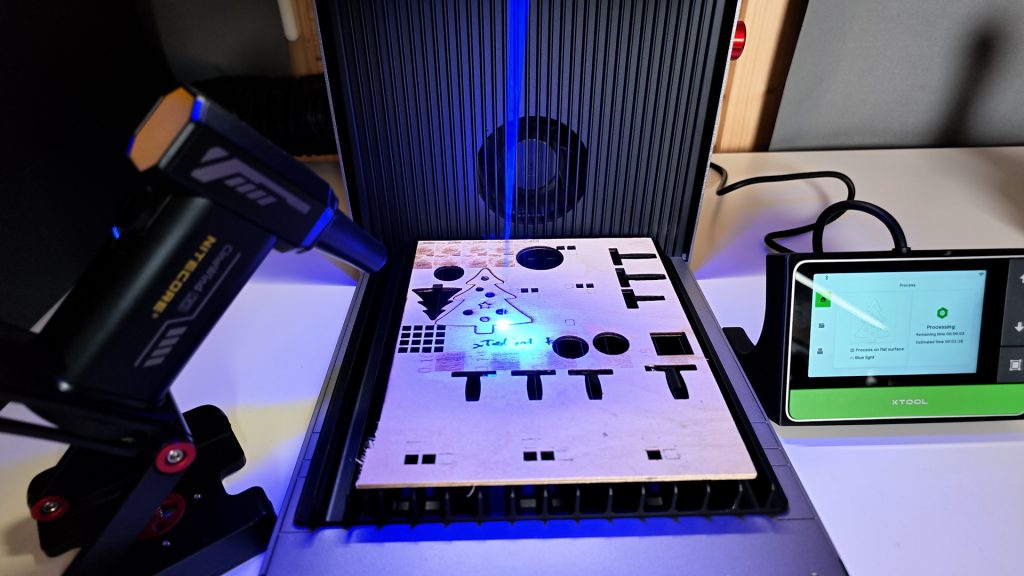
Still, with thinner materials, and by using slightly lower power with multiple passes, you can get decent results. And again, using my air duster trick, I was able to cut thicker materials more cleanly in fewer passes.
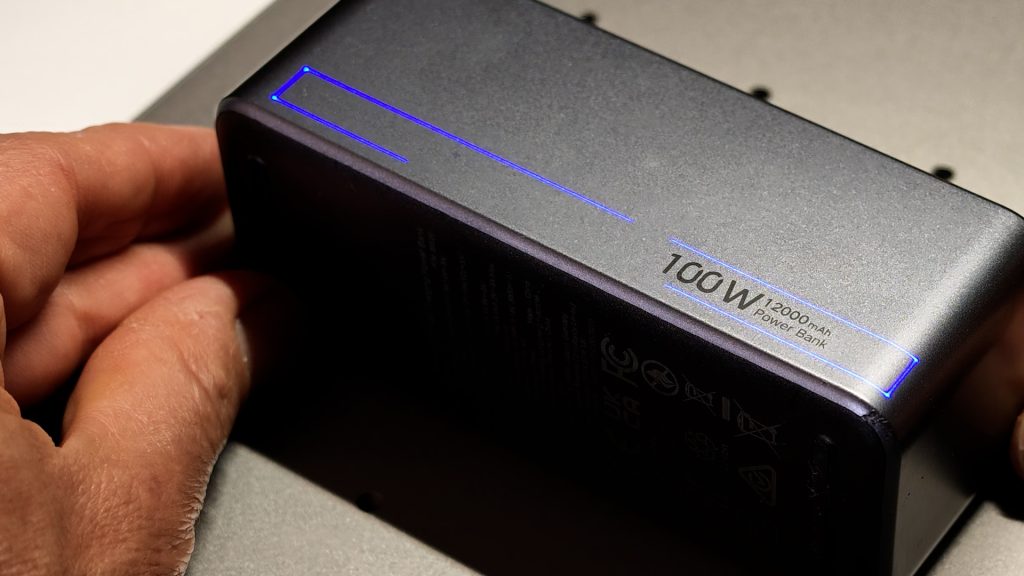
Coming back to the fibre laser, I also tried it on some plastic. You do need to make sure you’re not engraving PVC, since it releases toxic gases.
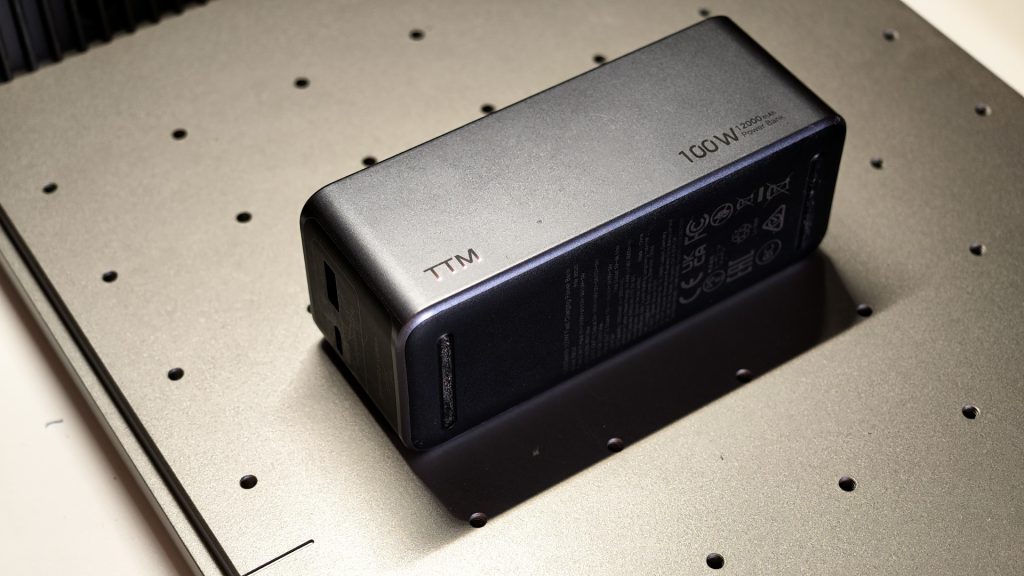
Although it’s not always easy to know exactly what something is made from, I engraved my YouTube channel’s initials on a power bank, and it worked very well, with the engraving closely matching the existing text on the power bank.
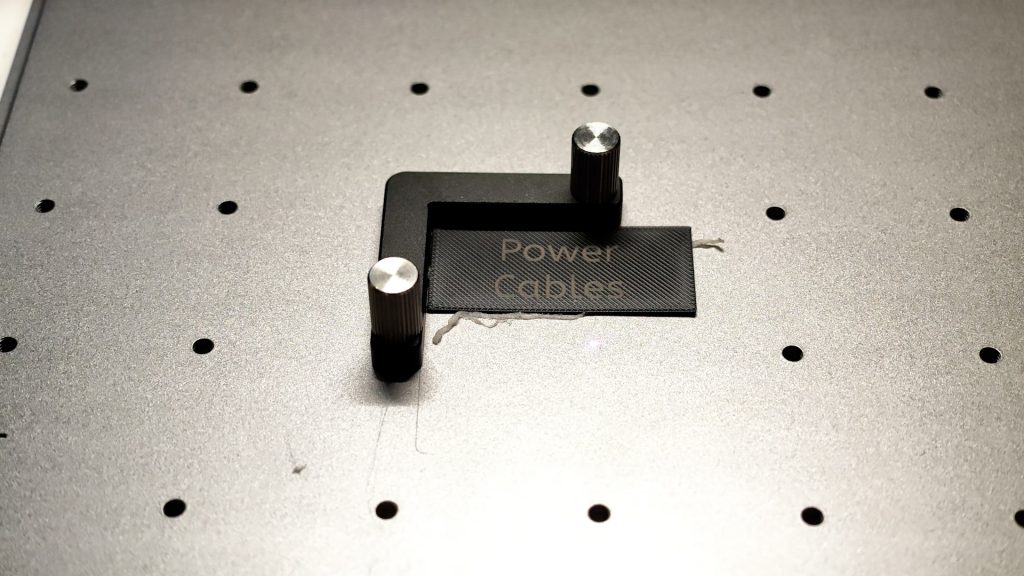
I also engraved some Bambu Lab black PLA, starting with a material test and then some labels for my filing cabinet again. The contrast you get will depend on the exact filament type and colour, but these came out okay and are certainly usable.
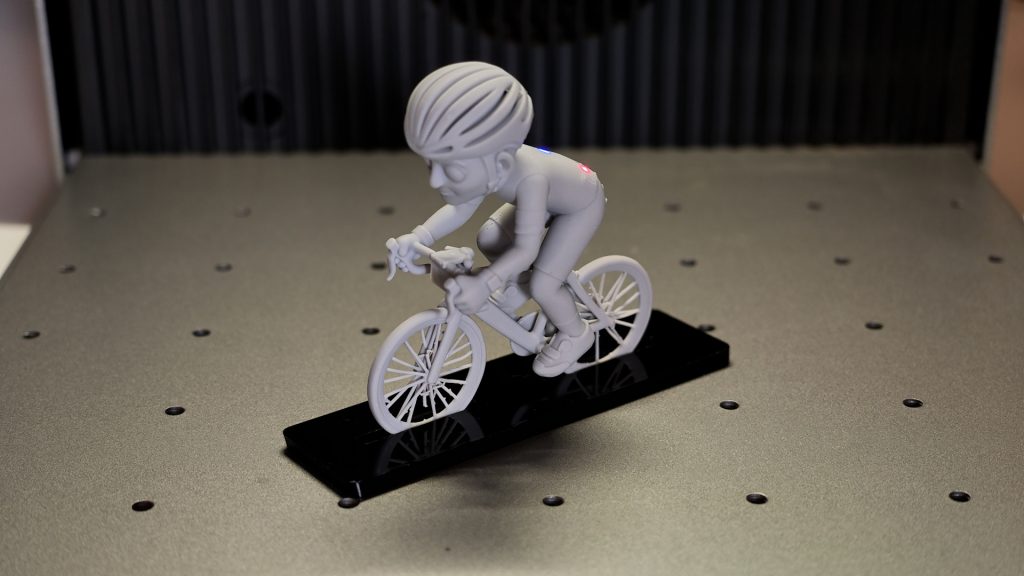
Next I wanted to make a little Perspex stand for the resin print I made in a recent article. I created the basic design in xTool Studio and used the default “Black Acrylic” settings. Since it’s reflective, I made the cut towards the back of the machine so you can see the angled cut, but it did a very clean job in just one pass.
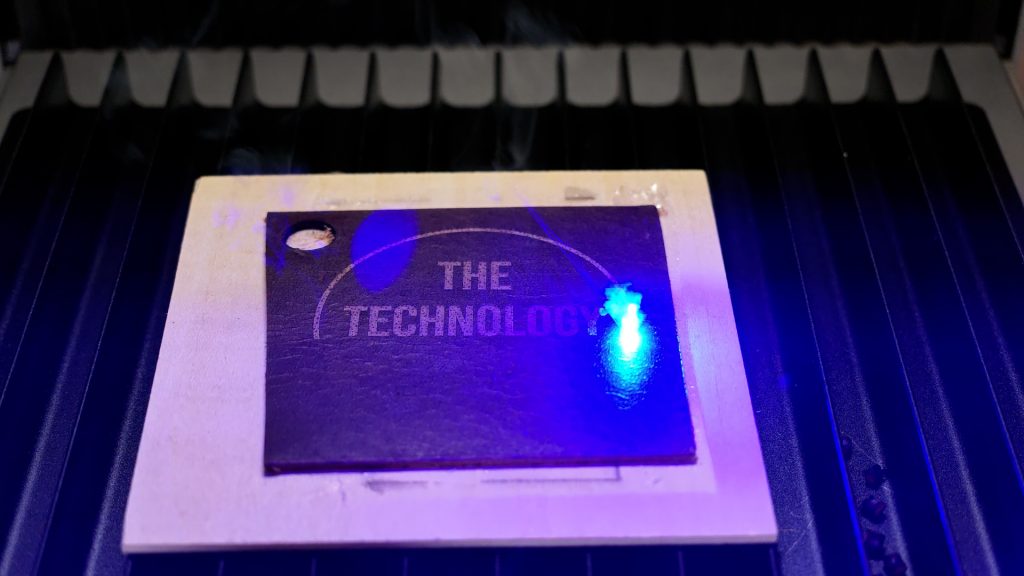
I tried various other materials, including slate and leather, and the 20 W diode laser worked perfectly.
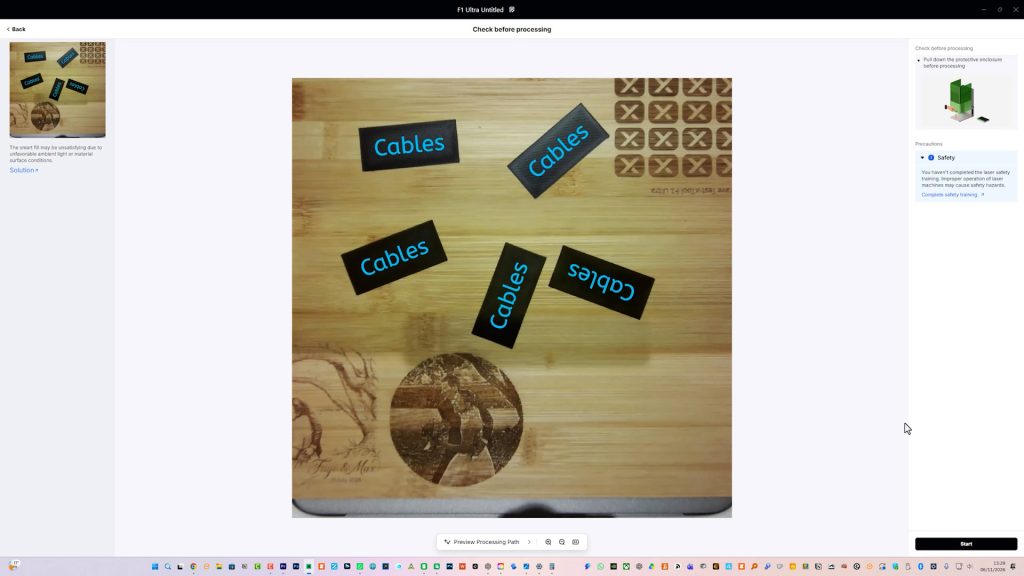
The last thing I wanted to try was the batch processing mode in xTool Studio. You can drop an assortment of identical objects onto the bed of the laser, create a design on one object, and the machine will identify all the other objects automatically.
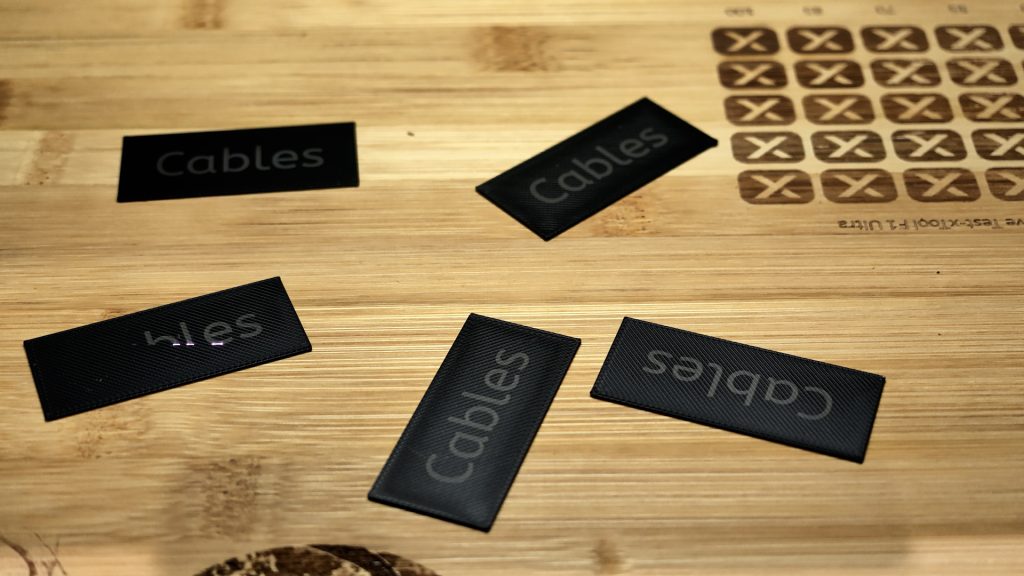
You can then send the job to the laser. It worked very well. This mode also works with the optional conveyor belt for continuous operation, although that’s not something I’ve tried just yet.
Conclusions
The F1 Ultra is a very versatile machine, and I’ve been impressed with just how much it can do. The enclosed design, built-in extraction, camera positioning, live framing and xTool Studio software make it very easy to use.
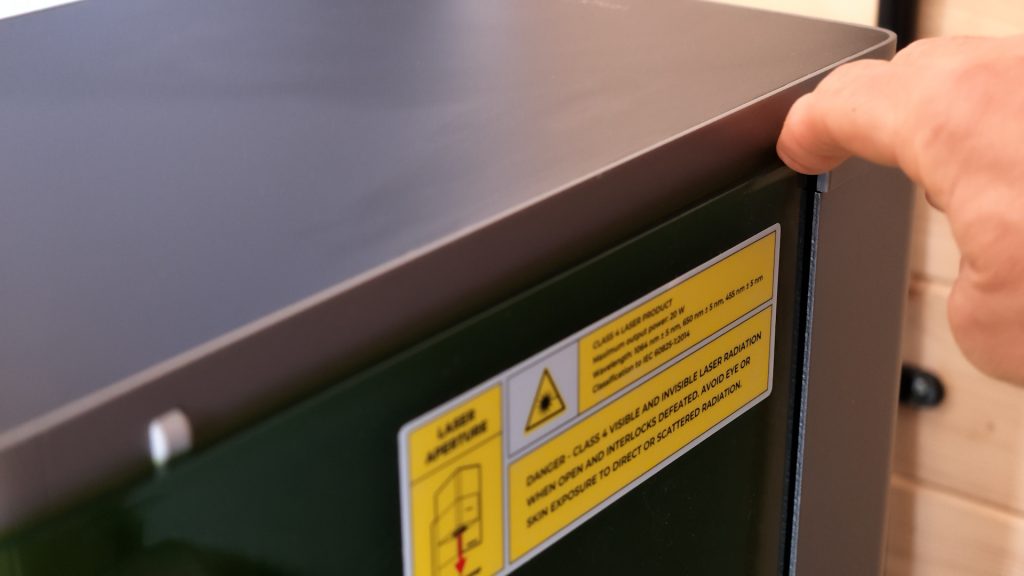
There are a few things that I’m not so keen on. Although the machine feels well built overall, there’s some noticeable flex in the laser head, and I often have to push down on the back of the lid to get it to seat properly. There’s also a constant whirring noise whenever the machine is switched on. It’s not loud but a little annoying if you’re working in the same room.
And while it can cut various materials, the lack of air assist and the angled cuts you can get with thicker materials mean it wouldn’t be my first choice if cutting is a priority.
As I film this, the F1 Ultra costs just over £2,000 on its own, which is hardly cheap, but it’s considerably less expensive than when it first launched, and it’s still just as capable.
I do think you could run a small business with this machine, and it’s certainly more than capable enough for serious hobby use.
I will be taking a look at the newer F2 Ultra, with its more powerful lasers. One of its main advantages will be faster engraving, but how much that matters really depends on what you’re making and how many items you need to produce.
Generally, preparing any artwork, experimenting with settings and getting everything just right will take far longer than the actual engraving, which often takes less than a minute. Of course, that depends on the sort of engraving jobs you’re doing, but I found the F1 Ultra pretty quick for most of the jobs I tried.
So overall, if you can live with the relatively small working area, don’t need to do much cutting and aren’t planning on regularly doing deep 3D engraving, there’s a lot to like. With its fibre and diode lasers in a compact, enclosed machine, and at its current price, I think the F1 Ultra genuinely might be all you need.
Don’t forget to take a look at my YouTube video at the top of the page, and again please subscribe to my YouTube channel where I’m releasing videos every week on the latest technology and how to get the most out of it. If you tap the bell icon when you subscribe you’ll get a notification as soon as I release a video, and there’ll be a link to my site here for the written article. YouTube is also the best place to leave a comment. I read all of them and respond to as many as I can!
Purchase the F1 or F2 Ultra (40% off both right now on Amazon)
► xTool F1 Ultra: https://geni.us/vwyv
► xTool F2 Ultra: https://geni.us/gCVFzI
These are affiliate links. If you buy through them, it helps support this website and my YouTube channel at no extra cost to you – thank you!
Leave a Reply