The Creality Ender 3 S1 Pro should be the most capable printer I’ve looked at so far. As well as your standard PLA and PETG it can print engineering grade materials like Nylon and Polycarbonate and it comes with many features that make it easy to use including a spring steel removable print surface, an all metal direct drive extruder, automatic bed levelling, a touch screen and it even has a handy LED lamp built in.
I’ll test all its claims, printing a range of models in a variety of materials to try and help you decide if this printer is right for you.
If you’re new to 3D printing I’d highly recommend watching at least some of my earlier video that introduces 3D printing with the budget Creality Ender 3.
So let’s take a closer look.
Overview

The printer comes well packaged and requires basic assembly.

First you need to attach the print head to the top gantry assembly with the 4 M3 bolts and then install the gantry into the base, securing it in place from underneath the printer with 4 M5 bolts.

The bolts are in individual bags which are clearly labelled with their sizes which is a nice touch. Then you install the screen on the right side of the printer with 3 M4 bolts, snap on the spool holder and plug in the cable to the filament runout sensor which is already attached.

Now you can attach all the cabling starting with the first Z axis motor, expansion interface for the LED light and the filament detector. Next connect the cables to the LCD screen and the second Z axis motor.

And finally attach the cables to the X axis motor and limit switch and plug in the 24 pin connector into the print head. It’s easier to follow the video included on the SD card that guides you through the assembly process. I think the manual would be hard to follow if this is your first 3D printer. If you prefer following a manual, the SD card contains the full user manual and you can see the illustrations more clearly.

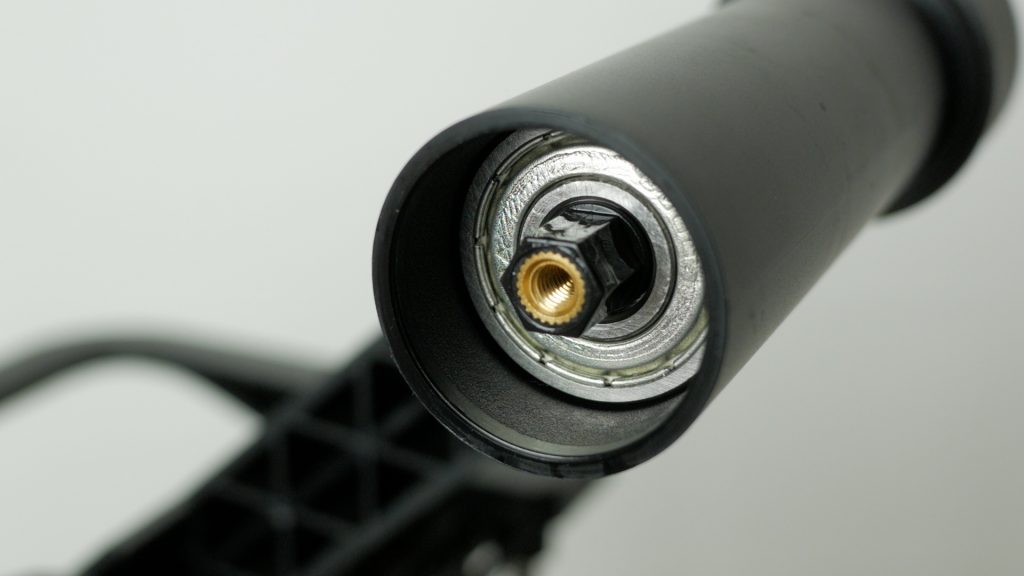
It’s worth checking at this stage that nothing is loose. You can tighten the bed, Z-axes and print head rollers with a fraction of a turn of their eccentric nuts, using the supplied spanner. There should be no play and none of the wheels should be able to rotate individually.

You can also adjust the belt tension for both the X and Y axis with the built in tensioning knobs.

You get a decent assortment of accessories with the printer including some side cutters and a spare nozzle. There’s also the Quick Installation guide and a useful materials guide. There should be an SD card and reader, but my printer was missing these. I downloaded the SD card contents from Creality onto my own SD card.
The build quality of the printer is generally good with the base enclosed in moulded plastic and the cabling all neatly organised with a thick sturdy cable to the heated bed. And the spool holder is particularly nice, rotating on smooth bearings.
It’s quite a large printer (490 x 455 x 625mm (W x D x H)) considering its relatively small 220 x 220 x 270 mm build volume. Especially when you compare it to the original Ender 3 which has a similar build volume. It also weighs more than the Ender 3 at 8.6kg. Still it doesn’t use that much more desk space when it’s actually printing.
Before turning the printer on, check the power supply is set to the right voltage for your country. The factory setting is 230V which is correct for the UK.

After turning the printer on you need to level the bed. Tap on Settings | Levelling and then tap on Start. The printer then uses its CR Touch probe to measure 16 locations on the bed.

The whole process takes around two and half minutes. You then need to set the Z-offset – the height of the nozzle above the bed.

Tap on Aux Level and then adjust the height of the nozzle until it just touches a piece of printer paper. Tap back to complete the levelling process.

Unlike other printers I’ve reviewed recently, you can manually adjust the tilt of the bed with the four levelling knobs. The manual only suggests doing this if the maximum variation of the bed is over 2mm which will cause the automatic levelling to fail. Tap on Level and then Aux Level and move the nozzle to the five preset positions and adjust the levelling knobs at each corner so the nozzle just scratches a piece of paper. Looking from the top of the printer, turning the knob clockwise increases the height of the bed, and turning the knob anti-clockwise lowers the bed.
I’d recommend doing this manual levelling at least once, just to check your bed is as flat as possible. It should help the automatic bed levelling.
Really the printer should heat up the nozzle and bed before levelling, particularly when adjusting the Z-offset but it doesn’t. So you need to manually preheat the nozzle and bed if you want to set the Z-offset more accurately. This will take account of any thermal expansion, but also melt any hardened filament since you’ll normally have filament loaded.

Tap on Ready | Manual | Preheat PLA. Then tap on Level | Settings again and then Aux level and adjust the Z-offset with the up and down arrows. This appears to be the only way to get to Z-offset before a print, which is a little cumbersome. And you can only adjust this Z-offset in 0.05mm steps – I’d prefer finer steps. Tap on Back when you’re done.

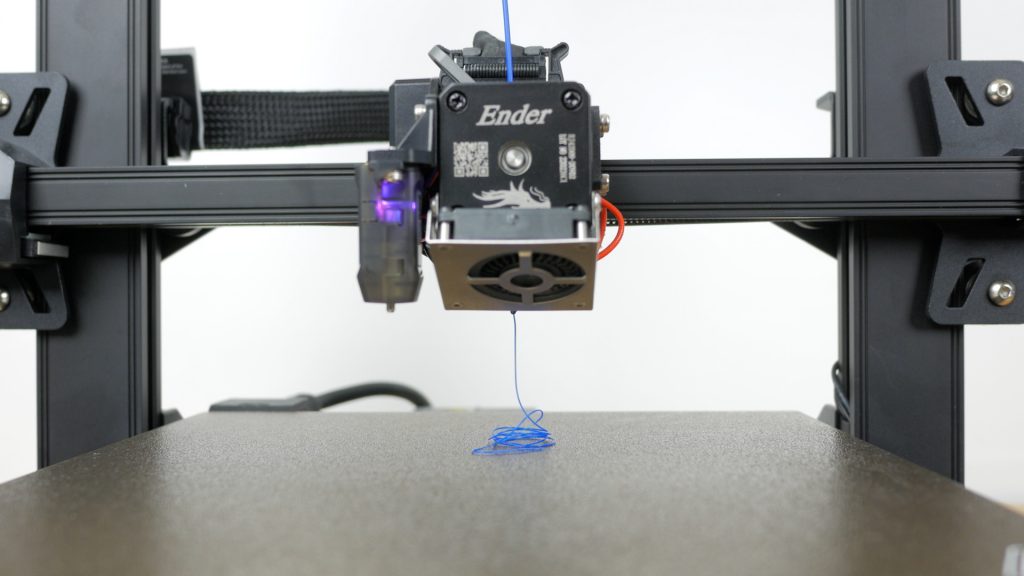
There’s no automated way of loading filament. Just make sure you’ve tapped on Preheat PLA as just described or you can set the nozzle temperature to whatever you want under Nozzle temp.

Once the nozzle is up to temperature, trim the end of the filament at a 45° angle and push it through the extruder and hotend and out through the nozzle, whilst depressing the extruder lever to release tension on the extruder gears.
There’s no way to unload filament automatically either. As before just ensure the nozzle is up to temperature, depress the extruder tension lever and push some filament out of the nozzle and then pull the filament out of the print head.
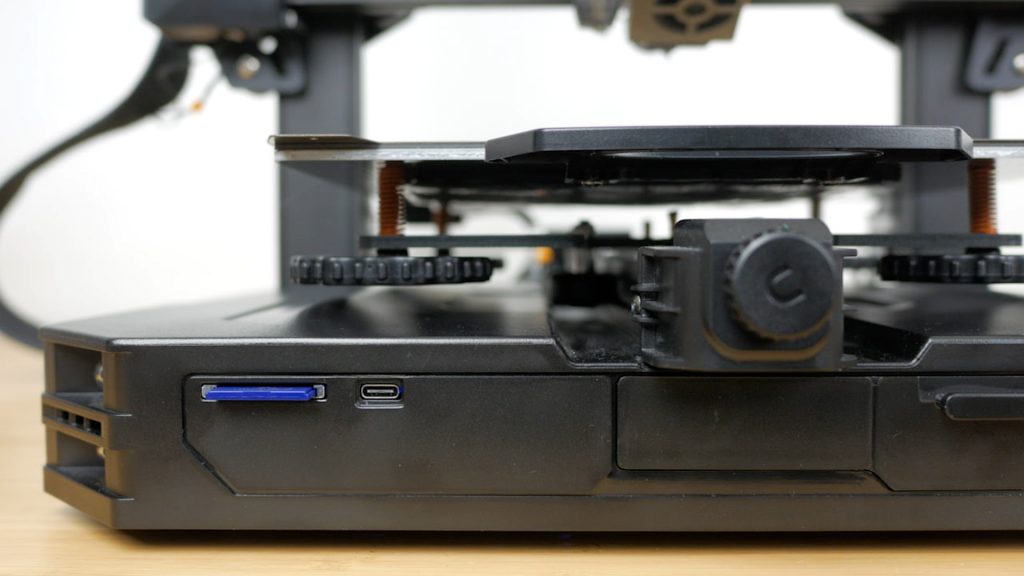
The front of the printer has a full size SD card slot and a USB-C port for connecting to a computer or a Raspberry Pi with Octoprint for example.
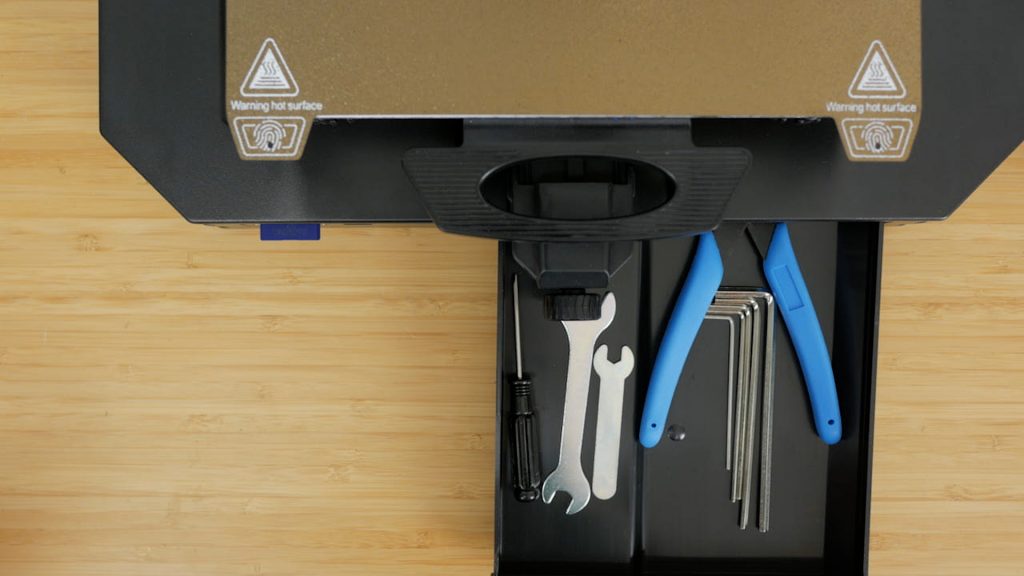
Beside these ports there’s a useful generously sized tray for your accessories.
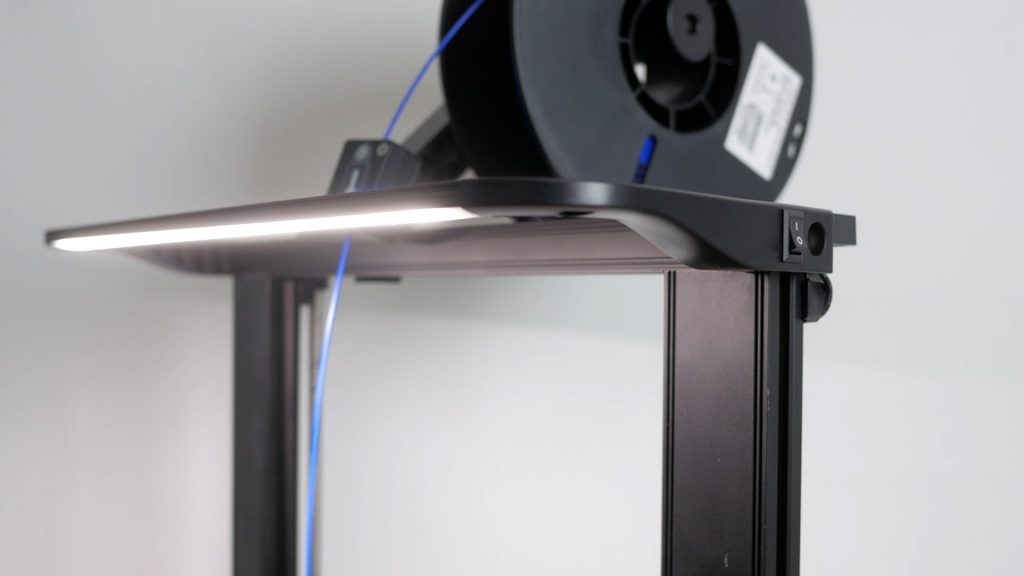
On top of the printer there’s an LED lamp with its own power switch. This is a great addition, especially when printing at night.
Performance
This is a pretty capable 3D printer. It has an all-metal hotend which can reach temperatures up to 300°C. This allows printing of a wider range of materials including engineering grade filament like Nylon and Polycarbonate.
And it’s a direct drive setup, with a dual geared extruder that sits directly above the hotend unlike your typical Bowden setup where filament has to travel through a length of PTFE tubing from the extruder to the hotend. This makes loading and unloading filament easier and should allow printing of more flexible materials that can be difficult to print with a Bowden setup.

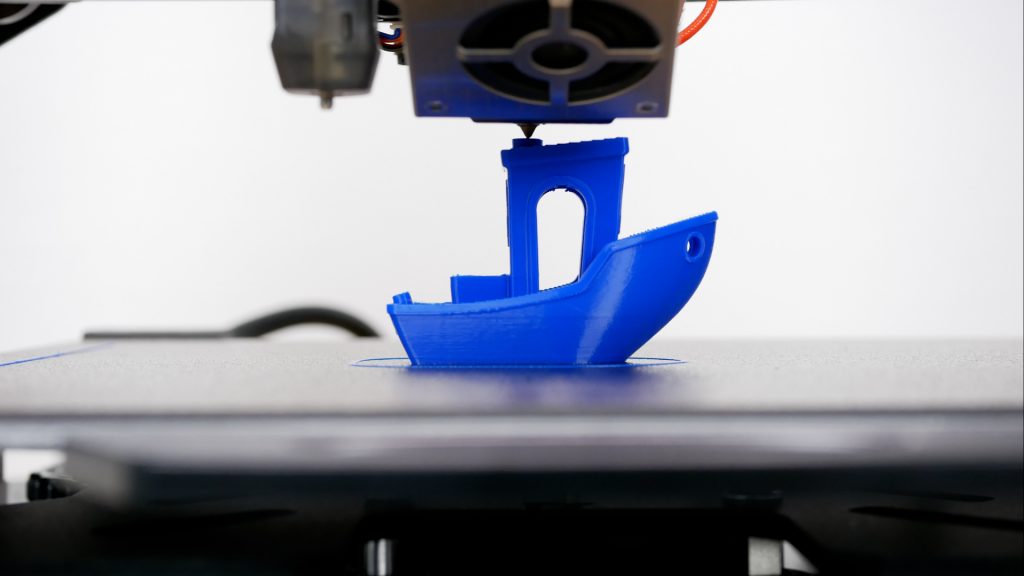
I started out printing the Ender coin supplied on the SD card in eSUN PLA+. You can adjust the Z-offset while printing if need be by tapping on the printing parameters at the top of the screen and then Z-axis Comp. This print came out very well – it’s hard to spot any flaws. And the S1 Pro uses a removable textured PEI build plate that makes removing prints easy. You either wait for the bed to cool down and they generally just pop off, or you can flex the sheet as soon as the print finishes to remove them.
Next I sliced my own models in Cura. Creality prefer you use their skinned version of Cura that already has profiles for this printer but it’s based on an older release of Cura. I had to set up this printer manually but you can copy settings from their slicer. And Creality supplies a useful guide that provides settings for various materials that will get you started. It would be easier though especially for beginners, if Creality just supplied profiles for popular materials that you could import. I’ll include my custom profiles down below in the description but I’m sure this printer will be included in a future release of Cura soon.
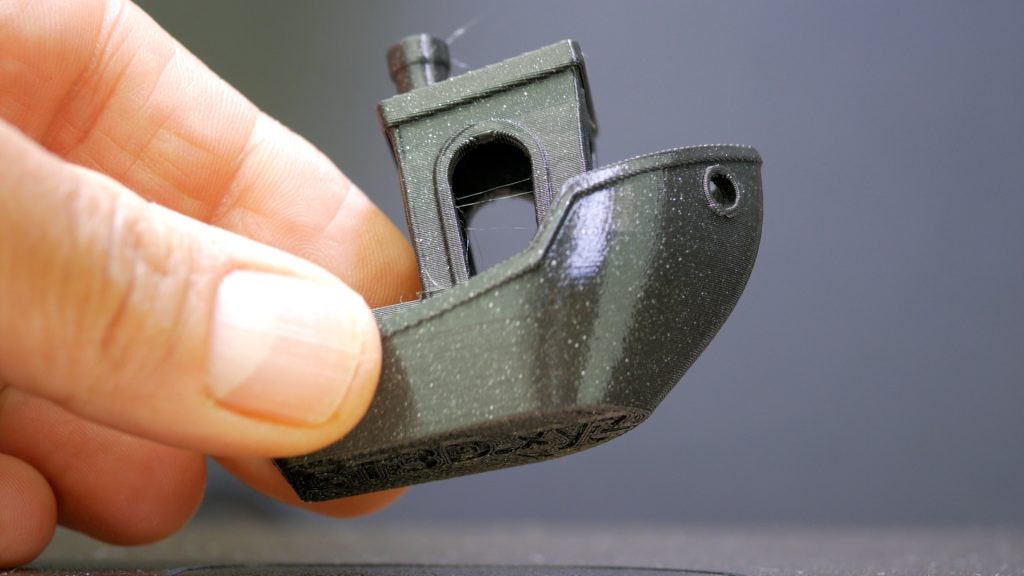
Next I tried the 3DBenchy test print which is a great way to identify any printing issues. This is one of the best quality prints I’ve had off a 3D printer with no tweaking. Easily as good as my Prusa MK3S+ at almost twice the price. The weight of a direct drive setup can cause ghosting or ringing, but not with this setup. Although this isn’t a fast printer which will contribute to the quality of this print. This print took just over 1 hour 50 minutes. I’m sure you could get this faster with some tweaking but that’s what you get out of the box. And even slicing with Creality’s own program and settings gave the same print time.

Next up I printed a calibration cube to test the accuracy of the printer. This is another excellent print and is very close to bang on 20mm in the X and Y planes and just a little off in height, but that does depend on other factors like the initial layer height and Z-offset.

For a more challenging print I again printed the Fab365 A-Team van. This uses up almost the entire bed which checks the accuracy of the bed levelling, but also has very tight tolerances for the live hinges that let you transform this flat print into the final model.
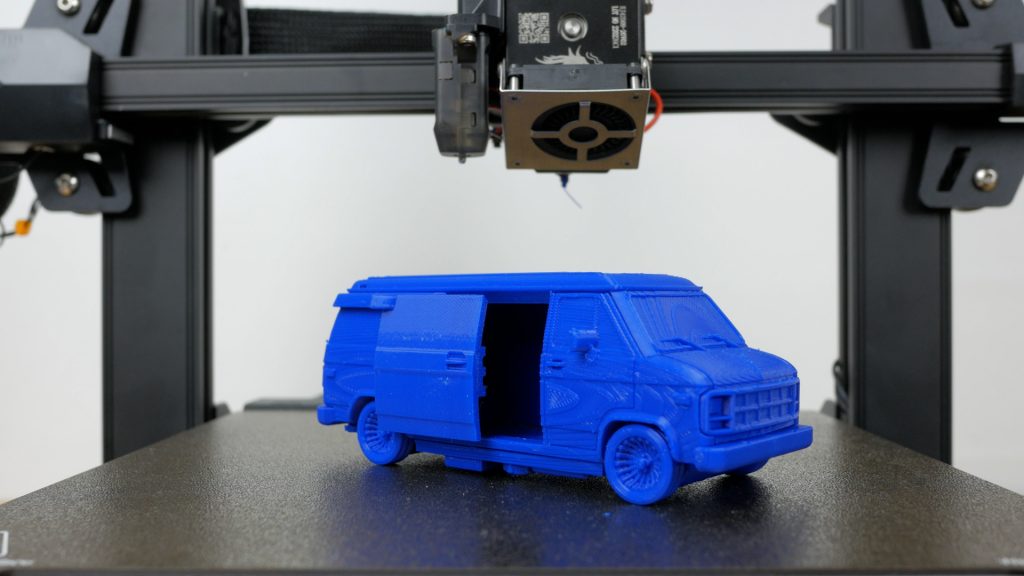
This came out very well. I left the print overnight and you can see it just released itself off the bed. The wheels rotate and the sliding door slides. But this did take almost 14 hours to print. Compare that to the Flsun SuperRacer delta printer I reviewed recently that took just over 5 hours to print the same model – and the quality wasn’t far off the S1 Pro.
With some eSUN silk silver PLA loaded I printed a vase that used almost the entire print volume. I sliced this in vase mode which prints in one continuous spiral. You need to tick Spiralise Outer Contour in Cura. I had issues with this print where the printer kept pausing momentarily resulting in regular small blobs of filament. I got this to print successfully after turning off power loss recovery. I added a line of code to the Start G-code in Machine Settings in Cura to disable the power loss recovery: M413 S0. This feature does regularly write the current state of the print to the SD card so that the print can recover if the printer loses power. I tested the SD card I was using and it did have poor write speeds which was the cause of this issue. I’ve since switched to a faster SD card and turned power loss recovery back on. I’ve not had any issues since.
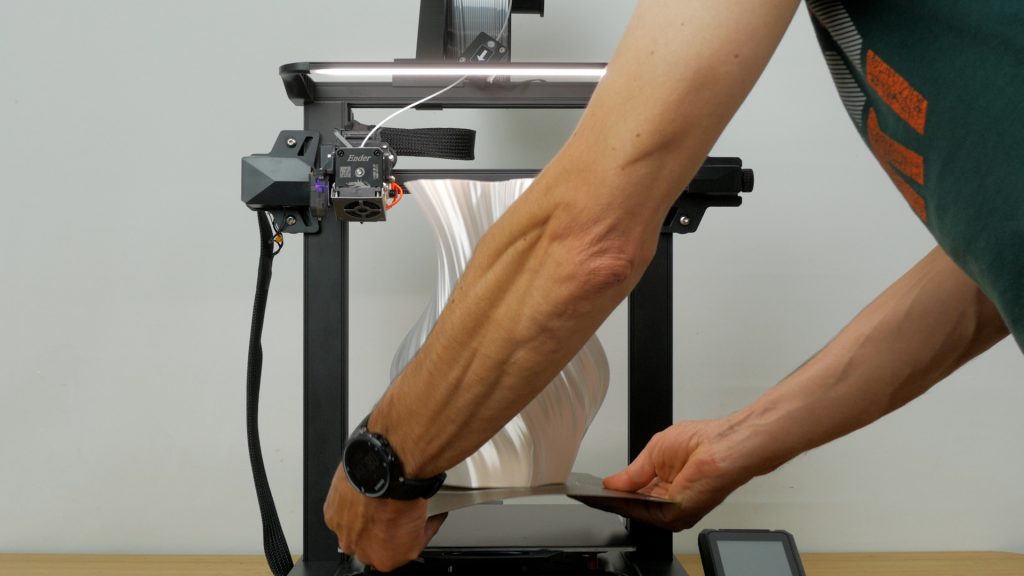
The vase looks very good with no noticeable artefacts and a perfect first layer. The dual Z axes help it maintain accuracy over its full height.

I tried printing a more detailed model, again in this metallic silk PLA. This tiny model of the Queen which we used to decorate this trifle for the Queen’s Platinum Jubilee. I used tree supports which came off easily. It could do with a little more clean up and ideally I should have switched to a 0.25mm nozzle for something like this but, the print looks pretty good considering its size which is smaller than my thumb.

I moved onto printing PETG, another Benchy in Prusament Galaxy Black. I changed the nozzle temperature to 245°C, increased the bed temperature to 80°C and increased the retraction slightly from 0.8 to 1 mm. I also reduced the cooling fan to 50%.
This is an excellent PETG Benchy – pretty hard to fault even under close inspection. And it released from the textured bed just as easily as PLA.
To put the all-metal Sprite extruder to the test I tried printing some NinjaFlex TPU which is very flexible and notoriously difficult to print. I needed an adapter for a USB vacuum pump that came with some EIBOS vacuum bags so I could use it with these eSUN bags.
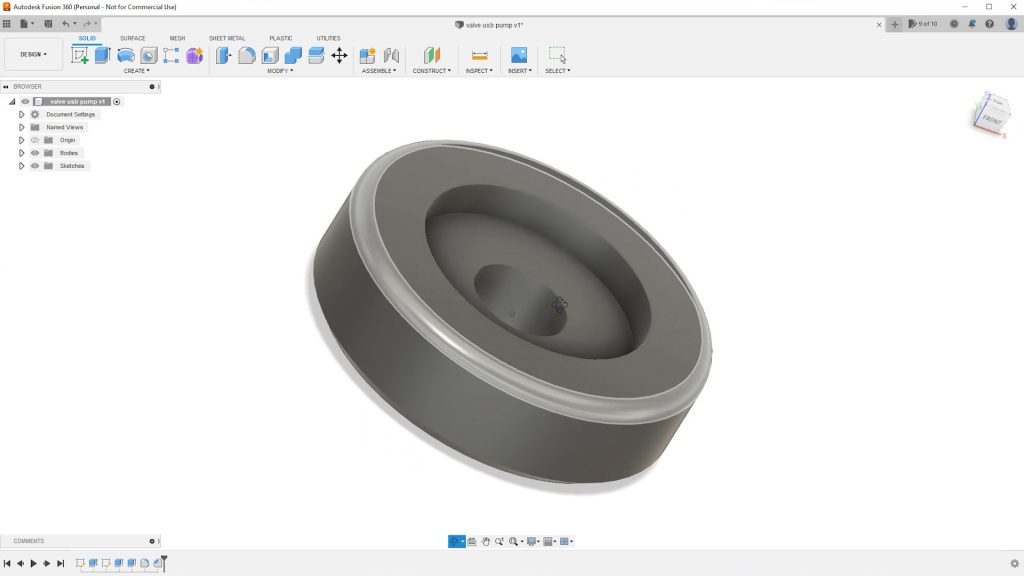
I modelled up something in Fusion 360 and tried printing it in Sapphire Blue NinjaFlex.

I used PLA settings but lowered the print speed from 50 to 30mm/s, increased retraction to 1.6mm and turned cooling back to 100%.

I tried the print at 230°C and although it’s not the most challenging print it came out well and performed its task admirably.

I thought I’d try printing the handle for the printer that’s included on the SD card in ABS. I used PLA settings but changed the nozzle temperature to 250°C and the bed temperature to the bed’s maximum 110°C. I also dropped the fan speed to 20%.
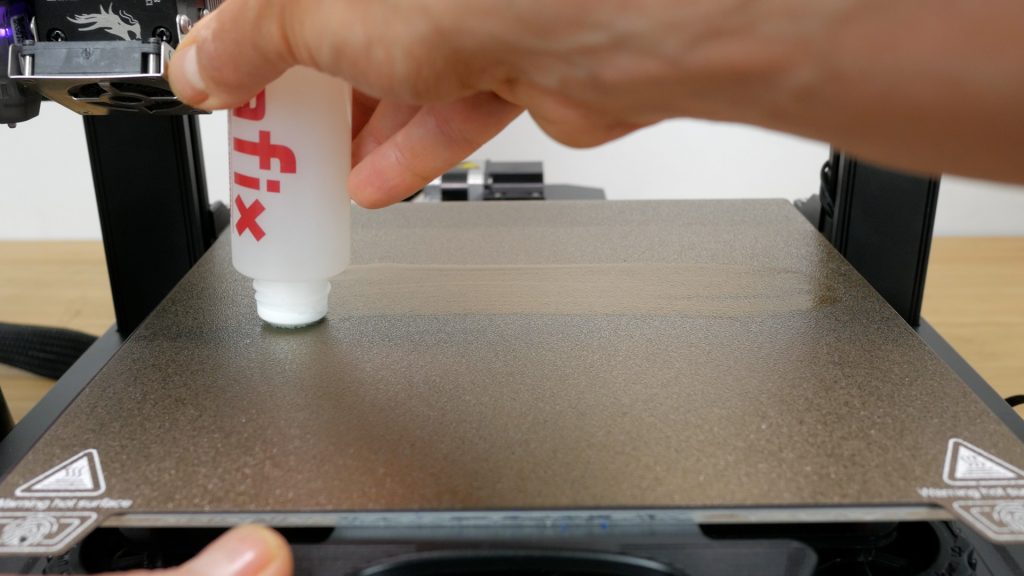
I did use some Dimafix on the bed to help with adhesion and release.

The heated bed took over 6 minutes to reach its maximum temperature but didn’t quite get to 110°C and checking with a Flir thermal imaging camera, there was considerable variation in temperatures with the front of the bed not getting close to temperature of the middle of the bed. Something to watch out for with larger prints.

The print came out ok in eSUN ABS+ but there was a little scarring on the top surface where the layers above the supports started to warp slightly.

Since the hotend supports high temperatures I tried printing a set of tweezers to clear the nozzle of spurious bits of melted filament in Polycarbonate, PolyMax PC specifically. I turned off print cooling, and printed at 270°C again with the bed at 110°C and again using some Dimafix. Even with no enclosure these printed out nicely.

Finally I tested the filament runout sensor and power resume feature.

I was printing this storage container in vase mode. The nozzle moves to its home position when the print runs out of filament and you’re prompted to change filament. The nozzle and bed temperatures are maintained, but you can’t change anything via the touch screen – you can only tap to confirm you’re ready to continue.

After a power outage you’ll just get a message to continue the print. Both features worked as expected and the print did complete although you can see where the power was interrupted since the nozzle doesn’t get a chance to move out the way.

Like nearly every printer I review the S1 Pro is advertised as silent but it really isn’t. It has a 32bit mainboard with silent stepper drivers and head movements are very quiet. Unfortunately fan noise isn’t particularly quiet and most frustratingly the power supply fan remains on constantly. I would be very happy to pay a little more for a printer with a decent power supply that you only hear when the printer is printing – like on my Prusa MK3S+. I leave this on all the time so I can send prints wirelessly via Octoprint, and can’t hear a thing until the print starts. Although print head movements are quieter with the S1 Pro and it’s certainly a lot quieter than my old Ender 3. You can hear how the printer sounds in the accompanying video.

The printer has a 24V 14.6A Creality branded power supply and idling the printer consumes around 7W, or over 13W with the LED lamp turned on.

My test calibration cube used 66Wh to print with the LED lamp off – my best result so far helped in part by the partially insulated bed.

The touch screen is fairly responsive but the user interface is not very well thought out. For instance to Preheat Filament you need to tap Ready then Manual then Preheat PLA. I’m not sure why such a common menu item is so hidden away. And as I mentioned earlier Z Offset is awkward and time consuming to adjust. But once you work your way around the menu, you can change all manner of more advanced settings including maximum accelerations and temperature PID although I can’t see a way to turn off beeps or adjust the extruder’s E-steps.

For even more control I did try connecting the printer to Octoprint which also lets me print wirelessly directly from Cura.

But I would love to see 3D printers start to have built in wireless functionality though.
I did try updating the firmware but even following the instructions to a tee, my first attempt appeared to brick the printer. I did manage to get the latest firmware installed, that also includes the option to swap the optional laser attachment. I’d recommend updating the screen firmware first which involves removing the back cover of the LCD screen and inserting a microSD card.

I was hoping the latest firmware would add additional features but I couldn’t see any – only a slightly improved home screen. Z offset could still only be adjusted in 0.05mm steps, and the printer failed to recognise filenames longer than 59 characters.
Impressively I got no clogs or jams printing for hours on end with a whole range of filaments, which is a relief since it looks like a fair bit of work dismantling the hotend and extruder.
Conclusions
The Ender 3 S1 Pro is a huge upgrade over the original Ender 3 I reviewed almost 2 years ago. It is pretty easy to assemble and produces very good quality prints in a wide range of materials out of the box, with very little tweaking.
I’d prefer the bed was fixed without any levelling knobs, which just make the levelling process more confusing, especially for new users. And the screen interface also isn’t that user friendly. But generally it’s a very easy printer to use once you get used to it. It’s all manual, but loading and unloading filament is quick with the direct drive setup and the removable textured PEI sheet is a joy to use. It is thinner than other sheets I have but prints stick well to the bed and release easily.
All this does come at a price. It’s one of the more expensive printers I’ve reviewed at around £470 or $500. If you don’t need to print any high temperature materials the non-Pro Ender 3 S1 is around £70 or $70 cheaper. It doesn’t have the all-metal hotend and extruder, textured PEI sheet, touch screen or LED lamp but will still produce similar quality prints. PersonallyI think these upgrades are well worth the extra money, but at least you have the option.
There’s also the Mingda Magician X I just reviewed which is probably closer to the S1 than the S1 Pro. Bed levelling is more straightforward and it’s even easier to assemble, but again it doesn’t have an all-metal hotend and comes with a glass bed. And it struggled with very flexible filaments even with its direct drive setup.

I’ve not yet got around to reviewing it but the Prusa Mini+ is the closest model in capabilities to the Ender 3 S1 Pro that I own. It does have a smaller build volume and a Bowden setup, but it’s a little cheaper and you’ll get better support from Prusa. I didn’t really have any reason to contact Creality support but sent them a question on the firmware upgrade. They took a good few days to get back to me. In contrast Prusa has their 24 hour chat support. And I also had very attentive support from Mingda. I’d say prints of the Prusa Mini+ are very similar to the Ender 3 S1 Pro.
Finally there’s the Prusa MK3S+, although if you buy this assembled it’s almost twice the price of the S1 Pro. It has similar capabilities and I don’t find the prints noticeably better but it does use higher quality components like linear rails, Bondtech gears, a genuine E3D hotend and a much quieter branded power supply. Plus you’ll get more responsive support.
This is still one of the most capable all-round printers I’ve reviewed so far.
Don’t forget to take a look at my YouTube video at the top of the page, and subscribe to my YouTube channel where I’m releasing videos every week on the latest technology and how to get the most out of it. If you tap the bell icon when you subscribe you’ll get a notification as soon as I release a video, and there’ll be a link to my site here for the written article. YouTube is also the best place to leave a comment. I read all of them and respond to as many as I can!
Affilate links:
Buy direct from Creality: https://shrsl.com/4ff8p
Amazon:
Creality Ender 3 S1 Pro: https://amzn.to/3mKEccr
Creality Ender 3 S1: https://amzn.to/3Qj59S9
eSun PLA+: https://amzn.to/3Hpxq5i
eSun Silk Metal: https://amzn.to/3tBi7Rp
eSun ABS+: https://amzn.to/3tzVayc
Here are Creality’s instructions for updating the firmware: https://youtu.be/NmoRRFW4zTc
And here’s the latest firmware:
Leave a Reply