The Wltoys 124017 radio controlled 4WD car, comes already fitted with a brushless motor and promises speeds of up to an impressive 75kmph or 47mph.
For around $145 or £110 you’re getting a hobby grade 1/12th scale buggy with a metal chassis, replaceable parts and upgradeable electronics and that price includes a very basic LiPo charger and 2 LiPo batteries – which you’d usually have to buy separately. To get something equivalent from a well known brand would cost around double that price.
But is it any good? I’ll see what you get for your money, test out its speed claims and durability, and in the conclusions I’ll compare it to a similarly priced car available from your local hobby shop – the 1/10 scale FTX Carnage. So let’s take a look.
Overview

Inside the box you get the car itself, 2 or 3 2200mAh 2 cell or 2s LiPo batteries depending on the option you go for, a radio control transmitter, a USB LiPo charger, a small spanner and a basic instruction manual.
The manual is in English although the translation is far from perfect. But it should at least get you started and does have exploded parts diagrams which is an encouraging sign of replacement parts availability, something you really want for a proper RC car.
My car already had one battery in the battery tray which has a simple but effective velcro strap. The battery tray does restrict anything longer or wider than the included batteries without some modifications which I’ll come back to. The included batteries measure 102mm x 35mm and 15mm thick, but you can fit a battery twice this thickness.

The batteries come with the popular Deans connector and charge with the included USB charger via their balance lead – the cable with 4 wires and white JST connector.
These LiPo or Lithium Polymer batteries can offer excellent performance compared to NiMh batteries you’d usually expect at this price point, but you need to treat LiPo batteries with care. They should not be stored empty or full, otherwise they can puff up and become unusable. And when not in use they should be kept at a storage charge of around 3.8V per cell or 7.6V for these 2 cell LiPos.
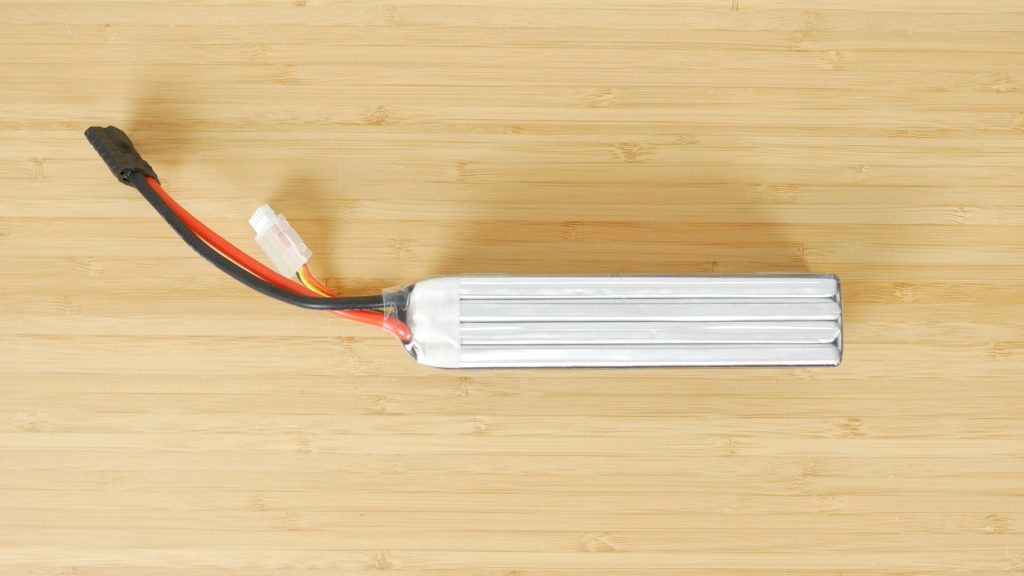
As a quick aside, you’ll see LiPo batteries referred to as 2s up to 6s. This just refers to the number of individual lithium polymer cells stacked on top of each other and connected in series – hence the s. Connecting them in series multiplies their voltage based on 1 cell’s nominal or resting voltage of 3.7V. So a 2s is 7.4V, a 3s is 11.1v, a 4s is 14.8v and so on.

When you charge these batteries their voltage will actually increase to 4.2V per cell, so a 2s battery pack becomes 8.4V. With everything else equal the bigger the voltage, the faster your car will go.

LiPo batteries should ideally be kept in a metal container or at least a LiPo sack. It’s unlikely, but they do pose a fire risk if not looked after properly.
The batteries did arrive at this storage charge, but unfortunately the supplied charger has no way of getting them back to this voltage. It will only fully charge them, unless you unplug them early and measure their voltage with a multimeter or cheap LiPo battery tester.

So although the supplied charger will get you started, I’d highly recommend getting a proper LiPo charger at some point which will also be a lot faster. Something like the Sky RC B6AC or I use this very capable Hota D6+. They will also have the added benefit of properly balance charging your batteries – basically ensuring both individual cells have the exact same voltage. Another important factor in LiPo battery care.

If you’re using the supplied charger, you’ll want to plug it into a 10-12W wall charger – most computer USB ports should work but will charge a lot more slowly. The charger is rated at 7.4V, 2A output and gets quite warm whilst charging. This should charge the included batteries in around an hour and half from empty, but I found it slower than that – taking about the same time from their approximate 50% storage charge they arrived at.

The car is well built with the chassis and shock tower plates made of aluminum, and oil filled front and rear shocks.

The knobbly tyres feel soft and together with its 4WD I’ll be mainly testing it off-road.
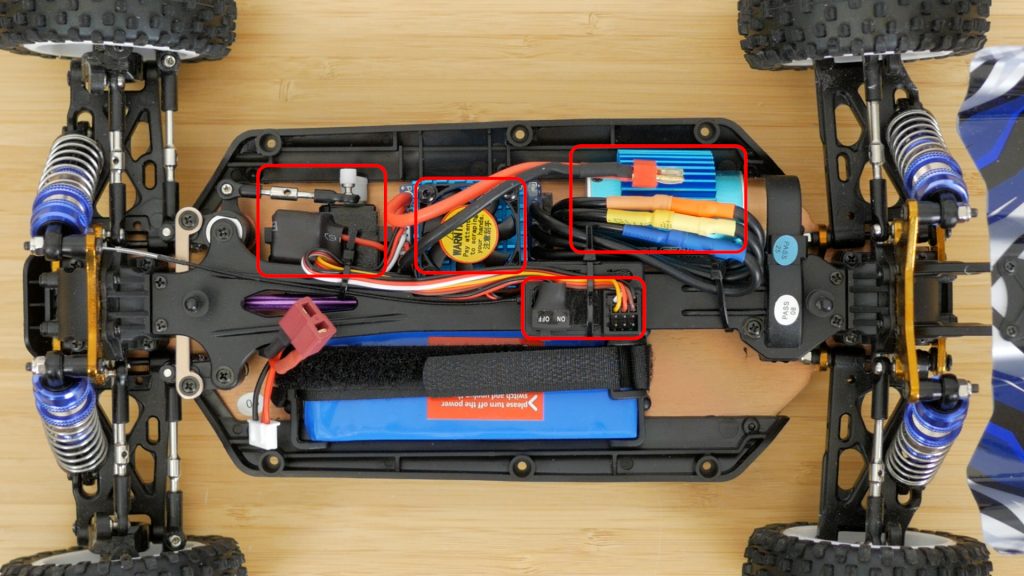
The electronics – specifically the steering servo, the BL Motor 2845 3400 KV brushless motor, receiver and electronic speed controller with its own fan are all separate electronics which makes future upgrades cheaper and easier. Again not something you typically get with budget cars like this.

The only thing not included are four AA batteries for the transmitter. I really quite like the 2 channel 2.4GHz controller. It feels well made for a ready to run (RTR) car like this with similar if not better build quality than the Traxxas TQi controller that came with my considerably more expensive Traxxas Maxx.

It might be a little on the small side for very large hands but feels very comfortable to me and fits my children’s hands well too. You have the usual throttle, brake and steering dial which has a nice foam sleeve.

And there’s the steering trim knob which you’ll need to adjust slightly if your steering is off. Below this knob is a throttle adjustment which is very handy if you want to hand the car to your children or someone new to RC. Rotate it anti-clockwise if you want to reduce the top speed of the car.

There’s also a mode button, but this has no function with this specific Wltoys car.
Performance & durability

Always turn on the controller first and then plug in the battery and turn on the car with its switch.

If you turn the car on before the controller you can get unpredictable results, like the car taking off on its own.

The Lexan body shell then clips on with the two body clips which is pretty standard for these cars, but they are easy to lose.

On my son’s car we tethered them with thin cord and some sticky cable tie bases. The shell doesn’t sit quite flat – it looks like it doesn’t quite clear the ESC fan.
They don’t advertise the electronics being waterproof, but the weather here in the UK has been pretty damp and I had no choice but to drive the car on the wet soggy moorland.

The first thing I noticed was quite severe stuttering or cogging as I pulled the throttle. To market the high speeds on the box, the gearing is a little optimistic which causes this issue.

The car has a 27 tooth pinion which will make it fast, but the consequence is there isn’t enough torque to get started in a lot of situations without some hesitancy.
This is worse in longer grass where it needs a little kick to get going. In shorter grass, or on road it just stutters a bit then takes off. And it’s worse when it’s wet. Once it’s going it’s fine and it’s a lot of fun. And it is quick.

It looks like in the latest version of this car Wltoys have fixed the cogging issue. If your car has a blue motor plate rather than the gold one on mine, you have the newer version with a 19 tooth pinion. If you do have one of the original cars, I’ll show you how you can fix the issue quite cheaply shortly.

In its stock configuration, with the included 2s battery I tried a speed test to see if it could reach the claimed 75kmph top speed.

I attached a GPS speedometer to the car and measured a decent 33mph or 53kmph on a pretty flat stretch of short grass.

On road I got this up to 37mph or 60kmph so not the speeds advertised, but it’s still very quick. This SkyRC speedometer also has a nice drag speed test where you can measure how quickly the car travels from 0 to 132 feet typically. The app gives you a nice little graph of speed and acceleration.

I managed around 3.7s but I’m sure with a bit of practice and dry roads I could better this score.

During my testing I tried a few small jumps and sent the car doing cartwheels and flips many times. You only have to hit a small bump at top speed with this car to send it flying. But I’ve yet to damage the car apart from a few small scrapes on the bottom of the chassis.

There’s not much ground clearance – around 1” or 25mm so it’s hard to avoid these scrapes. The lack of ground clearance does mean it’s not much good over rocky terrain.
Apart from the cogging, the range was the other issue I found a little disappointing. Sometimes the car doesn’t respond even when it’s not that far away.
The 2200mAh batteries last pretty well. I got about an hour of use with two batteries and when I measured this the conditions were damp and not ideal. So I’d say the version with 2 batteries is probably enough for most people.

Although there’s no claim of the electronics being waterproof, I took the car through puddles and it got caked in wet mud and it still ran fine. And I wasn’t too careful rinsing it off with the garden hose but it’s still working just fine. I did carefully dry the car and spray the moving components with WD40 – or Muc Off’s MO94 specifically.
Fixing the cogging & trying a 3s battery
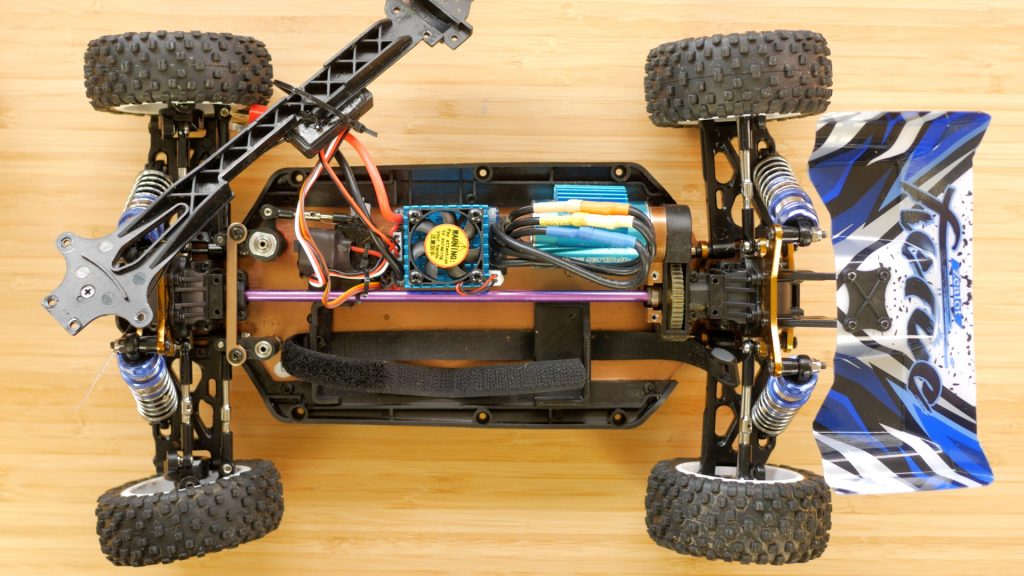
If you have one of the newer versions of the car, or if the cogging doesn’t bother you don’t need to do this. But I decided to change the 27 tooth pinion gear to a smaller one to eliminate cogging and improve torque and acceleration.
You will reduce the top speed significantly but for driving on grass the car is so much more enjoyable after fitting the smaller gear. And it tackles even thick grass and bracken with ease, still with no stuttering or cogging.
I followed an excellent guide that I found at QuadifyRC.com. I’d highly recommend taking a look at the article for details – you can follow his links to the required parts too if you want to try the modification yourself. But I will outline the procedure.
I went for the cheapest option which uses all the existing electronics but just swapped the 27 tooth pinion for a 15 tooth one. Since there’s no adjustment on the motor plate, you’ll need a new one of these too. The total cost is around under £10 or $10.
I wouldn’t say the procedure is particularly easy but it’s not too bad – it took me around 2 hours. But that will depend on the tools you have to hand and your experience. I would pick up a butane blow torch since you need a ridiculous amount of heat to release some of the screws as the article mentions. Wltoys use a lot of threadlock.

First you have to remove the motor with its motor mount. Then unscrew the tiny grub screw holding the existing pinion in place. This is probably the hardest bit – you need a high quality 1.5mm allen key and a lot of heat. Even after removing the grub screw I still needed to apply more heat to slide the pinion off.
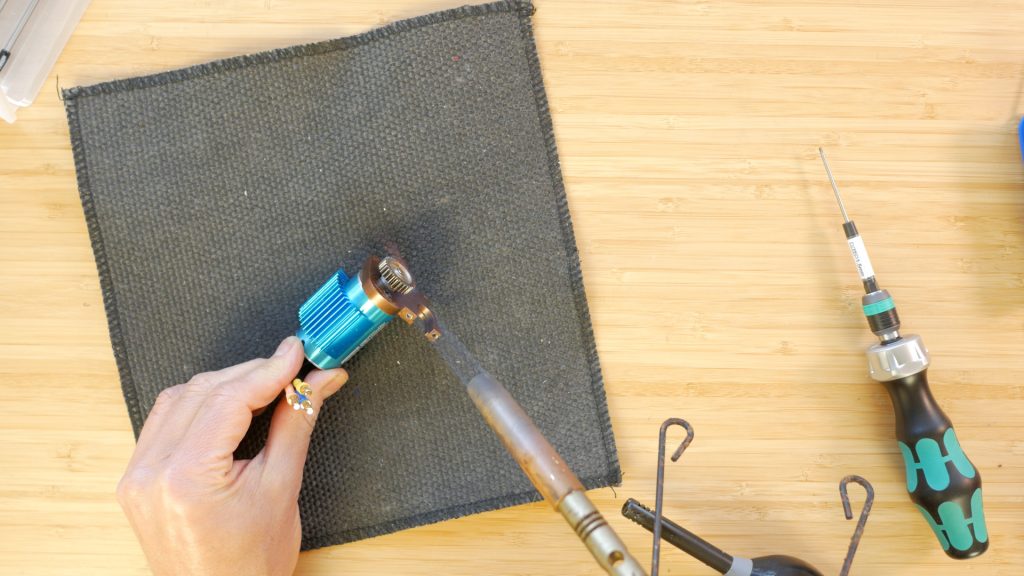
I didn’t have a small butane torch and my rework station heat gun wasn’t up to it, so resorted to a MAPP gas torch which is overkill but did do the job.
You then need to remove the two screws holding the motor to the motor plate which also requires more heat than you think – and since they’re philips screws would be pretty easy to strip out.
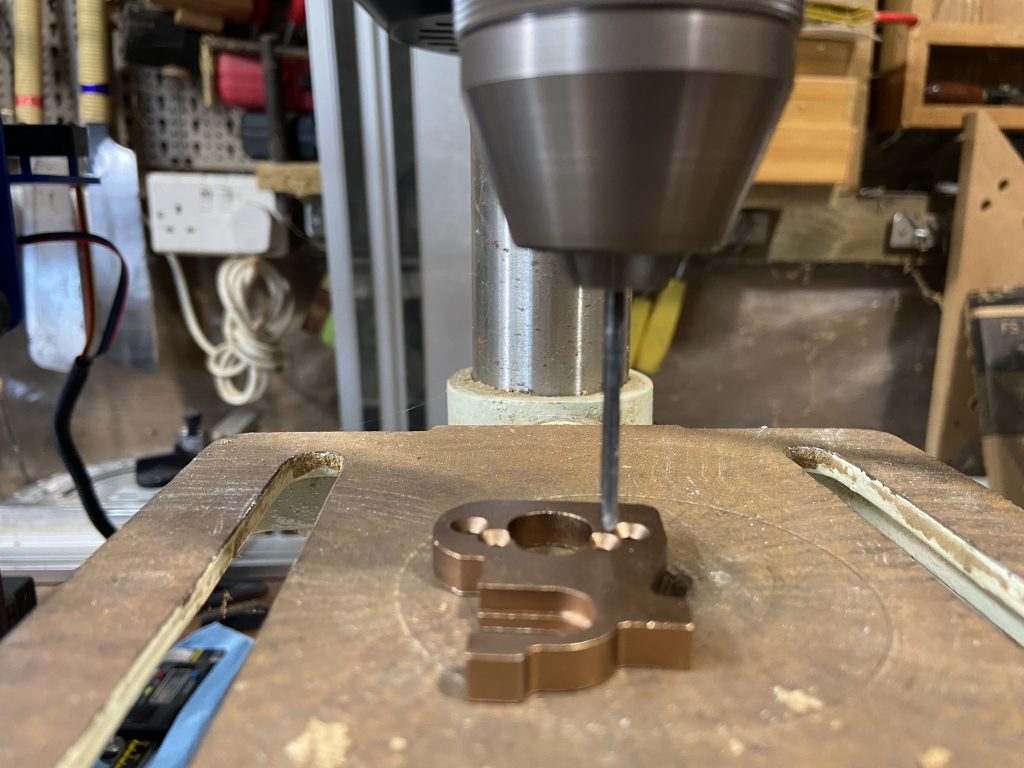
Then you need to enlarge the two holes in the new motor plate from 2.5mm to 3mm and enlarge the 2.2mm hole in the new pinion gear to 3.2mm. You’ll want to do this in stages – I went to 2.5mm then 3mm and finally 3.2mm as suggested in the article and I added a bit of WD40 for cutting fluid.

This hole needs to be dead straight so a drill press is handy if you have one.

You can then reattach the motor to the new plate, slide on the new pinion gear, and lightly tighten the pinion gear and put the car back together.

You can then adjust the pinion gear so it lines up with the spur gear, and then tighten the grub screw fully.

You will need to trim the lower and upper shroud with a knife. I also found I had to remove the motor’s heat sink since it interfered with the top deck.

This was tricky to get off – I again needed some heat and managed to prise it off. After reassembling everything I attached it back with some thermal glue.

I took the car out for a test drive and again measured its top speeds. In grass the speed was down to 23mph or 37kmph, but it feels faster than this since it pulls away instantly even off road.

I then tried a 3s battery – there’s a link to the battery I’m using down below. It’s a bit of a squeeze to fit it in so I designed and 3D printed an expanded end piece so it fits in perfectly.

You don’t absolutely need this but it’s very easy to fit and if you have a 3D printer I’ll provide a link to the model down below too.

With the 3s battery fitted I got the speed up to 34mph or 55kmph off road and 37mph or 60kmph on road. About the same speed as with 2s and the old gearing. You could probably use a 3s battery with the old gearing and get the advertised speeds. But Wltoys says this isn’t recommended and I’d imagine you’d put a lot of strain on the electronics and gears, especially with all the cogging.
Conclusions

It’s pretty impressive what you’re getting here for your money. The Wltoys 124017 is a hobby grade RC car which out of the box is fast and a lot of fun. It’s well built and even if you do break bits, most of the parts I searched for were available online and fairly inexpensive. Which makes it’s great for someone after their first serious RC car. And it doesn’t break that easily which is reassuring too.
If you can get the new version with the 19 tooth pinion gear that should hopefully eliminate the cogging, which is a little irritating when pulling off but not really noticeable once it’s away. And in drier conditions it would be less of an issue. Fitting the 15 tooth pinion with this original model did transform the car though for its intended off road use, and I’d recommend this modification to anyone happy to get their hands dirty.
The range was a little disappointing although that’s also meant to be improved with the new version. I will try and test the new version at some point to see how it compares.

If you’re after your first car, at this price you could also pick up something like the FTX Carnage from your local hobby shop. This is a monster truck so not directly comparable, but at first glance it doesn’t seem great value compared to the Wltoys car. The comparably priced entry level model has a brushed motor and comes with a NiMh battery. And it’s not as rugged as the Wltoys with nearly all plastic construction. With this NiMh battery and brushed motor it doesn’t have anything like the punch of the Wltoys.

But for not that much more money you can quite easily upgrade this car to brushless which transforms it. We added a Surpass 3650 4300KV brushless motor and a new ESC for around £35. Of course you also need a LiPo battery and something to charge it which will push the total price up a bit.
Still if you’ve after a fairly inexpensive route to your first proper RC car, I’d certainly add this car to your shortlist.
Don’t forget to take a look at my YouTube video at the top of the page, and subscribe to my YouTube channel where I’m releasing videos every week on the latest technology and how to get the most out of it. If you tap the bell icon when you subscribe you’ll get a notification as soon as I release a video, and there’ll be a link to my site here for the written article. YouTube is also the best place to leave a comment. I read all of them and respond to as many as I can!
Car available direct from Banggood – delivery was less than a week to the UK.
WLToys 124017: https://ban.ggood.vip/10Ote use code BGWL017 for extra discount (until 31th January 2022)
WLToys 124017 (single battery) includes 10% off coupon: https://www.banggood.com/custlink/mGDRbJl0Ow
2/3 battery version: https://www.banggood.com/custlink/K3mYNCoe6E
Hota D6+ LiPo charger: https://www.banggood.com/custlink/K3mYNCoe6E
3s LiPo battery: https://www.banggood.com/custlink/GGGdACOe08
SkyRC GPS speedometer tester: https://www.banggood.com/custlink/mG3yApj06z
Amazon links:
Hota D6+ LiPo charger: https://amzn.to/3sp2m0j
3s LiPo battery: https://amzn.to/32jTSwP
LiPo sack: https://amzn.to/3Fs5cW8
Leave a Reply