Having run a computer repair business for 6 years, you get to know the importance of organising all those pesky, minute screws. It’s not too difficult getting most things apart, but if you don’t take care, putting everything back together again can be a challenge.
A while back I started using some small rare earth or neodymium magnets and the thin steel sides of our graveyard of old computer towers. As I take apart laptops and to a lesser extent smartphones, I arrange the screws on the steel sheet using the magnets. The magnets serve two purposes: firstly they hold tightly to those little magnets so they don’t get lost; and secondly you can slide the magnets with their screws around the steel sheet, to mimic their original positions. I even use a non-permanent marker
to scribble helpful reminders (easily removable with isopropanol alcohol).
Even with our powerful blower, these screws don’t budge (as you’ll see in the video), so I can come back to a repair even after a week and they’ll be right where I Ieft them. This is handy if I’ve had to wait for a part whilst the laptop is disassembled, or I get an interruption in the shop. And their arrangement on the sheet is a very helpful reminder of where things go when I put everything back together.
It’s a simple idea but it works really well. There are alternatives I’ve since tried and seen. I did buy some sign writer’s magnetic sheet from a local firm but the magnetism is not really sufficient. And more recently I also tried some of the strongest magnetic sheet I could find but it’s still nowhere near as effective as my method. I compare both in the video.
iFixit have also come up with a magnetic sheet which will be the same as the one I tried from First4Magnets, although possibly not as strong. But it does have a white face for scribbling on and comes with a pen. But in a busy shop where space is a premium, it’s so easy to nudge these, whereas the method I’ve described here just stays put. Not to mention that the only cost is the magnets which can be had for less than £6.
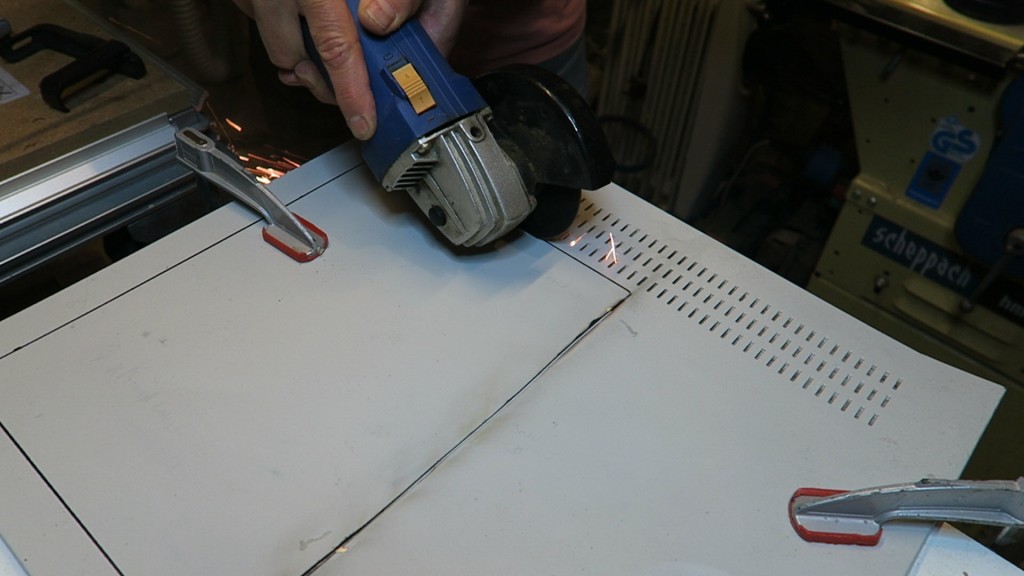
I’ve gone one step further in this video by cutting part of the sheet to the size of an A4 piece of paper with an angle grinder. You don’t need to do this – I’ve got by for over 5 years without – but having done it, it does save space and looks better too.
Cutting the metal to size

If you want to cut the side of computer to size, you’ll need:
- The side of an old computer tower. The older white or beige ones make the screws and any scribbles stand out better. Try a skip, or ask your local computer repair shop.
- A ruler and a marker.
- I’ve used an angle grinder with a thin 1mm metal cutting disc (quick) to cut the sheet. Or you could use a jigsaw with a fine tooth, metal cutting blade, or a Dremel with a cutting wheel attachment. Some of the old computer towers actually use thicker steel so you may wear out a few cutting wheels. Even with the angle grinder, I used up over one disc.
- Some clamps to hold the sheet while you cut.
- A file or sandpaper to smooth the rough edges.
Simply mark out the size of mat you want and clamp down the metal sheet as close to the edge you’re going to cut as possible to minimise vibrations. Cut the mat to size – if using a grinder, let the disc do the cutting and make sure you at least wear eye protection.
File the edges to remove the sharp edges. And round over the corners too. Give it a clean and you’re done!
Using the metal project mat
Simply arrange the magnets on the metal sheet as you remove screws from your project. I slide them around the sheet to the mirror their arrangement on the repair I’m undertaking. I use the pen to scribble notes if it’s not obvious. How much you scribble depends on your memory and how quickly you’ll be doing the reassembly. If we have to wait for a week for a part for instance – it’s good to have better notes to aid the repair.
I hope you’ll give this a try. I think you’ll find your repair projects a lot easier with it whether you’re a beginner or a seasoned pro.
If you have found this article useful please consider clicking on the link(s) below. You pay the exact same price and it’ll enable me to keep the site going! Please ask away in the comments section below if you have any questions.
Having maintained a PC repair business for a long time, you become more acquainted with the significance of sorting out each one of those bothersome, minute screws. It’s not excessively troublesome getting most things separated, but rather on the off chance that you don’t fare thee well, assembling everything back again can be a test.
Indeed, even with our effective blower, these screws don’t move (as you’ll find in the video), so I can return to a repair even following a week and they’ll be correct where I Ieft them. This is helpful on the off chance that I’ve needed to sit tight for a section whilst the tablet is dismantled, or I get an interference in the shop. Also, their game plan on the sheet is an exceptionally accommodating indication of where things go when I set up everything back together.
video is very helpful thanks for share this nice post ………………………….