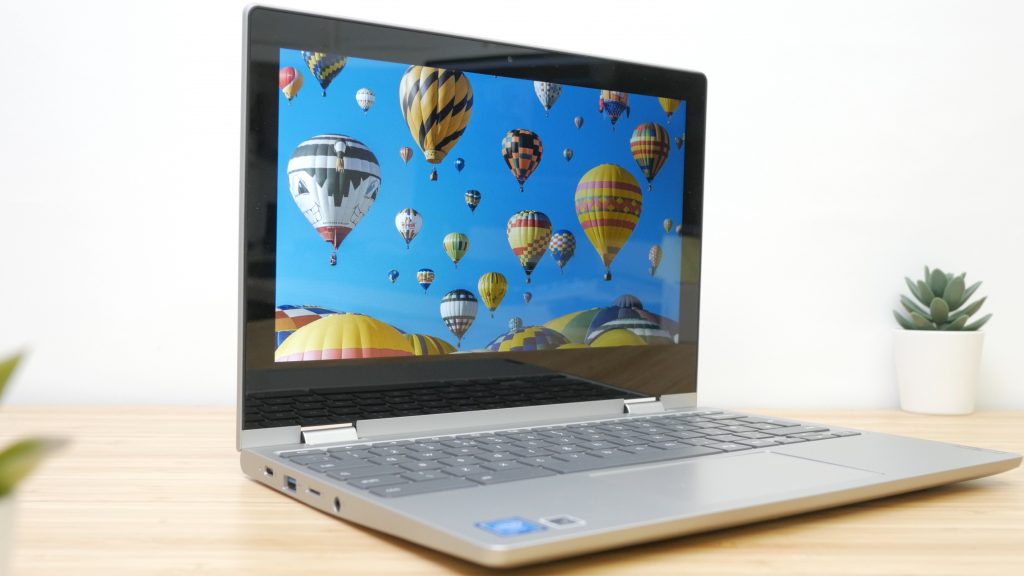
The Lenovo C340 Chromebook is a 2 in 1 laptop with a 11.6” IPS 1366 x 768 touch screen display, up to 10 hours of battery life, a good selection of ports and with a stylish design incorporating a metal finished lid. This specific model comes with an Intel Celeron N4000 processor, 4GB of RAM and 32GB of storage.
It’s not the cheapest Chromebook you can buy, but at around £270 or $270 it’s a decent price considering its 360 degree hinge and touch screen also makes it a very capable Android tablet.
I’ll start with an overview of the laptop and then I’ll run through a whistle stop tour of a how to use a Chromebook and if it’s the right choice for you, before putting the laptop through its paces discussing its display and performance.
Overview
Inside the box you get the laptop itself and a 45W USB-C charger. There’s a brief setup guide with a QR code that will take you to a complete user manual.

The left side of the laptop has a USB Type-C port for charging the laptop, outputting to a monitor and connecting accessories, a USB-A port, a microSD slot, and a combo headphone microphone jack.
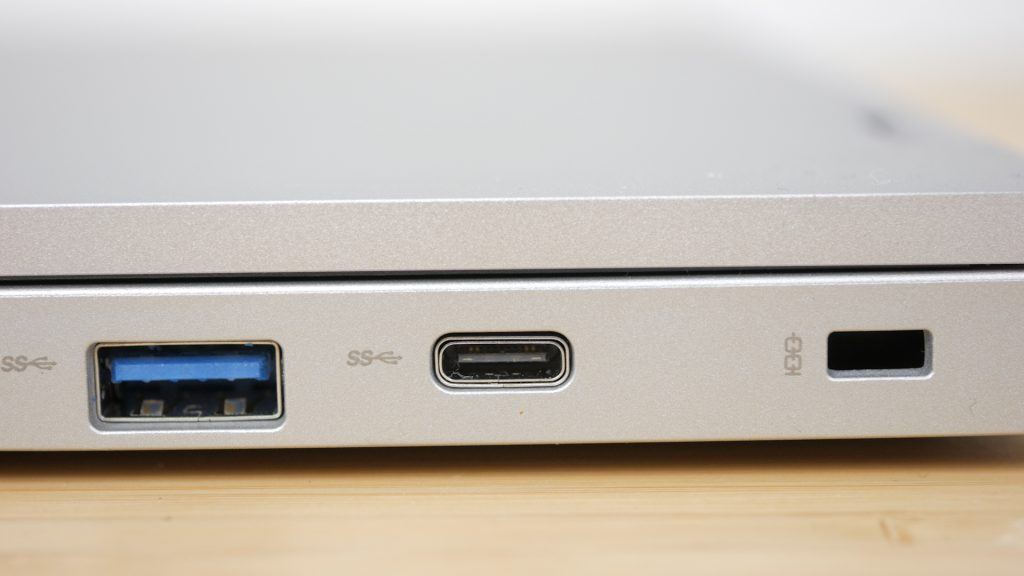
The right side has a Kensington mini security-lock, a second USB-C port, another USB-A port, volume controls and the power button.
The second USB-C port can also be used to charge the laptop, even though it’s not labelled as such. The USB ports are all USB 3.1 Gen 1, so support up to a maximum of 5 GBps, not the 10GBps of the more recent Gen 2, but still quick enough for most accessories you’re likely to plug in.

You’ll need both hands to open the lid of the laptop, to reveal a chiclet style keyboard with no backlight and there’s no room for a number pad.
The trackpad measures 105mm by 61mm, which considering the size of the laptop is adequate.
This model has a grey finish but it’s also available in pink. I was impressed with the build quality of the laptop. The lid is covered in aluminium which gives it a premium feel, although the remainder of the laptop is plastic.

It measures 290mm by 207mm and just under 19mm at its thickest point. It’s wedged towards the front which does make it look a little thinner than it is. It weighs a respectable 1212g . As a comparison my iPad Pro with its smart cover and a budget Bluetooth keyboard is around 800g.
Pressing the power button does nothing, you’ll need to connect the charger before you power it on for the first time. The status LED will light up according to the remaining charge of the laptop. Setting up a Chromebook is very easy and fast. After connecting to your WiFi network, you just need to login.

You will need a Google account so if you have a Gmail address, use this. Otherwise you’ll need to create one. This account can be used on any Chromebook, or to log into the Chrome browser on any operating system, carrying all your bookmarks and settings across. If you have an Android phone, you can connect it to the laptop. This provides a few benefits, possibly the most useful one is that unlocking your phone can unlock your laptop.
I’ll provide an overview of Chrome OS in the next section.

Once you’re at your desktop, the first thing you’ll notice is the massive bezel around the display. Around the sides and top it’s fairly sizable at 15mm but the bezel at the bottom is double that at 30mm and really stands out.
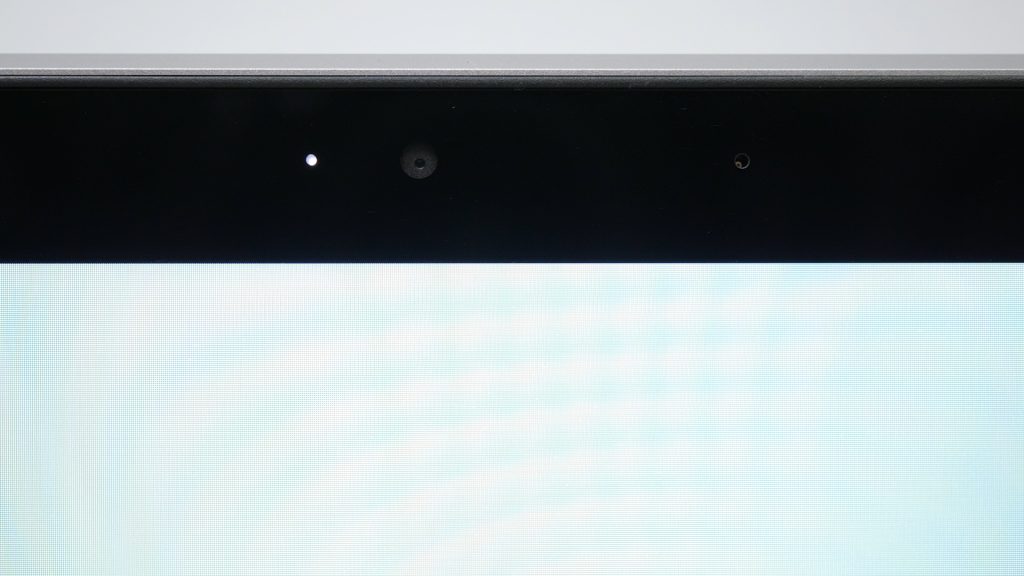
There’s a 720p HD webcam at the top of the display with a white LED that lights when it’s on. And to the right of the camera is the microphone. The keyboard feels quite firm with about 1.3mm of travel. Personally I’d prefer a little more travel but there’s very little flex even in right in the centre and after spending some time with the laptop I quite enjoyed typing on it.

The trackpad feels quite smooth to the touch and there’s no rattling with a firm positive click if you choose to click rather than tap, but it’s no MacBook touchpad. Moving the cursor around feels very slightly jerky, even after playing around with the trackpad options in settings. It’s still more than adequate – it just feels like a typical trackpad on an entry level Windows laptop. I quickly switched to a wireless mouse when I was using it for longer periods of time.

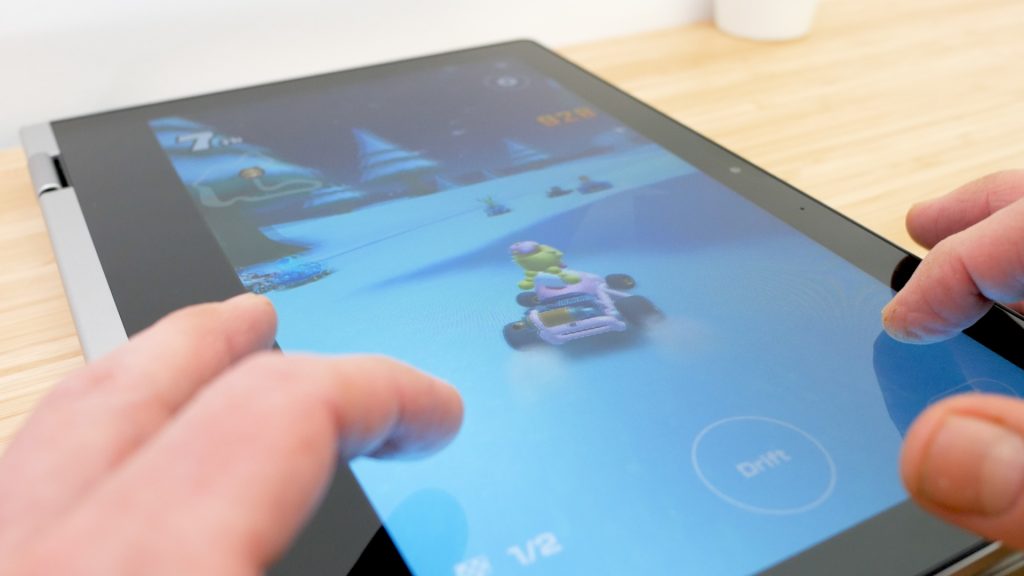
Like the Lenovo Yoga 530 I reviewed recently, the 360 degree hinge lets the laptop operate in three modes, as well as the standard laptop mode. Rotate it all the way around for tablet mode, which turns the Chromebook into a nicely proportioned Android tablet. It’s a shame it doesn’t support the Lenovo Active Pen Stylus – so you finger will have to do.

Theatre mode is convenient for watching video content where there’s little interaction. And finally there’s tent mode which is quite nice for interacting with the touch display with the laptop on a table. These two modes make the base of the laptop laptop visible with its three rubber feet and two 2W stereo speakers.
One thing to note, is that with a mouse or keyboard attached via USB the laptop won’t enter tablet mode, so you’ll need to unplug them from the laptop for the screen auto-rotate to work in tablet and tent mode.
I found changing modes slightly less cumbersome on a laptop this size compared to the larger Yoga 530 for example. And tent mode for casual touch interaction with the laptop takes up less space on your desk too. For a laptop that will likely be popular with students, the 360 degree hinge also makes the laptop more robust.
A whistle stop tour of a Chromebook

Feel free to skip this section using the timestamps below if you’re already familiar with Chromebooks, but since this is the first Chromebook I’ve reviewed on the channel, I thought it might be useful to provide an overview. And hopefully you might find out something you didn’t know even if you are familiar with them.
If you’ve used the Google Chrome web browser you should feel quite at home using a Chromebook. They use th e Linux based Chrome OS operating system. If you launch Google Chrome all your bookmarks and browser extensions will mirror any other installation of Chrome you have elsewhere.
The desktop screen looks pretty similar to a Windows desktop. The taskbar is called the Shelf and already has pinned applications which are either web pages like YouTube or Gmail, or Android apps that I’ll come back to. You might want to auto-hide the shelf for some more screen space. Two-finger tap on the shelf and select Autohide shelf.

If you want to add another application, select the launcher at the bottom left of the screen and then the up arrow. Scroll through all the available apps and tap with two fingers on the touchpad on an app you want on your shelf like for example Google Photos, and choose “Pin to shelf”. Or use the touch screen: drag your finger from the bottom of the screen to slide up the list of apps. Hold your finger on any app and again choose “Pin to shelf”. Slide your finger down from the top of the screen to get back to your desktop.

There’s also a dedicated search button on the keyboard. You can then just start typing what you’re looking for. If you like to use shortcuts, type Shortcuts to see a complete list. Tapping the search key again will get you back to the desktop. There are also some useful function keys along the top of the keyboard. The full screen button, and next to it, the “Show all windows” key. Which you can also get to by swiping down with 3 fingers on the trackpad. From here you can swipe to close down apps.
Clicking at the bottom right of the screen takes lets you configure your WiFi and Bluetooth connections, and clicking on the cog icon takes you to settings. You can type in the search box what you’re wanting to configure. For example type Touchpad. If you prefer the upside down Apple scrolling, check Australian under scrolling.
Type Google Assistant to select “Always on” at the expense of battery life, so you can interact with the laptop just with your voice.
Type printers to add any printer already setup on your wireless network.
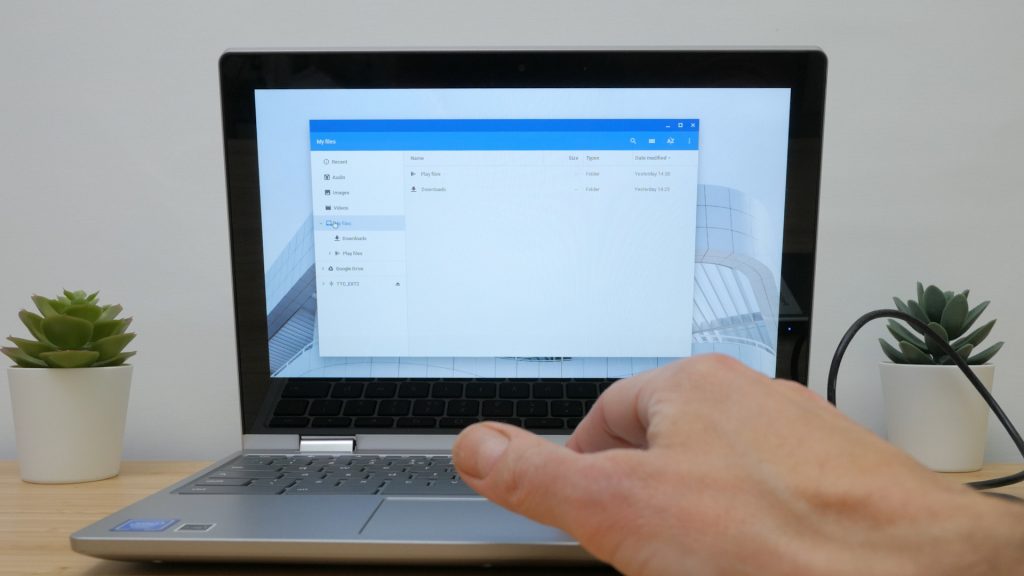
You can connect external USB drives, mice, keyboards etc to a Chromebook usually without any issues. If you connect a USB hard drive or insert a microSD card, you can move files around using the Files app. “My Files” and specifically the Downloads folder are local files that use the built in storage of your laptop. Google Drive is your cloud storage which is synced between all your devices. You can see how much space you have remaining on either by clicking on the 3 dots in the top right corner. Consider local storage as a temporary location – you’ll want to move it across to your Google Drive for safe keeping. You can change your default downloads folder to avoid this step if you like. Go to Settings | click on “Chrome browser settings” in blue. Type Location and Change. Create a Downloads folder in your Google Drive.

If have any problems with your Chromebook or want to sell it type Powerwash in Settings. This will quickly factory reset your laptop. You can log back in with your Google account and within a few minutes you’ll have a nicely freshened up laptop with all your account settings restored. It’s one of the great benefits of a Chromebook – everything is effectively stored in the cloud. Just take note of my previous point about local files which will be deleted if you’ve not saved them to your Google Drive. You could also backup these files to an external USB drive.

You can easily add other Google accounts to the laptop. These accounts will be completely separate from each other. Click on the bottom right of the screen, select Sign out. Tap Add Person and sign in with another Google account.
At the logon screen you can also let anyone browse the Internet as a Guest without having an account.

You can connect to an external monitor to extend your display. There’s no HDMI port on this laptop, so you’ll most likely need a USB-C to HDMI adapter depending on your monitor’s connections. I’m using a cheap USB-C hub that also provides 3 additional USB 3.0 ports, a full size SD card slot and another microSD card slot. This connects nicely to my LG ultrawide monitor. Go into Settings | Displays to move the displays so they are arranged as they are physically situated on your desk.
This Chromebook supports the Google Play Store so you can download apps just like on an Android tablet. For example, Microsoft Office apps and many Adobe apps like Lightroom and of course games. It’s worth noting that you’ll need a paid Office 365 subscription if you want to use any Office Play Store apps. It’s only free on devices smaller than 10.1” – something there seems to be a lot of confusion over!

And if you’re into Linux you can even enable Linux on your Chromebook and install full desktop apps like the powerful photo editing app Gimp. Note that although this Chromebook supports the Google Play Store and Linux, not all Chromebooks do.
There are of course limitations using a Chromebook. You can’t install any heavyweight full mainstream desktop apps like Adobe Premiere Pro that I use all the time, or the full desktop versions of Microsoft Office, and if you want to game you’re mostly limited to Android games or game streaming services. And if you have no internet connection it’s limited what you can do on the laptop. Although you can still use many Android apps, and some other apps like Google Docs and Google Keep will let you work offline.
Display and performance

The 1366 by 768 screen is a glossy IPS panel with good viewing angles. If you’re used to the super sharp display of your smartphone or tablet, you’ll find the display which works out as only 135 PPI, a little soft in comparison. According to the “Is This Retina” site, you’d need to view this screen from around 64cm for it to look “Retina” sharp. In practice you’ll probably be around 40cm away. You’ll get used to it, but I’d have liked a step up in resolution ideally. Text is quite small by default – you might want to increase the size in Settings | Display Size from its native size. This will make the text larger but will also soften the display further still.
I couldn’t use my X-Rite i1 Display Pro monitor calibrator to confirm the maximum brightness, or measure the colour accuracy, since there’s no calibration software available on Chrome OS. But the display lists a maximum brightness of a respectable 250 nits, and I found it quite usable even in brighter conditions.
Chromebooks have good battery life and I managed to get a full day of average usage: using Google Docs, browsing the Internet, watching YouTube clips etc with the brightness at around 75%. This aligns pretty well with its spec’ed at 10 hours. This will be much less if you’re solely watching full HD YouTube videos or playing games.
Charging the integrated 42Wh battery takes around 2 hours with the supplied charger. The power LED changes from red to orange to green when the battery reaches 97%.

The included 45W USB-C charger is a useful accessory in it’s own right. You could use it to fast charge lots of other gadgets too like your smartphone, GoPro camera, Nintendo Switch or one or the newer iPad Pros. It provides up to 3A at 15V although even working hard and at full brightness, the laptop didn’t draw more than around 2.5A. The laptop supports the standardised USB Power Delivery, so you can use any widely available compatible charger with the laptop, including portable chargers. I tried several wall chargers including an iPhone Pro 18W charger, an Anker 45W charger, and the ZeroLemon Extreme Charger Station I reviewed a while back. Apart from the underpowered Apple 9V 2A 18W charger they all worked fine. The Apple charger did charge the laptop, but just a little more slowly with a “low power charger” warning. I got the same result with a UGREEN Power Delivery power bank portable charger. But you could still use a small cheap charger like that to top up your battery when you’re on the move which is really convenient.

The laptop has a 1.1GHz dual core Intel Celeron N4000 processor, and this model comes with 4GB of RAM which isn’t upgradeable and 32GB of integrated eMMC storage not a faster SSD drive. You could expand the storage with a microSD card but the microSD card slot only runs at slow USB 2.0 speed of around 30MB/s.

Using the CPDT benchmark I got read and write speeds of the 32GB internal storage of 200MB/s and 83MB/s respectively. The browser benchmark Speedometer gave a result of ~44. A similarly priced iPad gave a score of ~55 and a 2012 MacBook Pro scored 45. Finally Geekbench 5 scored a rather low 423 and 788 for its single and multi-core CPU benchmark respectively.

None of these results are particularly impressive but the laptop feels fast enough for its intended purpose and for its price. It boots up in 15 seconds, and wakes from sleep almost immediately. Opening applications and browsing the web is all fairly nippy; I could watch YouTube full screen and Adobe Lightroom ran ok. And I tried playing a few games from the Play Store and they played fine.
The microphone beside the webcam did a decent job of recording audio, good enough for video calls. But there’s the combined microphone headphone jack so you’d be far better off using even a cheap wired headset. Please watch the video to hear how the microphone sounds.

The 2 x 2W stereo speakers underneath the front of the base aren’t the best quality and sound is very tinny. You can hear how the speakers sound in the video.
But there’s built in Bluetooth 4.2, not the latest 5.0, so you’d be better off connecting a Bluetooth speaker for the best experience. It does have the more recent WiFi 802.11ac and I didn’t have any issues with connectivity or speeds around the house.
Conclusions
The Lenovo C340 has a lot going for it. It’s well built, has a great selection of ports, an IPS touch screen and its versatile 360 degree hinge. Chromebooks have become far more useful now they support the Google Play Store and its huge library of apps.
They are easy to maintain, and setting up multiple users is about as easy as can be. Which makes it a great laptop for children’s homework, or for a student moving around different computers and devices. And depending on how you use your laptop, it might be suitable as your travel laptop or even everyday laptop. I spend a good portion of my week writing in Google Docs and this laptop would be more than enough for that.
But I do find the screen a little on the small side and I could do with it being a bit sharper. You get used to the bezels but they are particularly big. A full HD screen with smaller bezels would transform this laptop. There is a 14” and 15” version of this laptop with a full HD screen for a little more money, but I’d prefer something a bit smaller.
If you want to spend a little less for a very similar laptop, the popular predecessor to this laptop, the C330 is still available for around £220 or $240.
Overall the Lenovo 340-11 is great all-round entry level Chromebook, that can double up a good sized Android tablet. You can pay less, but having the hinged touch screen mostly justifies the extra cost.
Don’t forget to take a look at my YouTube video at the top of the page, and subscribe to my YouTube channel where I’m releasing videos every week on the latest technology and how to get the most out of it. If you tap the bell icon when you subscribe you’ll get a notification as soon as I release a video, and there’ll be a link to my site here for the written article. YouTube is also the best place to leave a comment. I read all of them and respond to as many as I can!
Lenovo C340-11 Chromebook: https://amzn.to/2TRnoTQ
Lenovo C330 Chromebook: https://amzn.to/2TT1oYQ
Leave a Reply