The Insta360 Link 4K webcam has a 3 axis gimbal that can intelligently track a subject as they move around the room. It has a larger than average ½” sensor which should improve its low light performance, and it has phase detection autofocus for fast and responsive focusing. Together with a range of clever modes like DeskView, WhiteBoard mode and portrait mode where it flips itself vertically, it’s one of the most impressive webcams I’ve come across and could be perfect for streamers, all kinds of online teaching and business meetings.
I’ll compare its image quality to a Panasonic mirrorless camera connected via a capture card and a popular Logitech webcam to see how it fares and I’ll run through all its special modes to see if this is the right webcam for you.
Overview
Inside the box you got the webcam itself, a 1.5m USB-C cable with a USB-C to USB-A adapter, a brief user guide and four whiteboard stickers that I’ll discuss shortly.

The webcam has a ¼” tripod mount or you can fold out its base to attach it to your laptop display or monitor.

It does have enough weight in its base to just rest on your desk.
Like all Insta360 gear I’ve tested it’s very well built, and has an attractive design with a matte black finish. It weighs 107g and does feel quite dense with its compact dimensions which you can see on screen. I would have liked to have seen a carry case included. With all its moving parts and exposed lens, you need to be a little careful carrying it with you, despite it being so portable. At some stage I’ll try and 3D print a small protective case for it.

Like most webcams installation is a doddle – just plug in the supplied USB cable into the webcam’s USB-C port and the other end into your computer. The webcam will perform a self test with its full range of movement and the light around its base will illuminate blue for a short period of time.
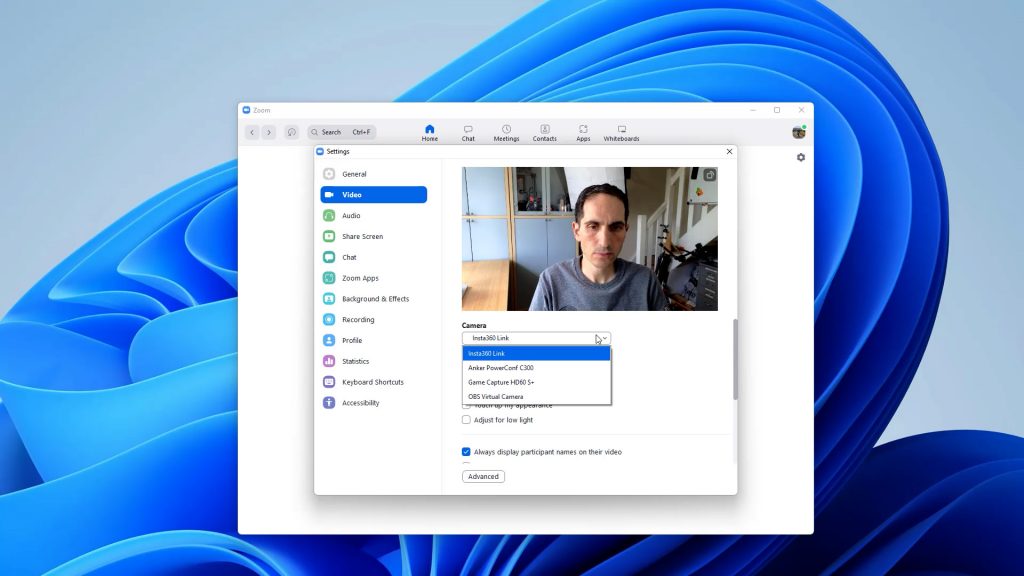
You can then use it with any software that supports a standard USB Video Class or UVC webcam including all the popular video conferencing apps like Zoom and Teams, and streaming software like OBS. The LED will light green when the webcam is in use.

When you close any app using the webcam this LED will go off and after 10 seconds the lens will enter its Privacy Mode and point itself downwards.
To use all the webcam’s features you’ll need to install the Insta360 Link Controller app for your PC or Mac which you’ll need to download from Insta360’s website.

The app’s default Gimbal Control view lets you control the webcam’s 3-axis gimbal with the virtual joystick. It can pan horizontally almost 360° and tilt and roll vertically almost 180°.

To reset its position you can click the reset icon or you can double tap the front of the webcam’s base. You can also digitally zoom with the zoom slider. You can save up to 6 positions as presets which is very useful. And moving between these presets is fast.
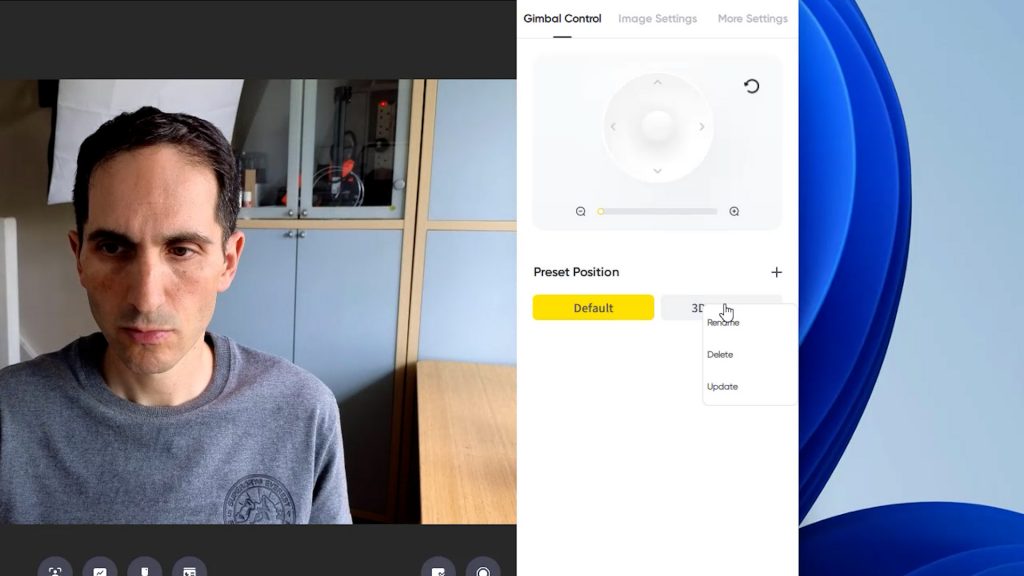
If you right click the presets you can rename, update or delete them. I would like the option to drag around the preview window with my mouse to control the gimbal, but I’m assured that’s coming very soon in a firmware release.
If you want to use the webcam in another app you must turn off the preview with the video icon. Beside this icon you can choose the video resolution up to its maximum 4K. I’ll discuss the various special modes shortly, but to the right of these special modes there’s a record button to quickly capture videos with the webcam, although you can’t change the default 30 fps frame rate. You can set the video save location under Preferences which you can access from the 3 dots in the title bar.
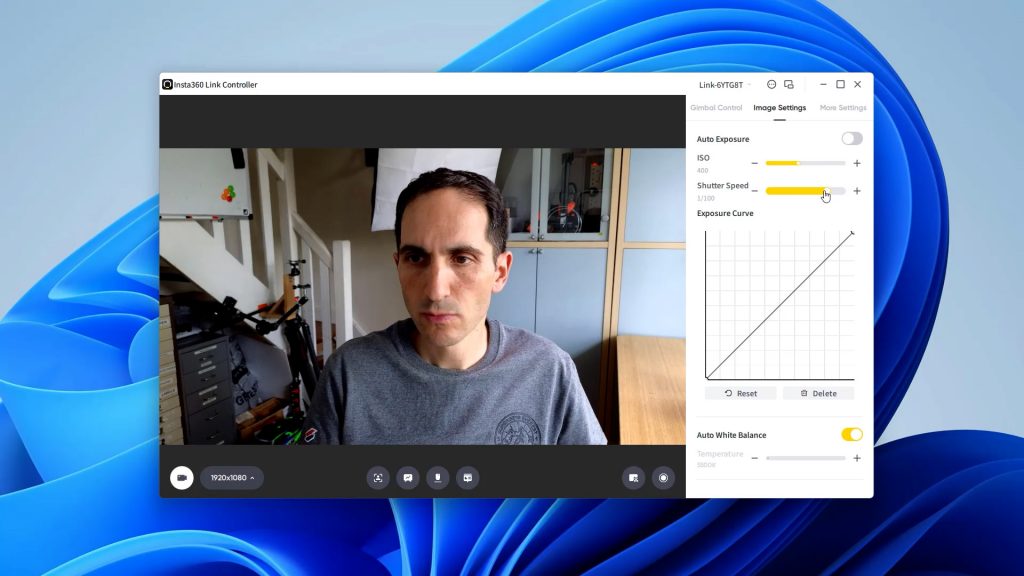
Under the Image Settings tab, you can set exposure compensation or manual exposure. And you can set manual white balance but unfortunately there’s no custom white balance which I’d like to see at this price point – especially a webcam aimed more at professionals.
You can also tweak brightness, contrast, saturation and sharpness.

In the More Settings tab you can toggle Gesture controls and AI Zoom which I’ll discuss further shortly together with Camera Focus, Streamer Mode and HDR. You can leave Anti-Flicker as Auto or set it manually for your region and and if there’s a Firmware update available, you can download and install the update here too. There’s also an option to factory reset the webcams’ settings.
If you click on the icon in the title bar with two rectangles, the main window is reduced to a compact toolbar with most of the same controls.
Image quality and performance

The webcam has an f1.8 autofocus lens with a 26mm 35mm equivalent focal length, that can capture at up to 4K at 30 fps and 1080p at 60fps.
It has a larger than average ½” sensor which should improve its low light capabilities.

I started off comparing the webcam to my Panasonic G80 mirrorless camera, the popular Logitech C920 webcam and the Anker PowerConf C300 – a webcam aimed more at the professional market.

The Panasonic camera was connected via an Elgato HD60S+ 4K capture card and I had a 30mm equivalent f1.7 Leica lens attached.
The Panasonic and Insta360 were recorded at 4K, 25 fps and the Logitech and Anker at 1080p 25 fps. All cameras were set to autofocus and auto white balance. I did set the focus and exposure manually with the Panasonic camera.

With plenty of daylight coming from a large bay window just beside me, all the cameras produced decent results. You can see how they compare yourselves in all these tests, but the Insta360 output looks very good, with accurate skin tones and the exposure was spot on. The ½” sensor still isn’t big enough to even slightly blur the background like the Micro Four Thirds sensor of the Panasonic, unless you’re very close. But overall I prefer the output from the Insta360 to all the other cameras. I did play around with manual exposure and white balance in the Insta360 app, but in most cases the auto settings worked just as well.

Next I closed the blinds and turned on a 1400 lumen Elgato Key Light Air LED light at around 15% output and 5000K colour temperature. The light is sitting in front and to the left of me. Again the Insta360 Link produced the most accurate colours with potentially difficult lighting.

There isn’t much noise but I’d possibly turn down the sharpening a little for my tastes or if I was going to post process the footage.
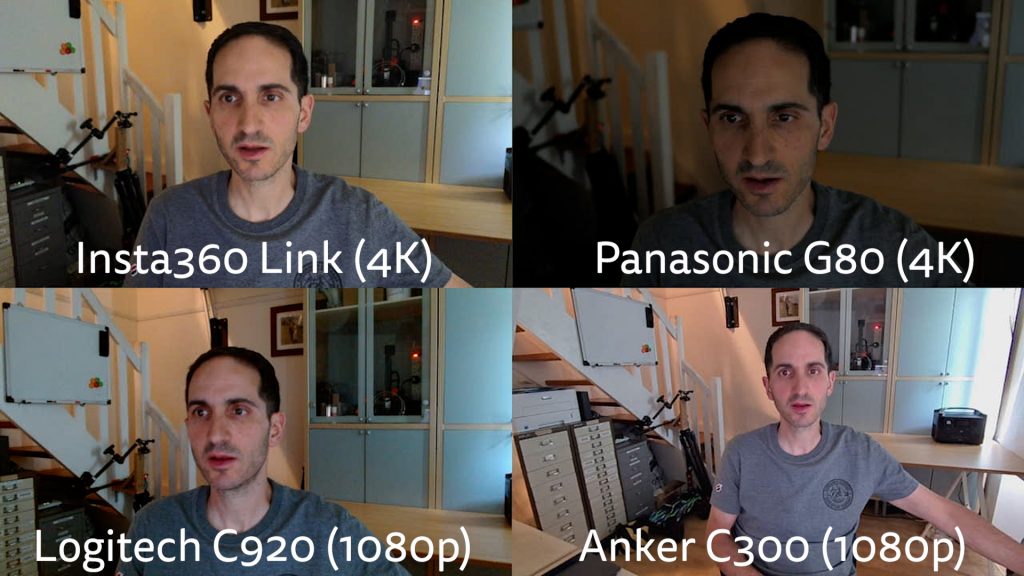
Turning the lamp off there’s very little light in the room and there’s a fair bit of noise with all the webcams as you’d expect – especially in the shadows. The mirrorless camera unsurprisingly fared best but I had to bump up the ISO of the Panasonic to 1200 – and that’s with the lens wide open with its maximum f1.7 aperture. The Insta360 Link image still looks more than acceptable – and most importantly, colour accuracy is maintained. The Logitech C920 is really starting to suffer in these conditions. The Anker does a better job than the Logitech, but it uses quite aggressive image processing and the image looks a little artificial.

There’s also an HDR option for high contrast scenes. This doesn’t work in 4K mode – you’ll need to drop the resolution down to 1080p. I tried it in front of a bright window with the blind partially pulled down.

You can see the difference with HDR off and then turned on. There are details in the window which are blown out with HDR off. Although I did find the overall image quality degraded slightly with HDR on and colours were slightly off. The webcam still does a pretty good job with exposing the foreground with HDR off, even with a bright background so I’ve tended to leave HDR disabled in most situations – and I prefer to use 4K anyway.

The webcam has Phase Detection Autofocus (PDAF) and can focus quickly. This is useful for any content where you regularly want to show a close up of an object like a product review. You need to keep the object at least 10cm away from the lens which is the minimum focusing distance, but you can see in these tests that the webcam quickly adjusts focus between the object and my face. Sometimes autofocus can be less responsive at higher resolutions, but I tried this in both 4K and 1080p and had similar results.

You also have manual focusing which can be useful when you don’t want the focus jumping around.

I did find the camera got quite hot as you can see with the Flir thermal imaging camera, but I didn’t get any overheating issues in my testing so far.
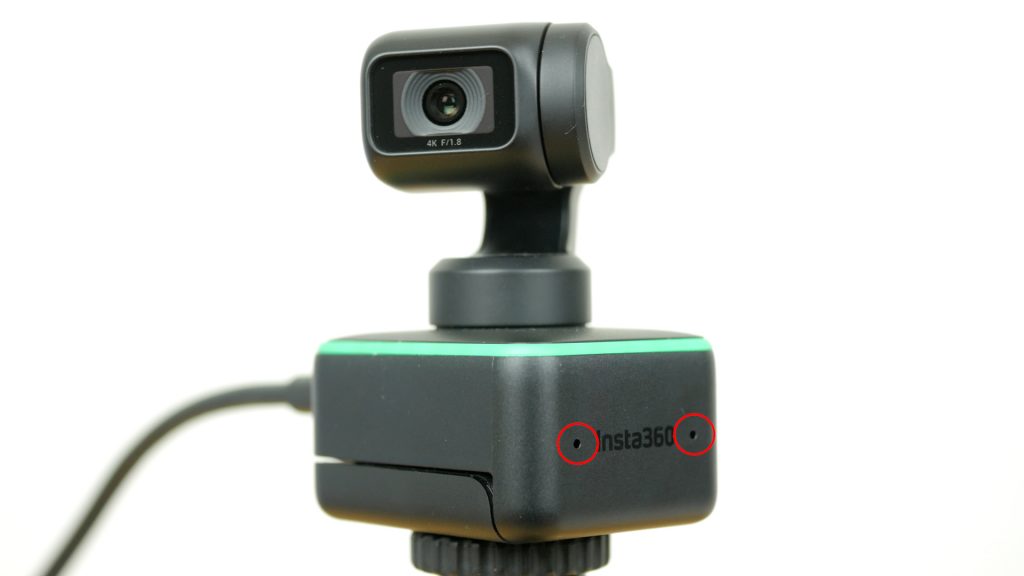
The webcam has built-in dual noise-cancelling microphones and the quality is very good, with no noticeable delay. You can hear how it sounds with and without background noise in the accompanying video.
Smart features
A big selling point of this webcam is its AI features and special modes.
Most notably AI tracking, which with the gimbal’s range of movement becomes genuinely useful. You can enable tracking mode either in the main app, the compact toolbar or with a gesture. Holding up the palm of either hand to the webcam will toggle tracking. The webcam’s LED will flash blue when it’s understood your command. You need to make sure you don’t cover your face when using gestures, so they tend to work a little better if you’re not too close to the camera.
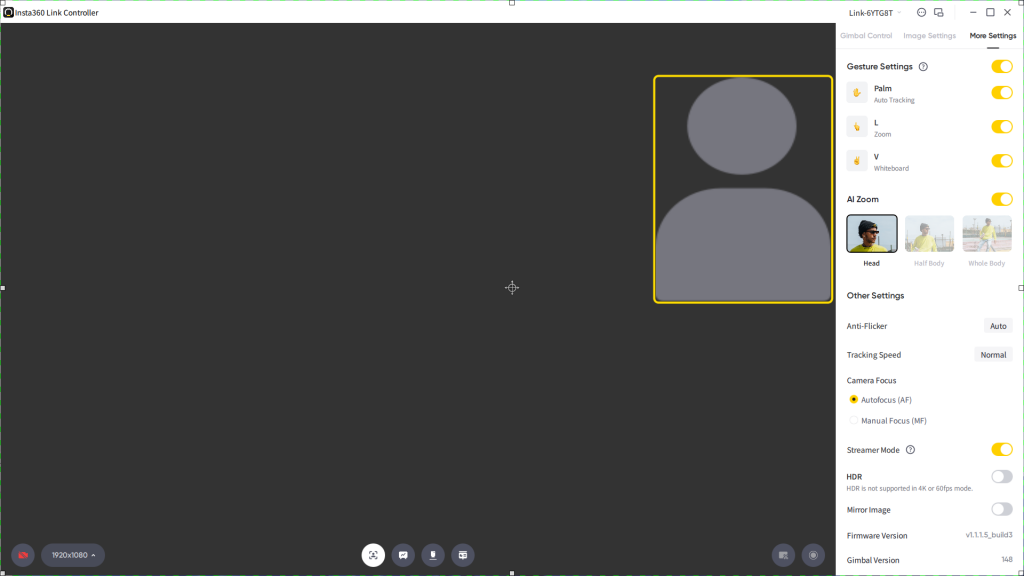
The webcam does a very good job of tracking you as you move around the room. If you enable AI Zoom under More Settings, you can then specify Head, Half Body and Whole Body and the webcam will both track you and digitally zoom in to maintain your preference.

It all works remarkably well – far better than I was expecting. You can even set the tracking speed although I found the default Normal was about right for me. I can imagine this could be a very useful feature for any kind of teaching scenario.
You can also use an L gesture to digitally zoom in or out. This takes a little practice – you need to hold the L gesture, again with either hand, until the blue LED flashes. Then move your hand up a short way and hold to keep zooming in. And pull your hand down a short way and hold to zoom out. This works better with tracking on, and if you’re a little distance from the webcam.

There’s a Whiteboard mode which automatically zooms into your whiteboard and attempts to correct for any keystone distortion. You apply the 4 supplied stickers to the corners of your whiteboard and then either click on the Whiteboard icon in the app or use a V gesture. If your webcam is in a fixed location rather than on a tripod, I find it easier to create a preset that points the webcam is the general direction of your whiteboard before enabling Whiteboard mode. It does do a good job of framing your whiteboard, but it doesn’t apply any exposure correction. It’s another potentially useful feature for online meetings and teaching.

Next up is Deskview which is a nifty little feature that points the webcam down at your desktop, flips it the right way up and again corrects for any keystone distortion. This also worked very well.

If you attach the webcam to an overhead tripod with its 1/4“ thread, you can also enable Overhead Mode which will point the camera directly downwards for a true overhead shot – which could be used for unboxing videos for example.
Both of these modes need to be activated in the Controller app.
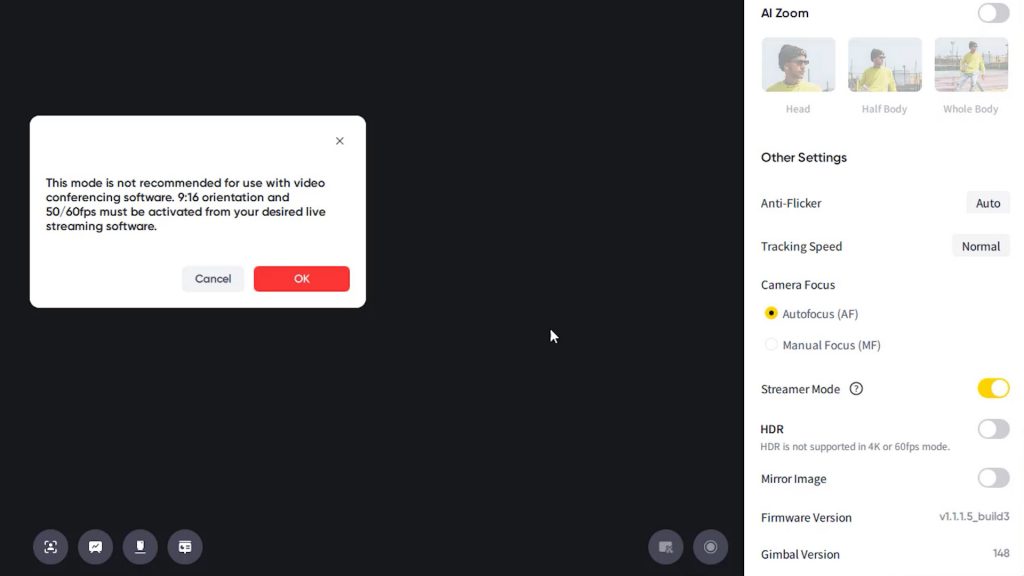
The last mode is slightly hidden away in More Settings. Streamer Mode lets you rotate the webcam to record 90° portrait mode videos.

You have to use your streaming software to choose the correct resolution to actually enable this mode. In OBS, you select 1088×1920 under resolution and the webcam will then rotate 90° for a portrait capture.

You’ll get better tracking performance using the webcam on a tripod and rotating the mount 90° as above. The webcam is then still able to use its full range of motion in portrait mode to track you.
Conclusions
The Insta360 Link has very good image quality and genuinely useful intelligent features. Even the gesture modes which I don’t usually have a lot of success with, work well.
I would have liked a little carry case and the touch key on the front feels a little under utilised. I’d like to be able to configure customisable double and triple taps – perhaps to turn tracking on and off, or to quickly select a preset position. And the software whilst functional doesn’t look as polished as software from Logitech for example. Windows Hello facial recognition would have been nice too.
But these are all minor points. The main consideration will probably be price. At £300 or $300 this is an expensive webcam. It’s almost twice the price of 4K webcams from other brands like Logitech. Although those cameras don’t have the 3-axis gimbal and the various clever intelligent modes the gimbal enables. If these features are useful to you, they could easily justify the price.
Don’t forget to take a look at my YouTube video at the top of the page, and subscribe to my YouTube channel where I’m releasing videos every week on the latest technology and how to get the most out of it. If you tap the bell icon when you subscribe you’ll get a notification as soon as I release a video, and there’ll be a link to my site here for the written article. YouTube is also the best place to leave a comment. I read all of them and respond to as many as I can!
Insta360 store link: Insta360 Link 4K webcam
Amazon link: https://amzn.to/3Js1GxM
Leave a Reply