I’m going to describe from start to finish how to create this interactive 360° spherical image (click and drag around the image – use the scroll wheel to zoom):
360° panoramic photography is a unique way of capturing images that can be interacted with, either via dragging and zooming with your mouse, or with a VR headset.
There are three parts to creating an image like this: capturing the photos, stitching them together and publishing them.
And there are countless ways to perform each step, but in this article I’m going to be using a mirrorless camera (Panasonic G80) with a fisheye lens (Samyung 7.5mm) to capture the images, and only free software and services to stitch, edit and publish the panorama. This produces a very high resolution image, with invisible seams where the stitching occurs. An alternative option, would be the Ricoh Theta S I looked at here, but this is quite expensive and produces relatively low resolution images. And there are smartphone apps like Occipital 360 you can also try.
I’ve produced a video of the process, along with a written description:
A little background
To make stitching your images together as easy as possible, you want to do your best to avoid parallax. To explain what this issue is, hold your thumb out in front of you and close one eye. Now close the other eye and watch your thumb and the background move relative to each other. It’s impossible for even the best stitching software to join offset images like this together, so when you take your photos, you need to rotate around a point in the lens of your camera called the entrance pupil or no parallax point (NPP). Sometimes (incorrectly) called the nodal point, this is usually just behind the front of the lens of your camera.
The most accurate way of finding the NPP and rotating around it, is to use a tripod with a special panoramic head. Bought ones are expensive, although I’ve made one out of wood which works well. But there’s a way of getting decent results without lugging a tripod and a special head around with you.
It simply involves dangling a piece of string with a weight off the lens close to the NPP. This acts a plumb line that you use to rotate around a reference point on the ground.
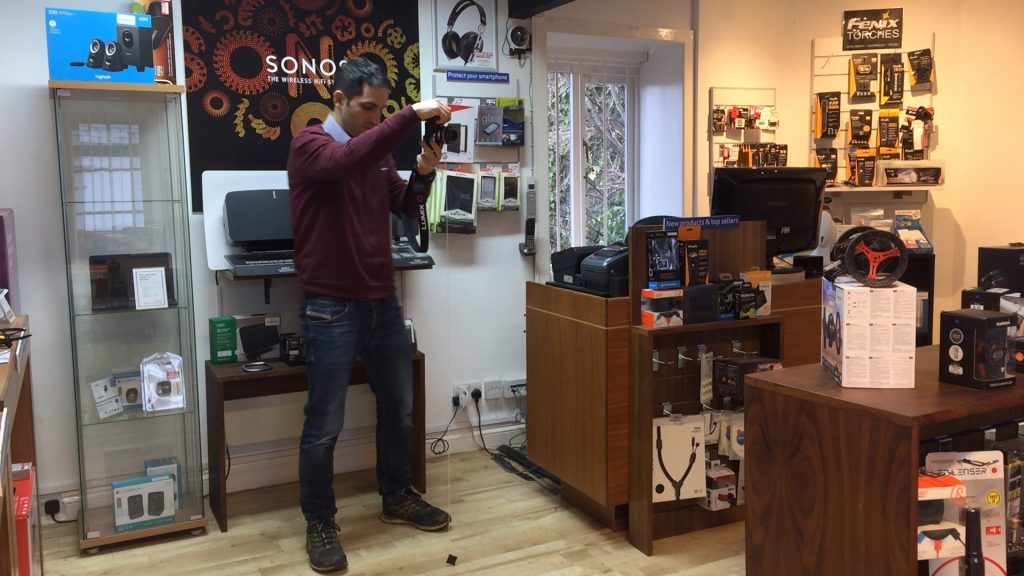
The amount of photos you need to take to produce a full spherical 360°x180° image, depends on the lens you use. The wider the angle of the lens (shorter focal length), the fewer pics you need to take. But you can take these full 360°s with any lens. In fact the longer focal length lenses will provide an even higher resolution image, but the stitching becomes more difficult, particularly if you’re taking the shots handheld.
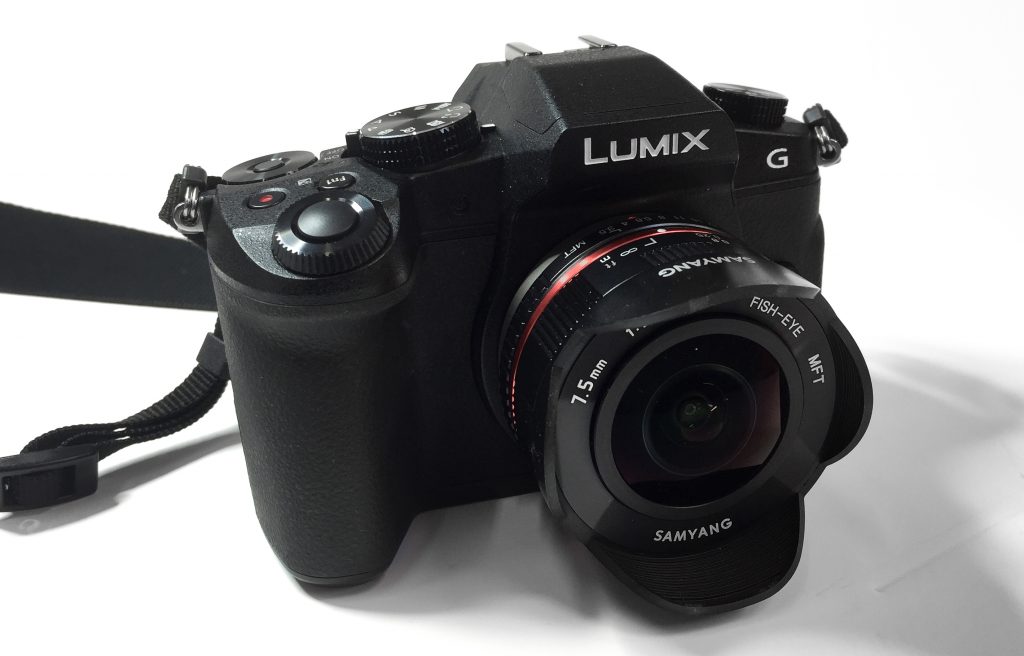
If you want to take as few shots as possible, a fisheye lens is a good option. And you’ll get the greatest field of view if you use a fisheye lens on a full frame camera. I’m using a 7.5mm Samyung fisheye lens on a Panasonic G80. The G80 is a micro four thirds (MFT) and has a 2x crop factor which basically means that 7.5mm is actually 15mm 35mm equivalent. For this setup, to get a full spherical panorama, I can use the handy calculator here to establish that I require at least 4 photos holding the camera level, one straight up for the zenith, and one straight down for the nadir. To give myself I little more overlap I’ll take 5 images with the camera level. These are with the camera in portrait position, to provide more overlapping for stitching, and it also makes it easier to join a featureless sky.
Capturing the images
We were were on holiday in North Devon, near Croyde and I decided on a 360° at Baggy Point. As the family scurried off I quickly attached the plumb line to the front of the fisheye lens, picked a reference point on the ground and went about taking my shots. The easiest and quickest way* to set the exposure, is to point the camera in the direction you’re most interested in. Switch to aperture priority mode and the lowest ISO you can, half press the shutter and take a reading of the shutter speed. Now switch to manual mode and set the ISO, aperture and shutter speed to lock the exposure for the whole panorama. This is important otherwise you won’t be able get the seams to blend properly. Also lock the focus and the white balance. I usually shoot RAW+JPG – but unless you’re going to do any RAW processing JPG saves on workflow a little.
With my combination of lens and camera as above, I then took the 5 images. Holding the camera in portrait mode, I rotated just under 90° around the NPP for each shot, trying to keep the plumb line in the same position, and the camera as level as possible. Then I took one shot of the sky – ducking down low to make sure I didn’t end up in the shot. And lastly the final shot of the ground.
Processing
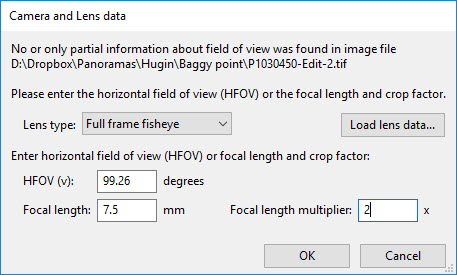
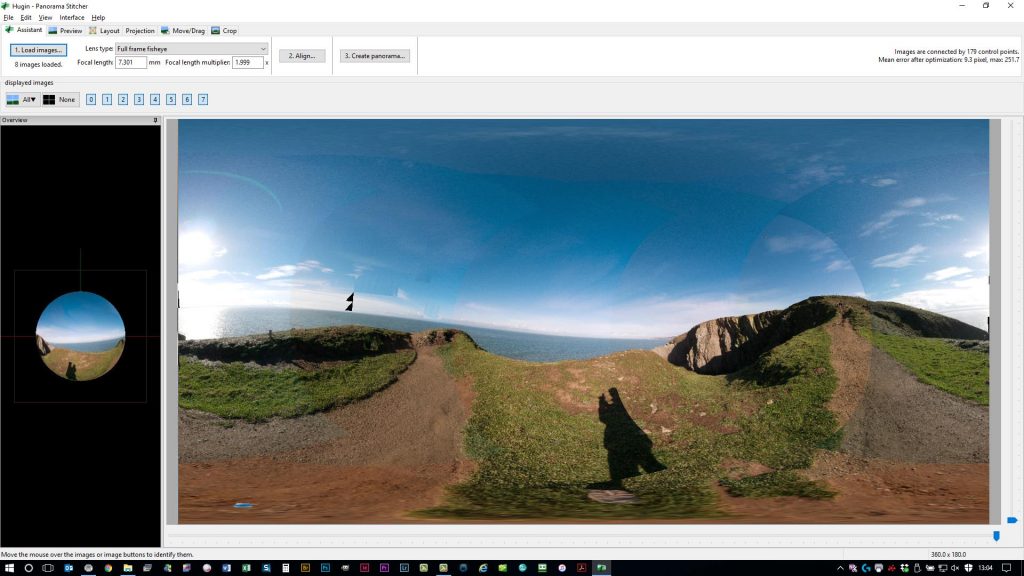
There is a very powerful free tool called Hugin, which I’m using here for the stitching. Simply drag the images into Hugin and the software should read the EXIF data, except in my case the Samyung is a manual focus lens so passes no data to the camera. I needed to manually enter the focal length and crop factor, which is used to calculate the field of view:
Then click on align:
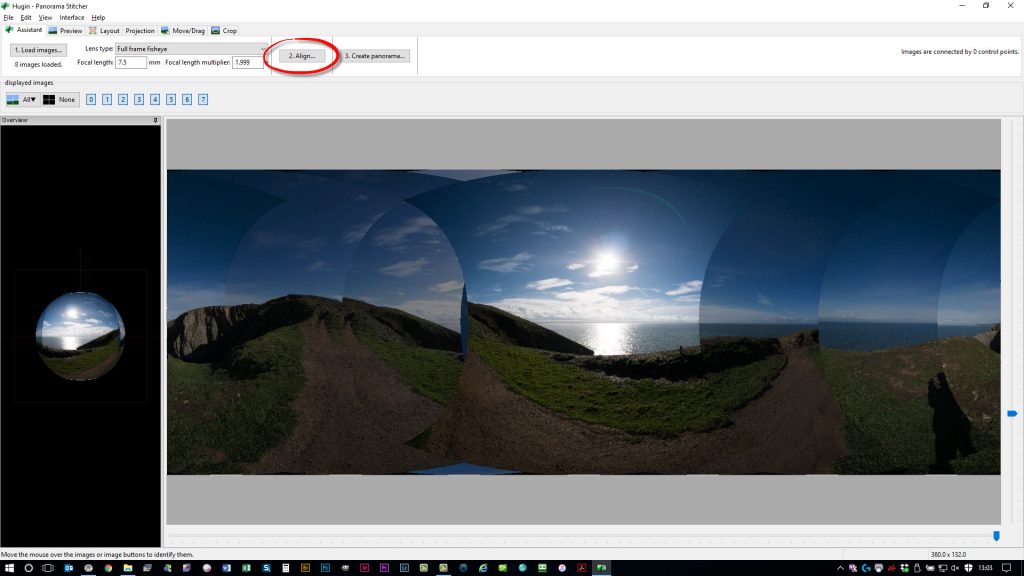
Hugin will then proceed to find matching control points between all the images and will produce a preview image of the resulting stitch:
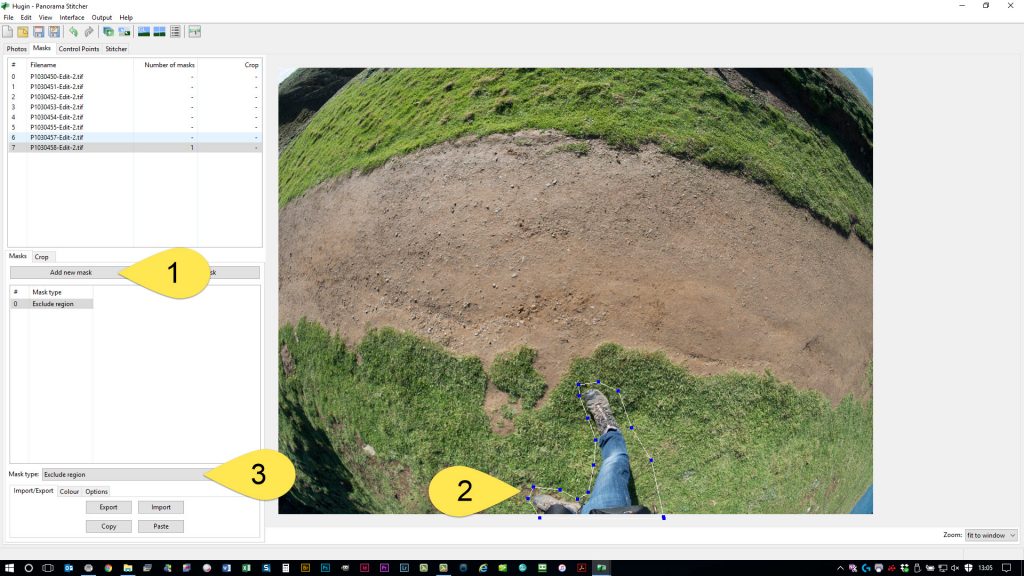
In this case I would like to mask away my foot and shadow so switch to expert mode and choose mask. In this tab select an image with an item you want to mask away, click on add mask (1) and then make the selection, finishing with a double click (2). Make sure exclude region is selected for mask type (3):
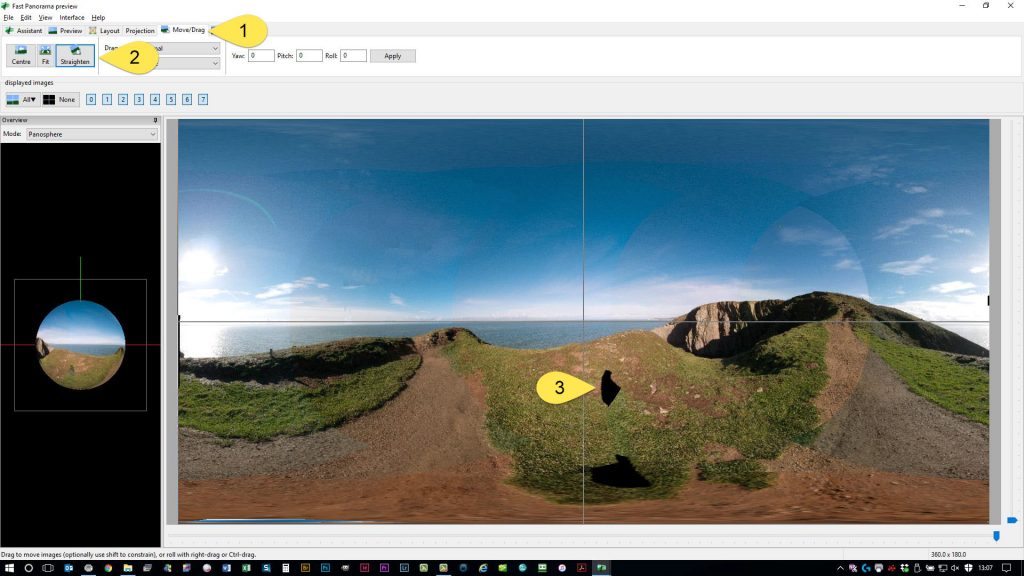
I’m also selecting the images with my shadow and masking those too. Then select the Move/Drag (1) tab and click Straighten (2) to fix the wonky horizon. When you then look at the preview image, you will see a couple of holes (3), where there isn’t enough overlap to cover all the area we’ve masked:
Fortunately this is easy to clone in Gimp, but first we need to stitch and blend the panorama so select the Assistant tab and select Create panorama. Save the file as an uncompressed TIF.
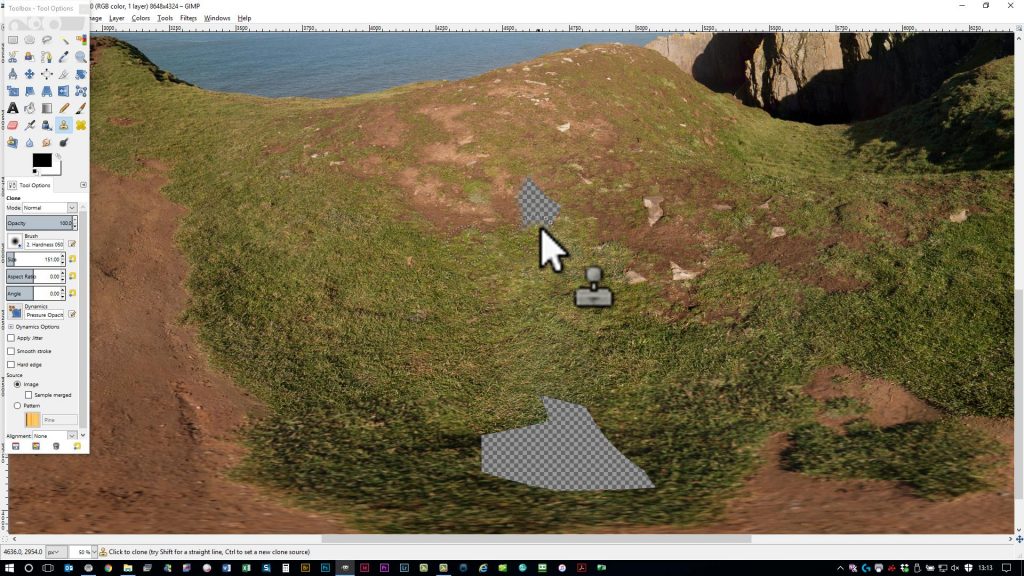
Load this image into Gimp and choose the clone stamp tool, keyboard shortcut C. Use the right and left bracket keys ([,]) to set the size of the brush, and ctrl-click where you’d like to clone from. Then brush away the holes:
Export this file as a JPG and preview the final image in the free 360° FSPViewer. The only thing left to do is to upload to a sharing service on the internet. I’ve uploaded the final result to Google Maps via the Google Street View app. Download the app, sign in with a Gmail account, upload the JPG and choose where the image was taken. This should appear on Google Maps within 24 hours.
I’d encourage anyone to give this a try – it’s great fun! Any questions, please ask away in the comments below.
*The most accurate method is to find the dynamic range of the whole 360° view and choose an exposure right in the middle. You’d do this by using spot metering on your camera, and taking a reading of the shutter speed in the shadows and the highlights of the scene. For example, say at an aperture of f5.6, the shadows reading was 1/125, and the highlights reading was 1/2000, you’d set the exposure right in the middle at a shutter speed of 1/500.
If you have found this article useful please consider clicking on the link(s) below. You pay the exact same price and it’ll enable me to keep these articles coming!
Panasonic G80 Mirrorless Camera: Amazon UK, Amazon US (G85 in the US)
Samyung 7.5mm Fisheye Lens: Amazon UK, Amazon US (Rokinon in the US)
Brilliant! Very useful.
Lots of clever tips and hints – I feel like giving it a go myself, having seen that.
A great picture to choose too.
Very well explained, as ever!
Thank you!