Drones from big names like DJI start from around £450, or $450 for the Spark. This is a lot of money for something you may not end up using very much. At the other end of the market there are plenty of cheap drones which tend to be lacking a lot of the features that make the more expensive drones so tempting.
The Hubsan X507A drone is around £70 or $70. Hubsan is a well respected name in drones, and the H507A has a feature list I’d expect to pay a lot more for.
It has GPS built in and a 720p camera with a live stream straight to your smartphone using WiFi. There are various flight modes, including Following, Orbit and Waypoint modes, features normally reserved for more pricey drones. In fact for my Parrot Bepob 2, you have to pay half the price of the Hubsan just to activate these features!
You use an app on your smartphone to control it, rather than a dedicated controller. But for casual use, I see this more as an advantage – one less thing to have with you. Hubsan do have a slightly more expensive version of this drone which does come with a Bluetooth controller if you prefer.
It all sounds good, so let’s take a closer look.
Getting started
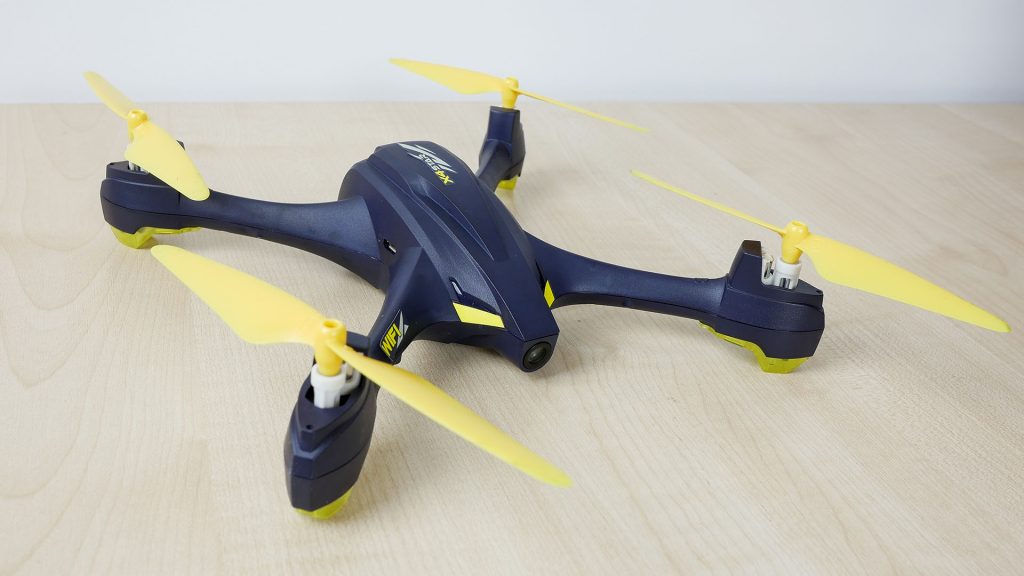
The drone comes well packaged with a spare set of blades, a single 550mAh battery and a USB charging cable. There’s also a screwdriver for changing the propellers and four propeller guards, which could be useful for indoor use. I’d recommend keeping the box for transporting the drone.
The drone is well built, and doesn’t feel cheap. The battery is already inserted but I’d suggest giving it a full charge, which takes around an hour, before the first flight.
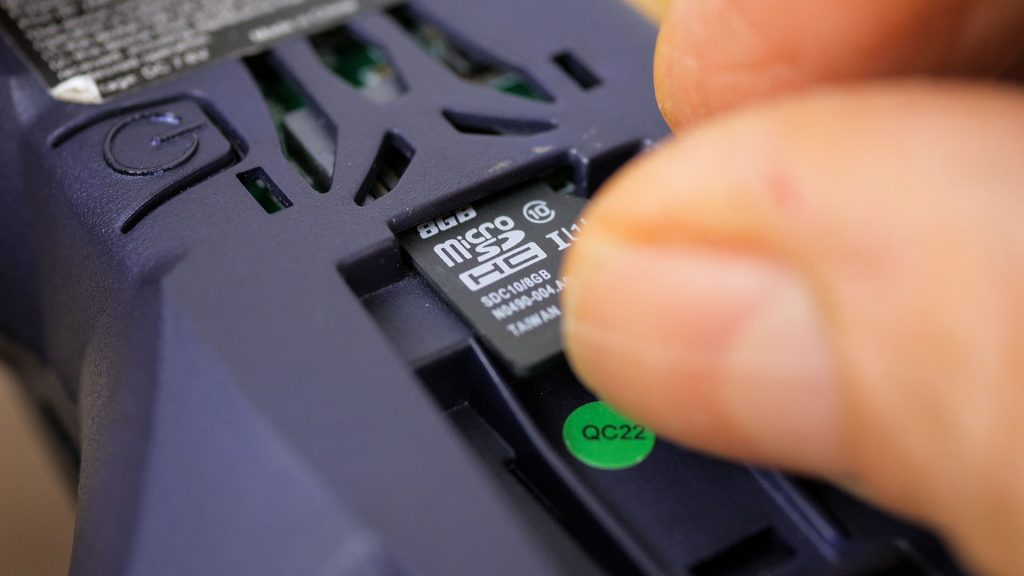
There’s a slot for a microSD card to record videos and photos. Capacities of up to 64GBs are supported and a class 10 speed is recommended. I’m using a Kingston 8GB class 10 card.
You’ll need to download the free X-Hubsan app from the App or Play Store on your phone to control the drone, before you head out.
Flying the drone
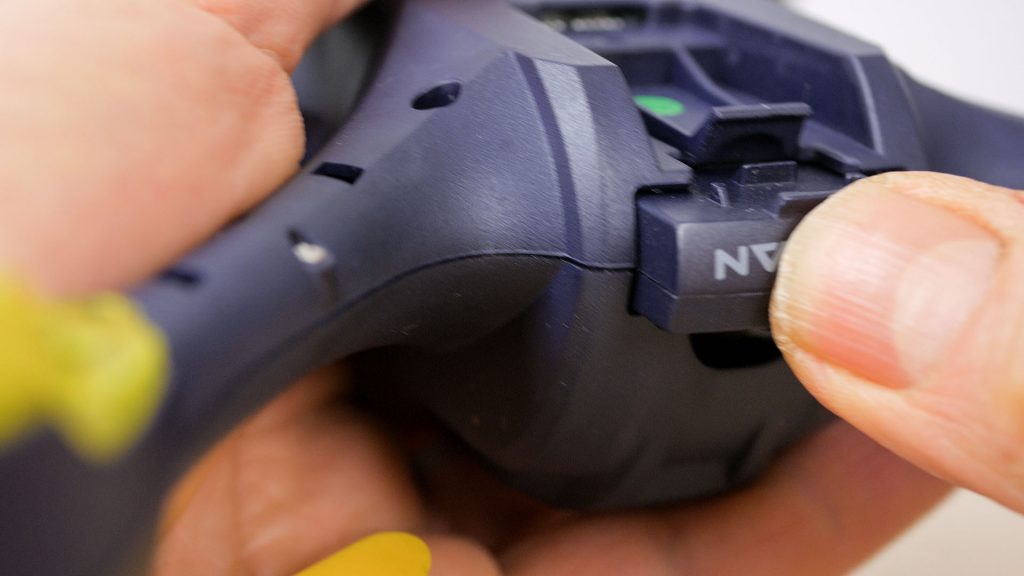
Insert the charged battery and hold the power button for 4 or 5 seconds to turn the drone on. Go to WiFi settings on your smartphone, and choose the Hubsan’s WiFi network to connect to. Enter 12345678 when prompted. I found this doesn’t always work the first time, and I often have to re-enter the password at least once.
Open the X-Hubsan app and choose the H507A drone from the drop-down list and tap Enter Device. Before every flight your need to do a calibration of the drone by rotating the drone horizontally and then vertically with the camera pointing downwards.
You then need to wait for a GPS fix which can take some time. By default, the drone won’t be able to take off before it’s acquired at least 6 satellites. You can turn this setting off, but I wouldn’t recommend that for outside use. Since the Automatic Return function is based on the accuracy of this fix, I prefer to acquire as many satellites as I have the patience for. Even if you turn the setting off, you won’t be able to use the various flight modes without acquiring at least 6 satellites anyway.
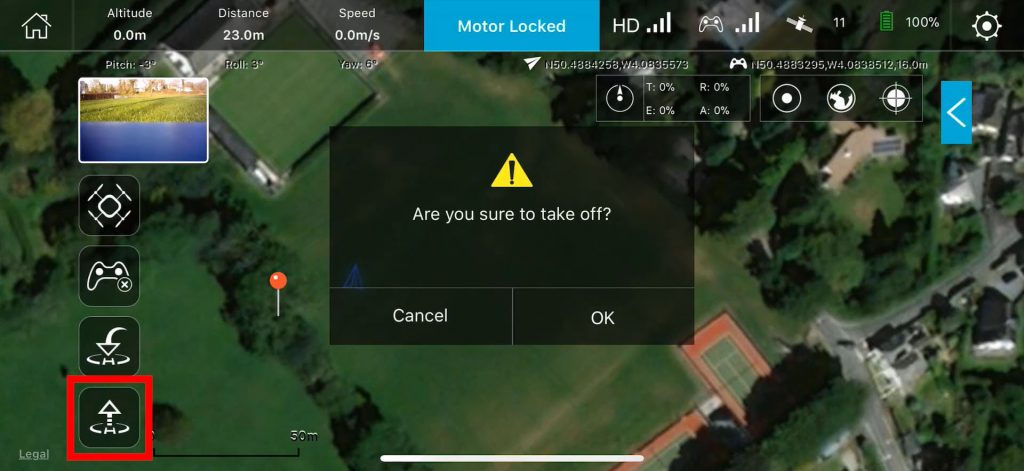
Once you’ve got your GPS fix, all you need to do is tap the Auto Take Off, and the drone will ascend to a metre or so in height and hold its position, without you having to touch the controls. You can then use the two virtual joysticks to control it. By default, use the left joystick to go up and down, and rotate left and right. And the right joystick to go forwards and backwards, and bank left and right. You can change this is Settings | Controller | Joystick Mode.
You can record photos or videos to the microSD card by tapping the red record button for video and the grey button to take a photo, switching between the two modes by tapping the bottom icon.
To land the drone, tap the Auto Land button. Or you can tap the Return to Home button which will automatically fly the drone back to its take off position. I found this to work well, returning to within a few metres from where it took off.
Once it’s landed, the motors should automatically cut off. If they don’t you can pull down and outwards on both joysticks to force the motors to shut off, and then you can press and hold the power button to turn the drone off.
Performance, battery life and camera quality
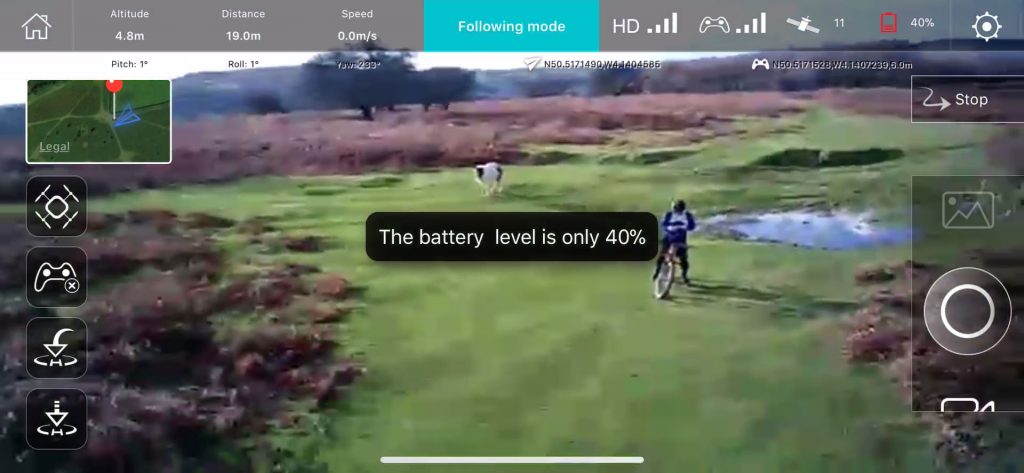
The drone is very stable and requires almost no skill to fly. With a fully charged battery I did manage to get the quoted 9 minutes of flight time, but you’ll get a battery warning after a very short time, and the various flight modes that I’ll come to shortly, aren’t available once the battery level drops. Ideally you’d want a couple of spare batteries, but they’re not so easy to get hold of the UK at least. You can use the supplied USB charger with a power pack, but there’s no quick charge and waiting for an hour for the battery to charge isn’t very practical.
Using your smartphone to control the drone is more than acceptable, although I know it might put some off. The drone ascends and descends quickly, but forward and backward speed is painfully slow if you’ve flown bigger drones before.
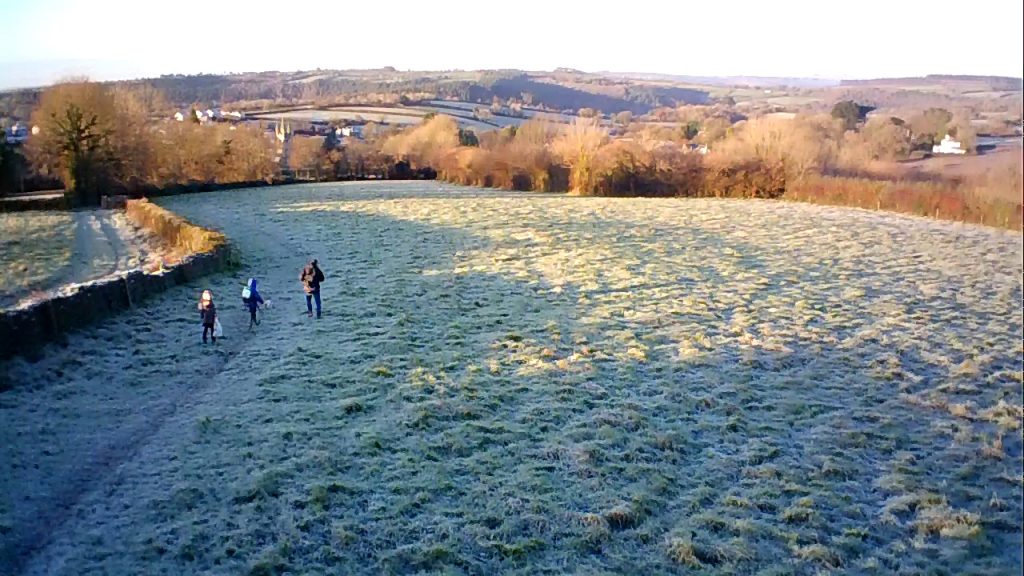
Video quality is 720p, so not the Full HD or 4K of more expensive drones. The quality is quite acceptable, but unfortunately there’s no image stabilisation. So even with a gentle breeze the video is far from smooth, although even with a strong wind the footage is usable, as you can see in the accompanying video.
I personally wouldn’t bother with the photo mode. It’s similar quality to a frame grab from a recorded video and less than 1 megapixel. So you’re probably better of just recording a video and grabbing a still from that.
Live streaming to your smartphone works surprisingly well and is one of the best features of the drone. It’s fairly low resolution and there is some stuttering and lag, but it’s acceptable. The WiFi connection is reliable and I didn’t lose the connection even once, although I tried to keep it within 100 metres or so.
Flight modes
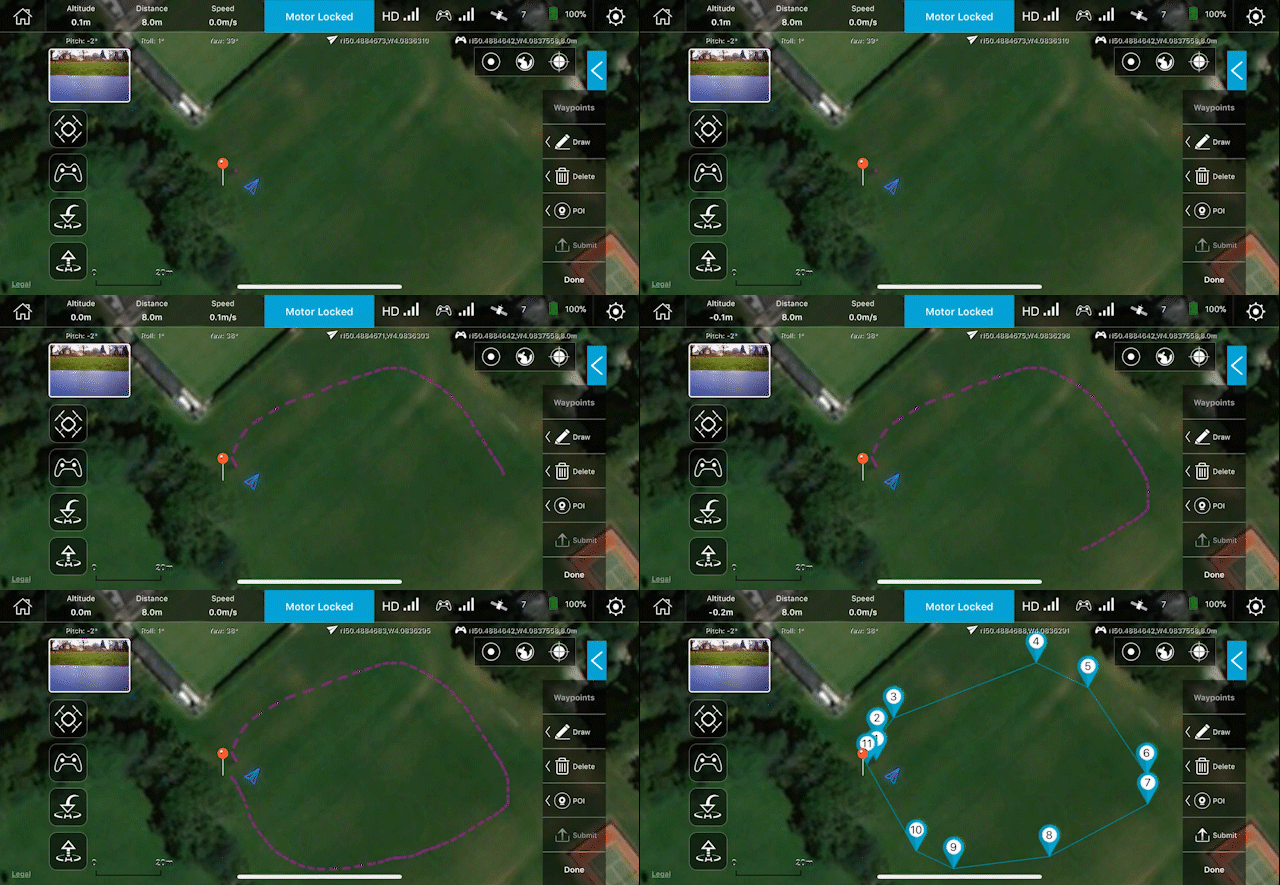
As well as the standard flight mode, there’s Waypoint, Following and Orbit modes.
In Waypoint mode, you can draw a route on the satellite map, and the drone will follow this route. Tap on the Mode Swap button and select Waypoint Mode. Draw a route and click submit. Then take off and click Done to start the set route. You have to work very quickly with the limited battery life. I tried a number of times and only managed once to actually set it off on a simple route. Unfortunately it was such a windy day, it didn’t manage to follow the route anyway.
The Follow-Me mode is easy to use – just tap the Mode Swap button and choose the Following mode. It works to some extent, but not well enough for anything particularly useful. It sort of follows me walking slowly across this field in the accompanying video. But I tried to get it to follow me mountain biking with little success.
The Orbit mode probably worked best of the three flight modes, although it’s a bit fussy about where it starts off from. Again tap Mode Swap, and select Orbit.
Conclusions
I have been quite impressed with the Hubsan drone, especially when you consider its price. It’s easy to fly with one tap take off and landing, the live video feed works well and the built in GPS with automatic return to home is a feature I’d expect to pay more for.
The build quality is a cut above most budget drones I’ve tried, and the app to configure and control the drone is well thought out.
The battery life is disappointing, especially if you’re wanting to use the flight modes particularly the Waypoint mode. The video quality is ok but without any image stabilisation, it’s not really going to be useful for that much.
But it’s a great introduction to drones at an affordable price, and a cut above the cheap and nasty toy drones. And it may just give you a taste for something bigger and better!
Pros:
- GPS with automatic return to home
- Very easy to fly via smartphone app. One tap to take off and landing. Holds position well without any interaction with controller
- 720p camera with decent quality
- Live video feed to smartphone
- Decent build quality
- Quite sophisticated smartphone app
Cons:
- Battery life too short, especially if you want to use the flight modes
- Slow to acquire GPS satellites
- Initial wireless connection to app often needs more than one attempt
- Motors don’t always shut off automatically. Have to pull back and out on virtual sticks to force shut off
- No supplied controller – more expensive model includes Bluetooth controller
- Slow movement a little frustrating
- No image stabilisation
I hope you found this article useful. If you have any specific questions, please do ask below in the comments section – I do my best to reply to any questions.
And as ever if have found the review helpful, please consider using the Amazon links below for any purchases. It doesn’t cost you a penny, and the small amount of commission I get will keep the site going! Thank you.
Amazon links to products mentioned in review:
Hubsan H507A Drone
Hubsan H507A Plus
DJI Spark Drone
Parrot Bebop 2
Do you have any idea as to what the micro USB socket on the side of the drone is for? Is it for charging the drone without removing the battery from the battery compartment? or just for downloading images from the SD card? or maybe even something else like firmware upgrades? if the latter, I wonder what version is the latest!!
Thanks if you are able to reply, and thanks for the review even if you are not.
Graham.
X4star pro h507a. Right out of box wont charge or turn on!!!
I don’t have a clue what the USB port on the side is for. Do you know what it’s purpose is?