The Akaso EK7000 is a budget action camera that costs around £50 or $60. It comes with a mountain of accessories including a waterproof housing and a remote, has built in WiFi so can be controlled via an app on your smartphone, and supports resolutions up to a theoretical 4k.
But is it any good, and how does it compare to a GoPro, even one a couple of generations old?
Getting started
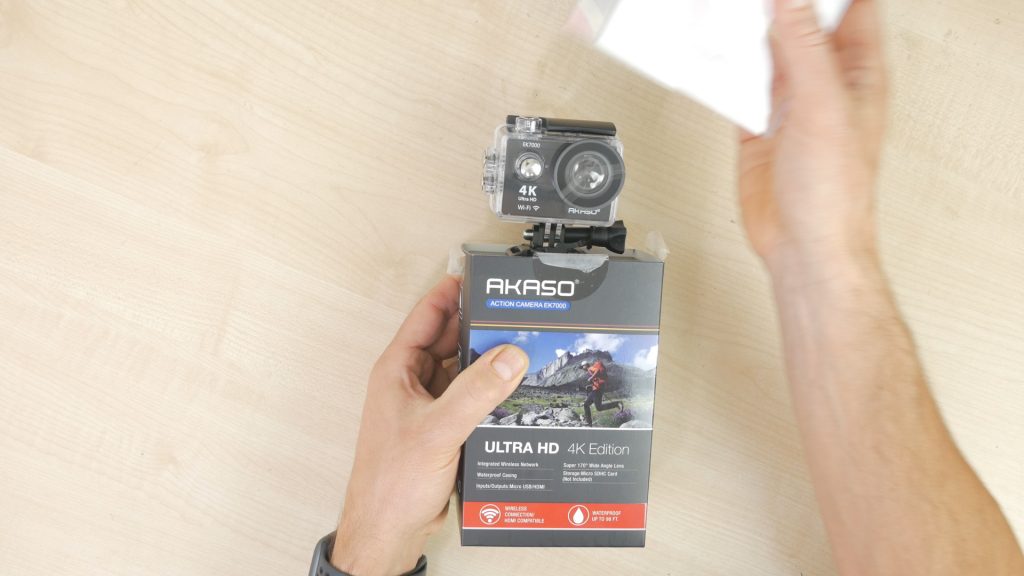
The packaging is quite smart and very similar to GoPros. Inside the box you get a load of accessories, some more useful than others. The most interesting included accessory is a remote control. There’s also two 1050mAh batteries and an external dual charger with an accompanying micro-USB cable. I’ll cover the remote and some of the other accessories later.
There’s also a brief getting started guide with a download link to the complete user manual.

The camera is enclosed in a waterproof housing that is waterproof down to 30 metres. The build quality of the case appears to be pretty good. Open the tight clasp to release the camera.

The camera is very lightweight made of a fairly cheap feeling but grippy plastic. With the battery and SD card it weighs just 57 grams and measures 59mm by 40mm by 30mm including the lens protrusion. In its case it’s 115 grams which is still lighter than a GoPro Hero 5 without its frame. The case measures 76mm by 61mm by 40mm.
The 50mm screen is not touch sensitive. There are just 4 physical buttons to control the camera.
The front of the camera has a lens that protrudes 5mm and the combined power and mode button. On the top is the shutter button with a status LED that flashes red when you’re recording. One side has two buttons that moves around menus and perform some other functions that I’ll come to. There’s also the speaker.

On the other side there’s a micro-USB charging port and a micro-HDMI display port. Above these two ports is the microphone. The manual states that there’s no audio with the waterproof case attached. Then there’s the micro-SD port which supports cards up to 32GB. No card is included but I’m using it with a Lexar 32GB Class 10 card. I did try a larger Sandisk 64GB card but it wasn’t even recognised.
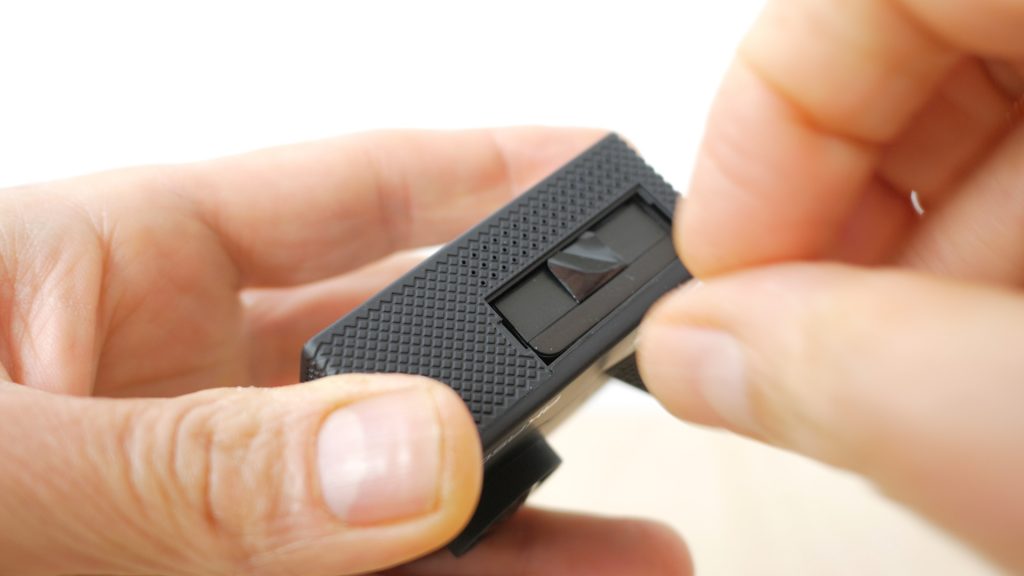
On the bottom of the camera is the battery compartment that you’ll need to use your fingernail to remove. It’s a very basic affair and reminds you how much you paid for camera.
The batteries already come with some charge but you can top them up in the included external charger, or you can charge them in the camera itself with the micro-USB cable, albeit a little slower. You can use the camera whilst it’s charging which is handy for time lapse photography amongst other things.
A long press of the power button on the front of the camera turns the camera on and off. There’s 10 seconds before you can start recording compared to 3 seconds with a GoPro Hero 5 Black.
The first time you turn it on you’ll most likely be prompted to format the SD card. Press the up or down side button and then the shutter button to confirm.

Press the shutter button to start and stop recording. Along the top of the screen, you’ll see the recording time and the estimated time remaining which was just under 3 hours on a 32GB card at 1080p 60fps. Along the bottom there’s battery remaining and the current date and time.
Press the up button to playback your recorded video. Press the down button to choose playback of any still images. Press the shutter button to confirm your selection. Move around your media with the up and down buttons. Press the shutter button to play back any videos using the camera’s built in speaker. Use the Power | Mode button to go back. A long press of the shutter button will let you delete an image.
Setup

The camera defaults to video recording mode. Pressing the mode button cycles through to photo mode, burst mode, time lapse mode and then the settings menu.
Press the shutter button to select, the arrow buttons to move around, and the power | mode button to go back.
I won’t go over all the settings, most are pretty self explanatory.
In Video Resolution you can choose from 720p at 120fps up to 4K at 25fps. I’d recommend leaving video recording at the default 1080p at 60fps. 4K mode isn’t a native mode and just upscales the resolution so is best avoided. 2.7K is only 30fps so is ok for slower motion, but for any sort of action you’ll want 60fps. I’ll come back to this in the video quality section.
There are no options to change the 170 degree field of view or the aspect ratio which is fixed at 16:9 for all modes including photo mode.
In Loop Recording you can choose to continuously record 1, 3 or 5 minutes loops. This is as close as you’ll get to a dashcam mode. You have to manually start it recording, and it’s not recording the last 1, 3 or 5 minutes – only chunks of these times. So if you had an incident at 3 minutes and 5 seconds after you started recording with a 3 minute setting, you’d only get 5 seconds of footage.
In Photo Resolution I would stick with the default 12MP, but if you’re really short on space you could select a lower resolution, all the way down to 4MP.
In Time Lapse you can choose a recording interval of a fairly limited 3, 5 or 10s. It will record these as photos which you’ll need to join together as a video yourself.
You’ll also need to confusingly turn on the next Continuous Lapse setting to actually enable the Time Lapse mode. Otherwise Time Lapse mode will just be a self timer mode taking a single photo after the specified interval.
Burst mode only has only one option so I’m not sure why it’s even in settings. Pressing the shutter button once in burst mode with take 3 shots in rapid succession.
There are Exposure and White Balance controls which affect all modes and there’s an option to manually flip the image upside down depending how you have the camera oriented.
In Screensaver you can change when the screen powers off after either 1, 3 or 5 minutes. Or you can have the screen stay on all the time. The default is 1 minute.

In Auto Shutdown you can change when the camera powers off after either 1, 3 or 5 minutes of inactivity. You can also turn this off so it won’t shut down automatically. The default is 3 minutes.
Date Stamp is by default on. I’d recommend turning it off since even if you set the correct date and time, every time you change the battery these settings are lost. So you’ll most likely have the wrong date and time stamped on half your videos.
Volume defaults to Middle. Turn this off if you don’t want the Time Lapse mode beeping continuously.
The following Beep settings don’t configure those countdown beeps.

You can format the card which the manual recommends doing regularly to avoid any issues, and the final configurable setting resets everything back to Factory Defaults. Basically if you set it back to factory defaults, turn off date stamp, and turn on Continuous Loop – unless you prefer a self timer, you’re probably good to go. And that’s one advantage of a basic camera like this versus something like a GoPro with its many sometimes confusing recording modes and options.
There isn’t any image stabilisation at this price point and there is no way to change between PAL and NTSC frame rates – you’re stuck with mainly NTSC at 30fps or 60fps and with just 4K recorded at 25 fps for some reason.
Remote App
Don’t make the mistake of installing the iSmart DV app that the electronic user manual specifies. This doesn’t work with the EK7000, if it works with yours please let me know in the comments. There may be some variants of the camera with a different chipset compatible with the iSmart DV app. But mine isn’t.
Download the Akaso DV app as specified on the box and in the quick start manual!
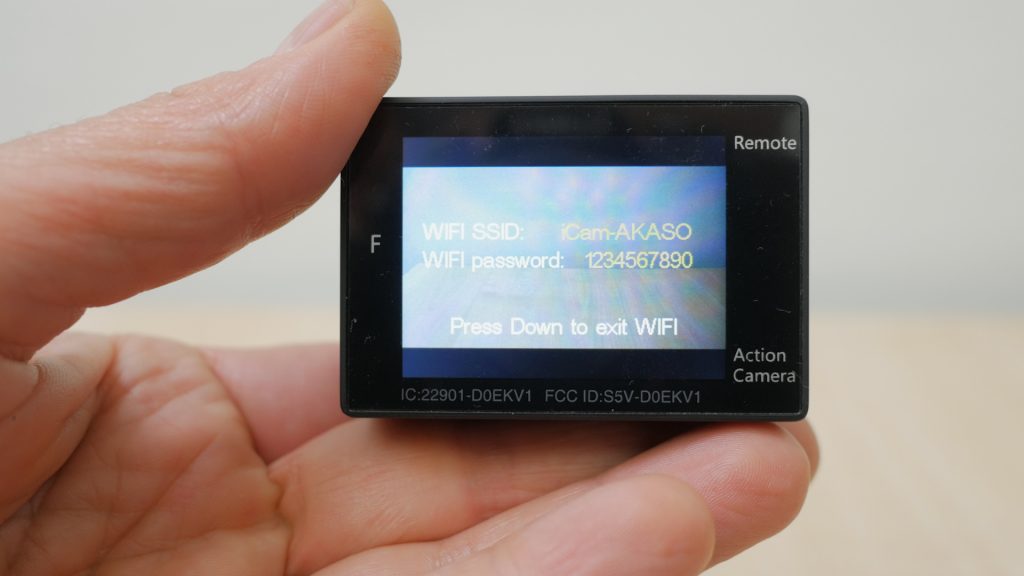
With the camera on, press the down button to enter WiFi mode. Go into your smartphone or tablet’s WiFi settings and connect to iCam-AKASO with 1234567890 as the password.

Then open the Akaso app, make sure your EK7000 is displayed and tap Connect. It’s pretty straightforward and the app works quite well. You get a live preview with very little latency and you can quickly choose you recording resolution, recording mode and settings. Range was ok too at between 5 and 10 metres.
Accessories

Conveniently these budget action cameras tend to adopt the GoPro mount and the Akaso EK7000 is no exception. Which means there are literally hundreds of accessories that you can use and in the box you get a fair few to get started. I’ve spent more on a few single GoPro accessories than I did on the whole Akaso package.
That’s not to say these accessories are going to be of the same quality, but then you have a cheaper camera attached if one were to break!
I used one of the included accessories to mount a homemade rig to compare the Akaso to a GoPro Hero 5 Black. This managed to break within 20 minutes with both the Akaso and GoPro crashing to the ground. I was pushing what this mount was spec’ed for but none-the less I’d be surprised if a GoPro mount suffered the same fate. But generally the quality of the accessories look ok.

The remote needs no setup to remotely control the Akaso. With the camera turned on simply press the red photo button to take a picture and the grey video button to start and stop recording. This worked really well up to around 5-10 metres away and you don’t need to have line of sight. It’s not waterproof.
There’s an interesting frame that clips to the bare camera keeping it still light and compact, with the convenience of a tripod mount on the top and bottom. And without the waterproof housing you can still record audio. There’s even a mount with a spring clip that slides into the back of this frame and enables the camera to be easily attached to your clothing or a cap.
There’s a handlebar mount and a standard tripod mount for attaching the camera in its waterproof housing. And there are two sticky flat helmet mounts, with a couple of quick mounts as well as various other accessories that you may never use.
There’s no chest strap or hand grip but you can get these and many others cheaply on Amazon or even GoPro accessories if you’re feeling flush.
Performance & video quality
Battery life was only around one hour 15 minutes in 1080p at 60fps. That’s with WiFi off. It’s not great, but you do get a spare battery and the external dual charger charges a battery from completely flat to full charge in just over an hour. I did find that sometimes inserting a battery just charged showed up as empty when I first turned the camera on. Turning the camera off then on again fixed this.

In its housing the camera is rated at waterproof to 30 metres. I wasn’t able to test that claim but I did leave it in the sink full of water for 30 minutes and it survived. I’ll report back in the comments on how it fairs at the beach over the summer.

The 50mm LCD screen is quite usable so long as you look at it straight on and the conditions aren’t too bright. Even in bright conditions it was sufficient for framing, and you could easily link it with your phone and use that as a viewfinder if you’re really struggling. It’s nowhere near as good as the screen on my Hero 5 Black but I wouldn’t expect it to be.
I never expect an awful lot from action cams microphones although more recent models are improving. With the waterproof case attached, you can barely hear any audio. With the case off the microphone quality was ok and definitely usable although there was a small amount of lip sync delay. There’s no option to add an external microphone, but you could record audio off your phone, even pairing it with an external mic and sync them up in your video editor.

Video quality in good light was ok and the camera generally did a good job with exposure. There is heavy processing so you don’t need to look too closely to see that familiar over-processed water colour effect from aggressive noise reduction and sharpening which can’t be turned off. Colours can be a little too saturated and skin tones often came out a bit yellow with the auto white balance not quite managing to adjust correctly in changing lighting.
There’s no image stabilisation which does make the footage very shaky. Even just handheld on a tripod, it’s pretty hard to keep a camera so lightweight steady. I tried it for running and cycling and the footage although useable could certainly do with some software stabilisation applied to it.
As I mentioned earlier, I would stick with 1080p at 60fps for the best results from this camera. I think for the price, video quality in good light was better than I was expecting.

In lower light however the camera really suffers. Even a good 45 minutes before sunset with light levels just starting to dip, the footage was barely useable going through wooded areas on my mountain bike. An action camera with its tiny sensor is never going to be great in low light, but footage off my GoPro, albeit significantly more expensive, is perfectly usable in these conditions. This is definitely a camera for bright conditions.

Photos are ok as long as you don’t don’t zoom in to look at them at 100% and you will still want good light. Again if you look closely they suffer from the same aggressive noise reduction and over sharpening as videos do. Unsurprisingly there’s no RAW photo mode.
I tested the camera inside and outside the case. The waterproof housing didn’t noticeably affect the quality of photos or videos.
I’ve prepared a montage of samples off the camera with a GoPro Hero 5 Black used for comparison.
Conclusions
The Akaso EK7000 is a good value action camera especially when you take into account the included accessories. In bright conditions the video quality at 1080p is really quite good considering the price. As light levels dip it does really struggle, and with no image stabilisation the footage is going to be far from smooth for most activities.
I wouldn’t buy this for your once in a lifetime action adventure, but for casual use or handing over to the children to get some footage you wouldn’t otherwise get, I don’t think you can go far wrong. In its waterproof housing it’s pretty robust and if you did smash the case, you can get new ones for £10 or $10 on Amazon. So I’d have no hesitation strapping to places I wouldn’t necessarily attach a more expensive GoPro.
It’s very easy to use, the accompanying app worked better than I was expecting and the included remote is a bonus. Just don’t use it when the light’s starting to fade!
Don’t forget to take a look at my YouTube video at the top of the page, and subscribe to my YouTube channel where I’m releasing videos every week on the latest technology and how to get the most out of it. If you tap the bell icon when you’re subscribe you’ll get a notification as soon as I release a video, and there’ll be a link to my site here for the written article. YouTube is also the best place to leave a comment. I read all of them and respond to as many as I can!
Akaso EK7000 Action Camera: https://amzn.to/2IvWXgE
Thanks for this very informative post. Now I can use the my camera very easily.