[I’ve just published a more general guide to using any GoPro as webcam, which might be a useful accompaniment to this article: Use any GoPro as a webcam | GoPro webcam mode vs cheap capture card vs wireless | Free to $10]
The GoPro Hero 7 Black, Hero 8 and Hero 9 support live streaming directly from the camera, but frustratingly don’t have any native support to use them as a webcam on your PC or Mac. This is possible on even the budget Apeman A100 I reviewed recently.
Using only free software, I’ll show you how it is possible to use your GoPro as a wireless webcam in OBS Studio, the free popular recording and live streaming software and Zoom. This will also work in any other program that supports a webcam like Skype and Google Meet.

GoPros make very useful wireless webcams. They’re rugged and waterproof so you can leave them outside, spying on the bird feeder or other wildlife in the garden, as long as it remains in WiFi range. They have their huge wide angle view, handy for an interesting camera angle in lots of situations. And they can run on external power without any additional accessories. This solution can capture audio too, which is much improved on these newer GoPros. Although they’re still not great in low light though, and there is a one to two second delay in the feed which may or may not be important to you, depending on how you decide to use it.
Before I show the setup, there is a piece of software called gopro2obs that can do a similar thing but it costs $80 and the following solution is not difficult, so I’d try this first.
I’m doing the installation on a PC, I haven’t yet tried it on my Mac.
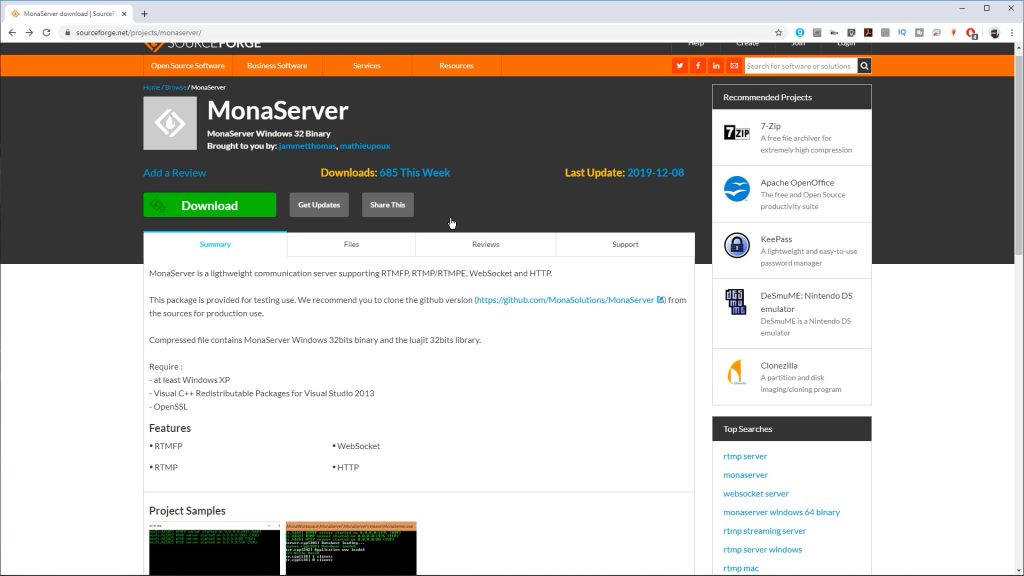
First off, download a free open source piece of software called Monaserver – I’ll provide a link in the description. There’s nothing to install, just extract the Zip file. There is an alternative called NGINX that I’ll link to below that I also got working, but it’s more complicated to set up.

Next, download and install the free open source OBS Studio. If you just want to use your GoPro with OBS, you don’t need to download anything else. If you want to use the camera with Zoom or any other app that needs a webcam as input, download the free OBS Virtualcam plugin on a PC. Again I’ll provide a link down below.
You’ll also need the GoPro app on your phone.
Open the MonaServer folder and double click on the Monaserver.exe to start the application.
Next connect to your GoPro with the GoPro app on your phone. This is probably the hardest part of the setup! Try and reboot your GoPro with a long press of the power button if you have trouble connecting.

Tap on Control your GoPro. Swipe all the way across to the Live icon and just below the Set Up Live icon, tap on Facebook and then select RTMP which is the streaming protocol we’re going to use to capture the GoPro’s video and audio. Then tap on Set Up Live.

We can now configure where we’re going to stream the GoPro’s footage, which in this case is our computer running the Monaserver which is already listening for a connection. We just need to enter the IP address of the computer. To find this on a Windows 10 PC, right click on your WiFi or Ethernet icon on the taskbar and select Open Network & Internet Settings, then click on View your network properties. Take a note of your IP address. In my case I’m connected via wired Ethernet which helps provide a more stable connection, and my IP address is 192.168.0.50.

Enter this address under the RTMP URL in the GoPro app with rtmp:// proceeding it. Choose your resolution. My Hero 8 supports up to 1080p but try a lower resolution if you don’t get a stable connection. The Hero 7 supports up to 720p. I got better results with Save a copy switched off. Saving a local copy puts additional strain on the camera’s processor.
Annoyingly this address is not remembered so you’ll need to re-enter it everytime.

Next tap on Set Up Live Stream at the bottom of the screen. Wait a few seconds until you hear the camera beep and it will show READY at the top of its display. The Go Live icon in the app will also become bright blue. You can either tap this icon or hit the record button on your GoPro. You can actually close the app once the camera is READY to livestream. You don’t see a live preview in the app anyway, but it does show the quality and bitrate of your stream.

If you look back at the Monaserver window you should now see 1 client connected.

Now open OBS and go through the initial setup if you’ve not used it before, and under Sources, click on the + icon and select Media Source. Leave Create new selected and provide any name you like. Then click OK. Untick Local File and under Input enter the same address you just entered in the GoPro app. In my case rtmp://192.168.0.50.

Everything else can be left at its defaults. Click ok and with any luck within a few seconds you should see the feed from your camera.

Tap the display icon off and on if the feed doesn’t show within a few seconds.

You’ll notice there is some delay from the camera depending on your network connection – a couple of seconds in my case.

You could stream this to YouTube or any other streaming platform using OBS’s comprehensive streaming options, or you could record the file locally. You can check your recording settings under Settings | Output | Recording. If you’re not too familiar with OBS, I’d just change the Recording Format to MP4, then click on Start Recording.
And you’ve got the full power of OBS, so you could green screen this footage and then crop or resize it. And you can add any other input you like.

Here I’m adding another camera angle capturing footage live from an iPhone or iPad using iVCam as I showed in a recent video. Or you could capture your desktop. The options are endless.
You’ll notice from the audio level meter that audio from the camera is also being captured. And if you record a file this is in sync with the video.
It’s straightforward to send this combined feed to Zoom or any other software that supports a webcam.
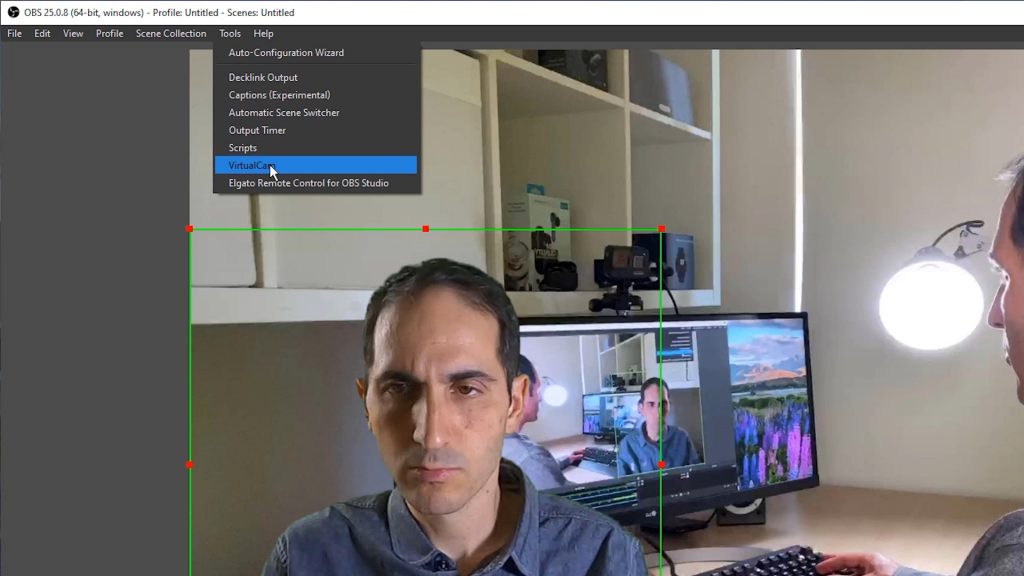
Click Tools | VirtualCam and click Start. You can close this window.

Open Zoom and tap on the Settings cog. Under video choose OBS-Camera under Camera and you should see a preview of whatever you set up in OBS, including any additional sources and filters, like the Chroma Key or green screen for example.
Unfortunately Zoom won’t receive the audio from the GoPro camera without a few additional steps, but you could use an external microphone. This is far from ideal since the recipient will hear your audio about two seconds before seeing your lips move because of the delay in the video feed I mentioned earlier.

To get the audio from the GoPro camera itself into Zoom we can use the Stereo Mix feature of most modern sound cards. In OBS, click settings cog in the Audio Mixer and choose Advanced Audio Properties.

Under Audio Monitoring select Monitor Only (mute output). This monitors or listens to the GoPro’s audio. Close this dialog box and go to OBS’s Settings, then select Audio. Under Advanced | Monitoring Device, we can tell OBS where to play this audio to. In this case, select your desktop speakers.

Now right click on the sound icon in the taskbar and “Open Sound Settings”. Click on Sound Control Panel, select the Recording tab, right click on the Stereo Mix device and Enable it. Not all sounds cards will have this option but most will.

Now back in Zoom, under Audio Settings change the microphone to Stereo Mix. This will now feed the monitored audio from the GoPro camera into Zoom. Since it’s coming across with the video feed it should be in sync – albeit with the one or two second overall delay. Unfortunately with this option, you’ll also hear whatever you say, back through your speakers or headphones.

The only way I’ve found around this issue is to use a virtual sound card and I haven’t found a free option as yet. So if you know of one let me know!
I’m using e2eSoft’s VSC which costs $20 that I sometimes use for Zoom calls using my mobile phone as a webcam. I probably wouldn’t buy it just for this purpose since you still get that one to two second delay, but at least the audio is mostly in sync, and unlike the free stereo mix option, you won’t hear your audio back through your speakers.

After installing the software, leave the monitoring options as they are and go back into settings. This time select Speaker (e2eSoft VAudio) under Monitoring Device.
So now we’re sending the monitored audio from the GoPro to the virtual sound card’s output.

In Zoom select “Microphone (e2eSoft VAudio)” under the microphone in Audio settings which will now receive the audio from the virtual soundcard which has been captured from the GoPro.

Handily you can run GoPros off external power without any additional accessories. I usually run mine off a portable battery pack. In that case you can also remove the battery, which I find keeps it a little cooler if you’re going to leave it running for a while. You can remove the microSD card too if you didn’t enable “Save a copy”.

I was able to reliably stream 1080p from my GoPro for several hours using this method.
Don’t forget to take a look at my YouTube video at the top of the page, and subscribe to my YouTube channel where I’m releasing videos every week on the latest technology and how to get the most out of it. If you tap the bell icon when you subscribe you’ll get a notification as soon as I release a video, and there’ll be a link to my site here for the written article. YouTube is also the best place to leave a comment. I read all of them and respond to as many as I can!
MonaServer: https://sourceforge.net/projects/monaserver/
OBS Studio: https://obsproject.com/
OBS Virtualcam: https://obsproject.com/forum/resources/obs-virtualcam.949/
(NGINX – alternative RTMP server: http://nginx-win.ecsds.eu/download/)
iPhone as webcam video: https://youtu.be/n7c-a9M52iw
GoPro Hero 8 Black: https://amzn.to/3bNFAmV
GoPro Hero 7 Black: https://amzn.to/3cXDLoU
Leave a Reply