Laser cutters use a focused high powered laser beam to cut or engrave a variety of materials including wood, metal, stone, glass, acrylic, leather, cloth, cardboard and paper.
Over the last few years they have come down in price considerably and you can now pick one up for less than £300 or $300. They’re pretty easy to get started with and they have plenty of uses from making name tags and signs, to engraving pretty much anything you can get your hands on, to constructing intricate 3D designs and much more.
I’ll cover the various laser machine options available in the hobby space and what you need to get started, including software to design your project and communicate with the laser. And I’ll show how to design, engrave and cut out a simple name tag from start to finish.
Looking at laser cutters under £1000 or $1000 there are two types available: CO₂ lasers and diode lasers.
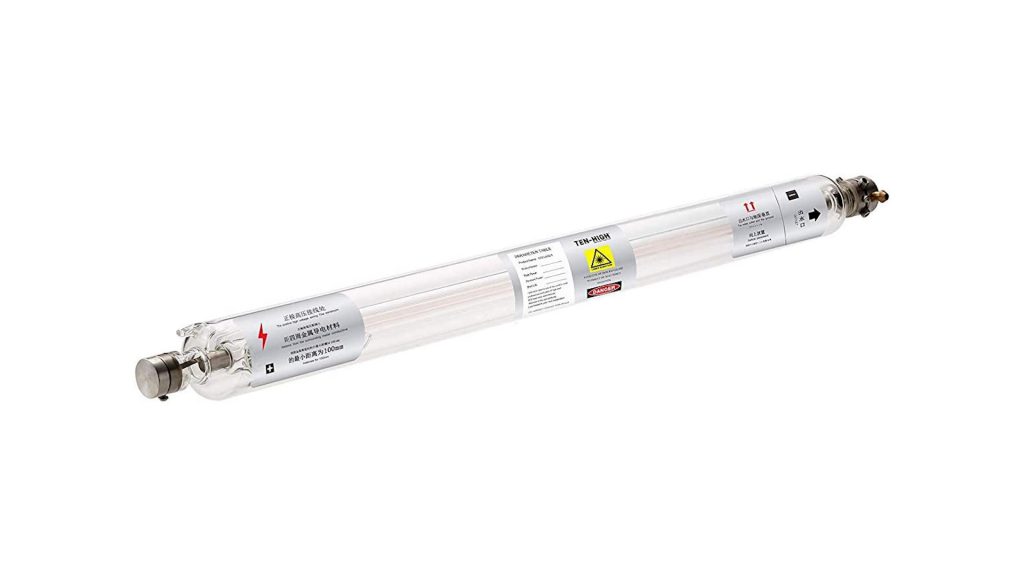
CO₂ lasers pass a high voltage through a gas filled glass discharge tube to produce the laser beam.
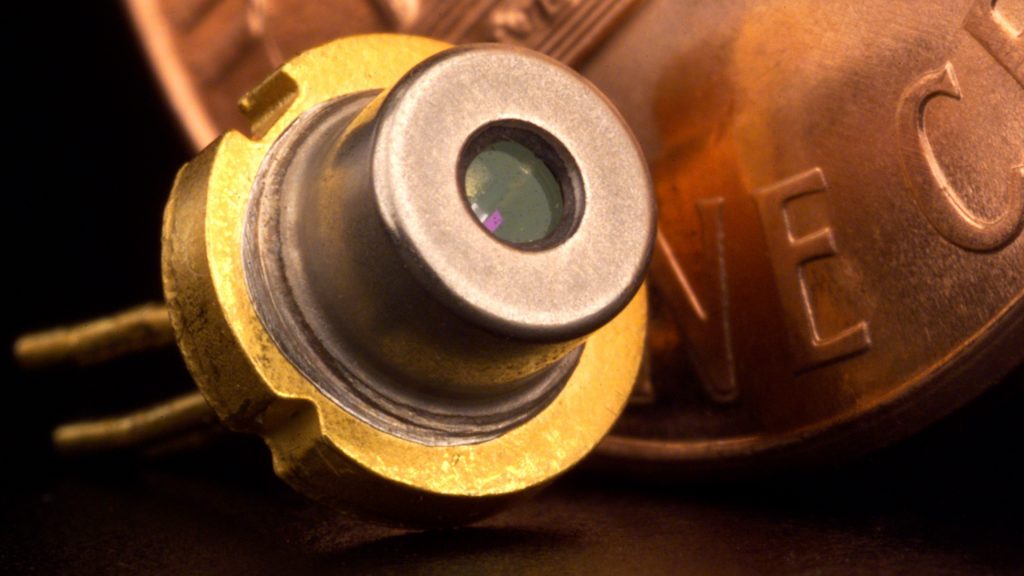
Diode lasers use a special type of semiconductor diode similar to a typical LED, that converts an applied voltage into a laser beam.
CO₂ lasers are generally more powerful which means they can cut thicker materials and they can cut and engrave faster than a diode laser. But they tend to be more bulky and generally more expensive. With their glass discharge tube, they’re also more fragile.
Diode lasers are generally less expensive, smaller and more robust. They typically aren’t as powerful as CO₂ lasers, but recently manufacturers are stacking multiple laser diodes together to increase their power.

I’ll be using this 10W diode laser from TwoTrees – the TS2, that combines two laser beams and can cut thicker materials than your average 5W laser and should be able to engrave twice as fast. I’ll be using it in this video to demonstrate laser cutting and engraving, but I will also have a full review up soon running through all its features and testing it with a wide range of materials. Although I’ll be using a diode laser in this video, most of the information will apply to a CO₂ laser as well.
These laser cutters work very much like a 3D printer but are simpler since they only operate in a two dimensional plane. If you’re after an introduction to 3D printing I’ll provide a link on screen and down below to a video I did a while back.

The laser module can move anywhere in the XY plane within the limits of the machine. The TS2 has a generous 450mm by 450mm work area. It’s not enclosed so if there’s room you can place it directly over what you want engraved. Although typically you’d have a sacrificial piece of wood or metal underneath your project.

And for cutting, something like this optional honeycomb bed (above) which allows the smoke to dissipate quickly is the best option.

This machine uses aluminium extrusions for the open frame and you’ll need a fair amount of desk space for it. But you can get smaller machines if you don’t need all that capacity.
Typically these open frame machines need some assembly to construct the frame, attach the laser module and connect the wiring. It’s not particularly difficult but it’s something to bear in mind. You can get some diode lasers that come already assembled in an enclosure like the TwoTrees TS3. And CO₂ lasers usually arrive like this too.

Some machines will come with a control screen but the TS2 doesn’t – you’ll need to connect it to your computer with a USB cable. There is an optional LCD screen for the TS2 but I don’t have that to test.
You will need software to control your laser cutter and send across designs to cut or engrave. Most of these more entry level machines don’t come with their own software and rely on third party options.
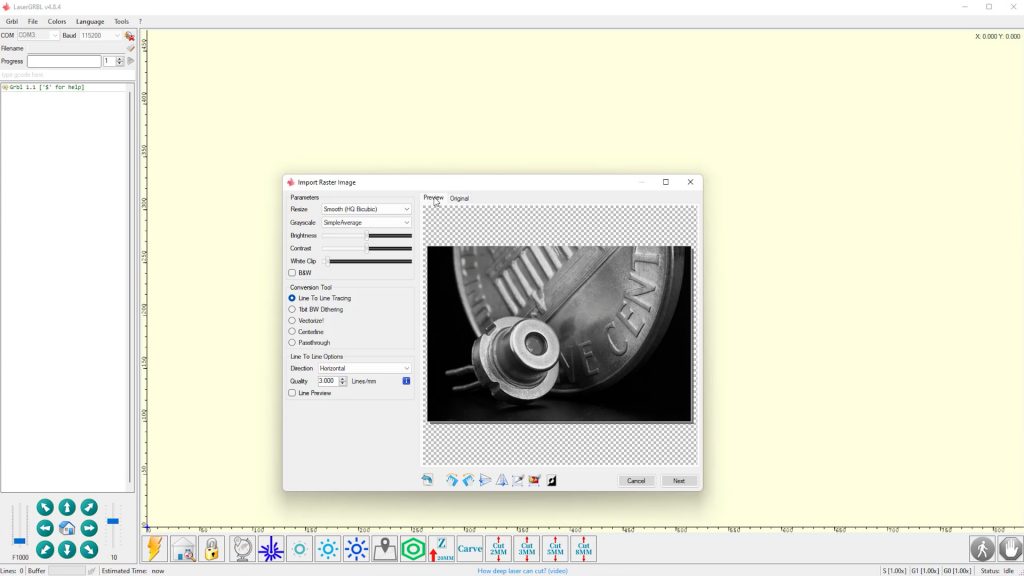
There are two main applications: the free LaserGRBL, and LightBurn that costs around £50 or $60 but they offer an unrestricted 30 day trial. LaserGRBL doesn’t have any design capabilities although you can convert photos to be engraved. With LaserGRBL you’ll need to use something like InkScape for your designs which is free or paid software like Adobe Illustrator.
I’d recommend at least starting with the LightBurn trial – it makes things so much easier and it’s a very capable design package too. That’s what I’ll be using in this introduction to laser cutting.

You’ll need to set up your laser cutter in LightBurn. With it connected to your PC and turned on, the software should guide you through automatic setup, or the manufacturer will provide details of how to set up your laser cutter manually. Most hobby laser cutters use G R B L, pronounced Gerbil, to control their motion and laser power using g-code that your computer software outputs. So if you need to choose your controller manually in the software, in most cases you can select GRBL – but check with your manufacturer.
Then choose Serial/USB, give it a name, specify the overall work area, and where the laser’s origin is. For the TS2 it’s front left where the limit switches are. If your machine has limit switches like the TS2, select Auto home.

A lot of machines don’t have limit switches which allow the laser module to automatically return to a known position – in this case its origin. But depending on how you use your laser you might not need them. I’ll expand on this shortly.

Under Edit | Settings, check your units are mm / min if you’re using a diode laser and mm / s if you’re using a CO₂ laser.
We’re going to use Lightburn to create a simple name tag that we’ll engrave and cut out of some 3 mm plywood. Click on the text tool in the left toolbar and type in a name anywhere in the work area. You can then click on the font name in the top toolbar and choose a font you like. The Text will automatically update. Tap escape twice to exit the text tool and you can move the text around or use one of the corner handles to resize it. You can also set the exact dimensions in the width and height fields in the top toolbar. Make sure you turn the padlock on to lock the aspect ratio.

Now click on the Offset tool in the left toolbar, check the Direction is set to Outward and the corner style is set to Round and adjust the Offset distance to your tastes.
We want to engrave the name and cut out this offset shape. Select the name graphic and locate the Cuts / Layers panel on the right. If you can’t find it, go to Window | Reset to Default Layout and it should be top right.
Change the Mode to Fill and check your manual for recommended engraving speed and power settings for plywood. This is just a starting point which I’ll come back to shortly. Enter these values under speed and power underneath the layers.
Now click on the Offset line you just created. If you’re having trouble selecting either graphic, use the tab key to move between them.
With the Offset line selected, click on the red swatch below the work area. Clicking a colour creates a layer and each layer lets you specify different settings. It doesn’t matter what colours you use, but typically red is used for cuts,
Make sure the red cut layer is below the black fill layer – if not use the up and down chevrons to the right of the layers window to adjust the fill or cut order. You want the name to be engraved first before its outline is cut out, otherwise it may move as it’s released.

Change the Mode to Line and again refer to your user manual for cutting speed and power settings for 3mm plywood. Cutting is really no different to engraving – you’ll just be increasing your power and slowing down your speeds which results in a deeper cut.

If you click on the preview icon in the top toolbar you should see exactly how your design will be engraved and cut. You can drag the slider control to simulate the cut – check the name engraves first, and then the outline gets cut out.

You’re now ready to send the design to your laser cutter. This is a good time to talk about laser safety. Even reflected light from these lasers can damage your eyesight so laser safety glasses are critical. Most laser cutters come with free glasses, but I‘d highly recommend getting OD or Optical Density 6+ glasses that specifically cover the wavelength of your machine’s laser – 450nm in the case of the TS2. They are meant to reduce the intensity of the laser light by a factor of one million. I bought these ones off Amazon – they’re also far more comfortable than the free ones which also don’t have any CE mark. I’ll provide a link down below to the glasses I’ve settled on.
It also goes without saying you need to keep your hands well away from the laser beam too – as well as pets and children. And you’ll need good ventilation or better still a way of exhausting any fumes.

Cutting or engraving you are burning through whatever material you’re using, which can release unpleasant and even dangerous fumes. Even cutting through plywood intended for cutting with a laser gives me a headache without good ventilation. And some materials like ABS plastic should not be engraved or cut since they release particularly nasty fumes. I’ll provide a link below to materials that shouldn’t be cut or engraved with a laser cutter. This is one issue with open frame machines like this TS2 without any enclosure – it’s harder to exhaust any fumes.You can get laser enclosure tents but I make sure the windows are open and am currently using an under-powered small fume extractor for soldering positioned right up against the laser module. But I’m looking to improve on this setup very soon.

Some machines have additional safety features. The TS2 has a flame detector which will sound an alarm and shut off the laser if it detects a flame. It also has a gyroscope that will shut off the laser if the machine tips over. I would still never leave a laser cutter like this running unattended.
You now need to line up your piece of plywood. Place it anywhere in the work area. In the Laser panel select Current Position in Start From and use the controls in the Move window to move the laser roughly over where you want the cut to start. You can use the number pad cursor keys to move the laser too – just make sure you click on the work area first. In most cases I use Current Position which also means you don’t really need to home your machine with or without limit switches, since the machine just starts from wherever the laser module is positioned. Put your glasses on and click on Fire in the Move window which will turn the laser on at a very low output so you can see exactly where it’ll start from.

Next you need to adjust the laser’s focus. Most lasers come with a height block or similar to set the height of the laser above the workpiece for precise focus. The TwoTrees TS2 has a very neat feature that sets this height automatically. The laser module is on rails driven by a stepper motor that can adjust its height.

When you select either Engrave or Cut in the Console window, it lowers the laser module until a sprung probe touches your workpiece. It then sets the height exactly 50mm above the workpiece for engraving. If you’re performing a cut it then lowers the laser the thickness of the wood divided by two so that the focus is halfway through the piece of wood or whatever you’re cutting. This has some interesting possibilities for cutting thicker materials that I’ll cover in the full review.

Holding down the Shift key, click on Frame. This again turns the laser on at a very low power and then shows the overall outline of your cut. You can now click Start in the Laser Window to execute the job.
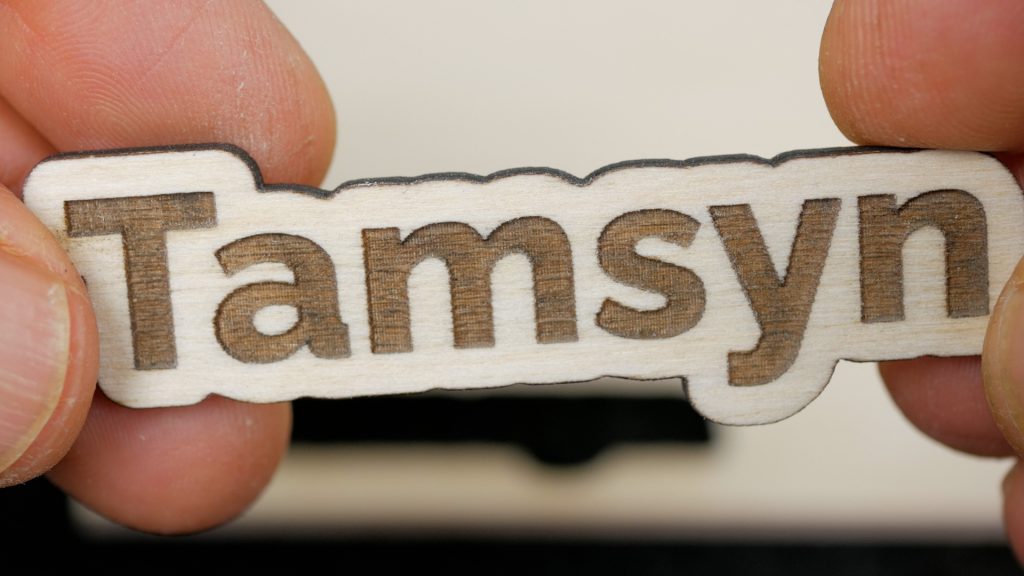
With any luck a few minutes later, you should have your name tag engraved and cut out.
In its simplest form that’s pretty much all there is to laser cutting and engraving. The trickiest part which I’ve skirted over is finding the right combination of speed and power for the materials you’re using. You just need to experiment with these two variables to get the best settings for your machine and the materials you’re working with. Too much power or moving the laser too slowly can end up burning your material, too little power or moving the laser too quickly can result in your engravings being too faint or your cuts not penetrating the material.

It does need a little trial and error but LightBurn has a very useful Material Test under Laser Tools which can print out a simple grid with varying speed and power that will help you fine tune your settings. You can use the manufacturer’s recommended settings as a starting point. Just varying power and speed settings, I can go from cutting plywood to engraving this piece of powder coated steel salvaged from a desktop PC case.
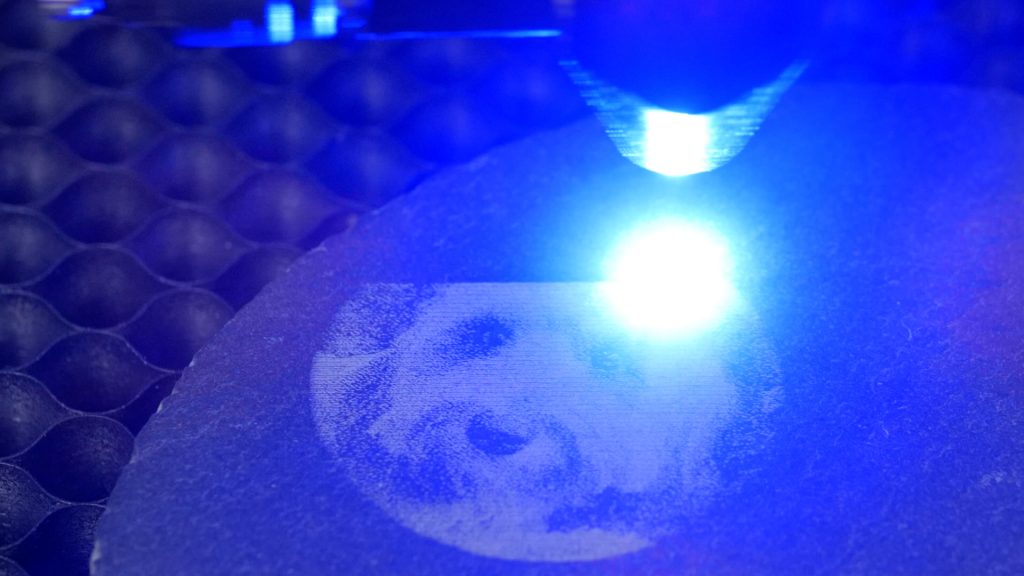
Or engrave this piece of slate. You can then save the perfect settings in LightBurn’s material library for future use.

There is one more feature you need to know about for laser cutting and that’s air assist.
The laser produces a lot of smoke where it burns through the material. This smoke obscures the laser beam which degrades the cut quality and gets the lens of the laser dirty which will reduce the laser’s output.
The TS2 has an air assist nozzle which, if connected to some sort of air source, blows away the smoke with a steady stream of air and noticeably improves the cut quality. If your laser doesn’t have an air assist nozzle installed , there’s normally one available as an optional accessory or you might be able to get something 3D printed.

You’ll need some sort of air pump or a compressor – on these lower end machines you don’t usually get anything provided. On the TS2 there’s a thin black tube to connect to that connects to the air assist nozzle. You can get a cheap aquarium pump, or laser cutting specific air pumps are available but are quite pricey. I’m using an air compressor I already own and I’m using it with a water trap to ensure no moisture or contaminants get near the laser diode. I also use a digital regulator to reduce the pressure to around 15 psi which I’ve found gives the best results.

I did have to design an adapter in Fusion 360 which I 3D printed and it works well.

You can see just how much difference it makes using air assist with these sample cuts done with and without air assist.
Although it does make an already noisy machine even noisier!
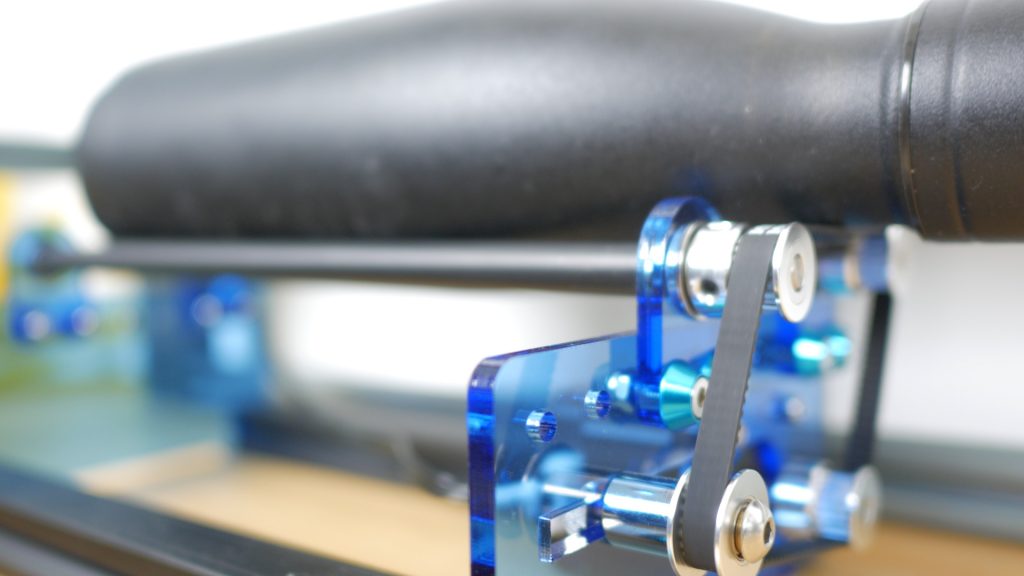
Another accessory you can add is a rotary attachment for engraving mugs and flasks etc. I’ll show this in operation and lots more examples of what you can do with a laser cutter, cutting and engraving various materials in the full review of the TwoTrees TS2 that I hope to release soon.
Don’t forget to take a look at my YouTube video at the top of the page, and subscribe to my YouTube channel where I’m releasing videos every week on the latest technology and how to get the most out of it. If you tap the bell icon when you subscribe you’ll get a notification as soon as I release a video, and there’ll be a link to my site here for the written article. YouTube is also the best place to leave a comment. I read all of them and respond to as many as I can!
You can purchase directly from TwoTrees:
TwoTrees webstore
(This is an affiliate link to TwoTrees that helps support this website and costs you exactly the same)
Amazon links:TwoTrees TS2 laser cutter / engraver: https://geni.us/NQV66
TwoTrees honeycomb bed: https://amzn.to/3PLkUjQ
Laser OD6+ safety glasses: https://amzn.to/3aZJ8rQ
Slate tiles: https://amzn.to/3aX3dyZ
Basswood wooden blanks (very easy to cut): https://amzn.to/3Bid0ds
3mm Birch laser plywood: https://amzn.to/3RWdEDm
6mm Birch laser plywood: https://amzn.to/3cmMHZh
Leave a Reply