The Insta360 GO 2 is a 27 gram action camera smaller than my thumb but can still record up to 2.5K and with impressive image stabilisation. It’s waterproof, has a replaceable lens cover and charges in what looks like a large AirPods Pro case that can also control the camera remotely.
Despite the company’s name this camera does not shoot 360 degree footage – it has a single ultra-wide lens. It’s a successor to the GO 1 but it’s much more of a fully fledged action camera and has some interesting features that even trump the relatively large and heavy GoPro Hero 9. But it’s also had a price hike to £295 or $300.
I’ve tested it thoroughly, comparing it to the GoPro Hero 9, mountain and road biking, running and for general use out and about with the family.
Could this be the perfect everyday action camera? Let’s find out.
Overview

Inside the box you get the camera itself, its charging case, a USB-C to USB-A charging cable, a quick start guide and a very useful range of mounts including the magnetic pendant, pivot stand and clip mount. I also got the optional GoPro mount.
The build quality of the camera, case and accessories is generally good, constructed from a tough white matte plastic.

It’s only available in white but I 3D printed a black sleeve to make it a little more discrete.

The camera is tiny – smaller than my thumb, measuring just 52mm tall, 24mm wide and 24mm thick including the removable lens cover.

And it’s extremely light weighing under 27g. There’s the action button under the company’s logo, a status LED below the lens and the microphone at the top of the camera.
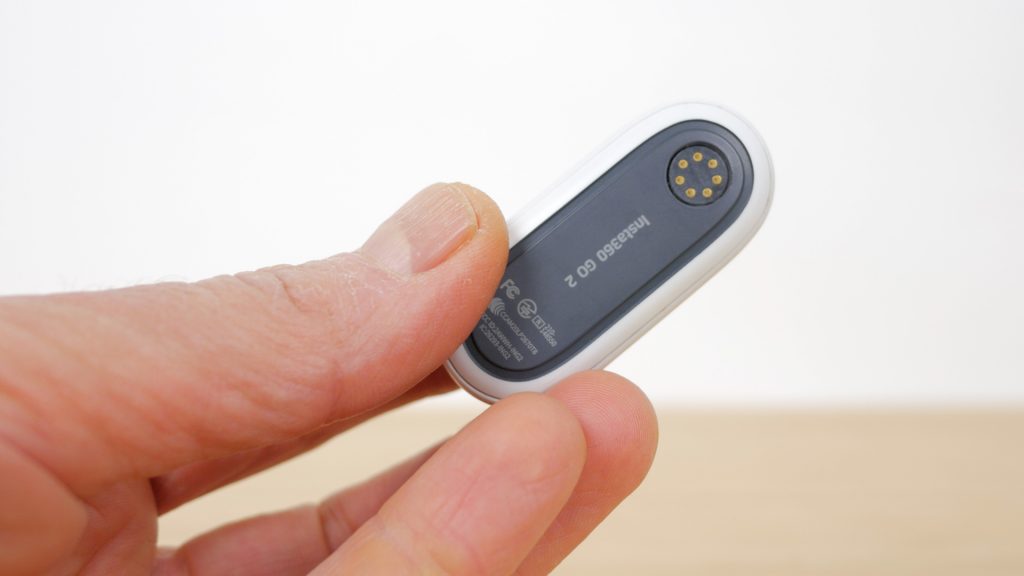
The back is magnetic and there are charging points to mate with the pins in the case. The camera has 32GB of built in storage which is not expandable.

The case looks like an oversized AirPods Pros case and is a little taller and wider than the camera and just over double the thickness and weight. The case with the camera weighs 89g – still a lot less than a GoPro Hero 9 which weighs just under 160g.

It’s great to see a small action camera – Drift used to do the Stealth and GoPro did the Hero Session which I still have and like a lot. But recent GoPros have been getting larger.

The camera has an IPX8 rating and is waterproof down to 4m with the replaceable lens guard attached. The charging case has no such rating.

It attaches magnetically into its storage case, which can be used to charge and control the camera, transfer files across to a computer with the supplied cable and also as a tripod with its two pull out legs and hinged lid.

The tripod legs don’t feel at all robust, but can still be useful at a pinch indoors or outdoors on a flat very stable surface if there’s no wind.

There is a standard ¼” tripod mount below the USB-C port, but since it’s slightly recessed and on a curved edge it’s not compatible with every tripod I tried.

There’s no built-in mounting options on the camera itself – you need to use one of the proprietary accessories.

The case also has a status LED and a small hole in the lid for the microphone when using the camera in its case.

It charges using the supplied USB-C to USB-A cable – a double ended USB-C cable doesn’t work. The case’s 1100mAh battery charges in just over an hour at a little under 1A. And the camera’s 210mAh battery takes around 35 minutes for a complete charge or just over 20 minutes to get to 80%. It would have been great to have also seen wireless charging.
The camera has around 30 minutes of recording time without the case and up to 2h 30mins with the case. I’ll come back to battery life shortly.

The case’s red charging light turns green when the case is fully charged. When you open the case, it pairs with the camera. The small OLED screen displays the camera’s active mode and you can change modes using the right mode button. To start recording you press the left record button with the red dot.

The OLED display on my model developed a fault quite early on as you can see. This camera is from an early batch and Insta360 have assured me this will be fixed with newer cameras. I should have a replacement unit soon so will provide an update down below and in the written article, and hopefully in an upcoming video too.
You can cycle through the various shooting modes using the mode button and configure settings with a long press of the record button, but most of the time I used either the action button on the front of the camera or the app to control the camera.

One useful feature of the case is it connects wirelessly to the camera, so you can use it to control the camera remotely.

You have to yank the camera out of the case by its lens protector – it does require some force.

The easiest way to mount the camera is on the magnetic pendant. This should sit underneath your clothing with the Insta360 logo facing your chest.

The camera attaches magnetically in a vertical position and is pretty secure – even through a fairly thick insulated jacket.

The pivot mount has a grippy washable base that will stick to most smooth surfaces.

It’s handy for overhead shots.

The Clip mount can be attached to a baseball cap and the tilt angle is adjustable.

By default press the action button once with the camera off to record in Standard video mode. The camera vibrates once. Another single press stops recording and turns the camera off with a long vibration.
A double press with the camera off will take a photo. The camera vibrates twice, takes a photo and turns off with a long vibration.
Turn the camera on and into standby mode with a 1 second press of the action button, accompanied by the camera vibrating twice. A single press will take a video in Pro video mode that I’ll come back to, and a double press will start a Timeshift recording. Again with a single and double vibration respectively. A single press of the action button ends shooting again accompanied by a long vibration. The camera automatically enters sleep mode after two minutes by default and the camera vibrates once. Or you can press the action button for 2 seconds to enter sleep mode immediately. You can configure all these settings in the app which I’ll come back to.
The status LED is cyan in Standby mode, flashes white slowly when recording video and quickly when recording Timeshift mode. It takes some time to get to grips with what the camera is doing, and it would be much easier to see the LED in most cases if it was on top of the camera, rather than at the front obstructed by the lens as you typically look down at it on your chest.
And there’s no audible beep from the camera so there were plenty of occasions, especially early in my testing when I either failed to record something, or ran out the battery recording nothing of any interest. I found it helpful to keep my finger on the camera after pressing the action button to feel confirmation from the vibration that I’d started or stopped a recording.

If the camera is unresponsive you can reset it with a 6 second press of the action button with the camera out of the case. A 6 second press of the mode button with the camera in the case will reset the case should that become unresponsive.
Image quality & performance

The camera has a small but still respectable 1/2.3” sensor with a f2.2 lens. This is the same sensor size as the GoPro Hero 9 which is impressive considering the GO 2’s diminutive size. It supports resolutions up to 2.5K or 1440p, at 50fps, so no 4 or even 5K options like the GoPro Hero 9. But it does have a few very useful tricks up its sleeve that the bigger and more expensive GoPro can’t match.

If you record in the Pro Video mode which I’d highly recommend, you can change the field of view and aspect ratio of a video after you’ve taken it in the mobile or desktop app. This is perfect for social media where you might want to change the aspect ratio from standard widescreen 16:9 to portrait 9:16 or even square 1:1, perhaps for Instagram. The camera is actually capturing an ultra wide angle 11.24mm 35mm equivalent video disc, which you can extract the information you need from, after the fact.

If you hold down your finger on the screen you can actually move around this view slightly, although you’ll start to get edges of the captured video if you move around too much. You can just use the left mouse button to move around in the desktop app. It’s good to see Insta360 using their 360 degree heritage to allow all this flexibility.

And even more impressively, no matter how you have the camera oriented the video will always stay upright using the Horizon Lock feature. This works even while you’re shooting video and although you can see some of the minor artifacts of software processing used to achieve this, it works remarkably well.

The GoPro Hero 9 needs the $100 Max Lens Mod attachment to get this feature. I’ll be comparing the quality shortly.

There’s also Insta360’s FlowState Stabilization, which whilst not as effective as GoPro’s HyperSmooth, is a lot better than I thought it would be, again considering just how small this camera is. I’ll also show how this compares directly to the GoPro Hero 9.

You can turn off image stabilisation in the app – or switch to First Person view or FPV stabilization, even after you’ve taken the footage. This could be useful if you’re attaching the camera to a drone and don’t want the horizon locked.

There are few additional photo modes including a Night Shot mode.
The camera does have a slow motion mode but this drops the resolution to Full HD 1080p and there’s no audio. And you can capture photos at 9MP resolution.

By default these are captured in RAW format, again allowing more control for post processing if you want.

TimeShift or Hyperlapse mode is equivalent to GoPro’s Timewarp mode.

Basically it’s an automatic time lapse mode that smooths the video using image stabilisation. These can be recorded up to 1440p at 30fps. There’s a conventional Timelapse mode too with intervals from half a second up to 2 minutes.
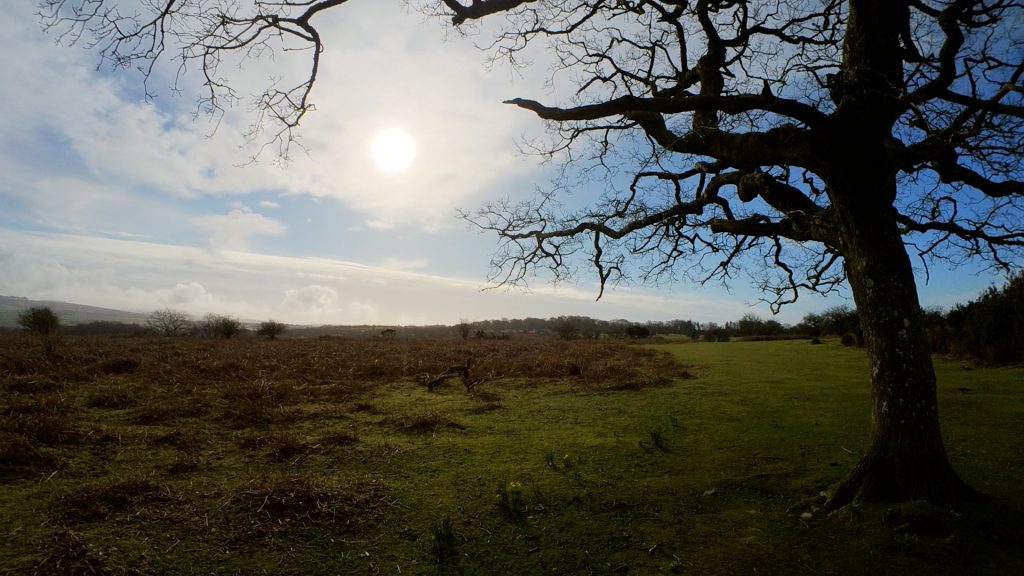
Finally there’s an HDR video mode to capture greater dynamic range. Unfortunately there’s no webcam mode which I think is a missed opportunity in the current climate.
In the video modes you have three colour profiles to choose from: Vivid, Standard or LOG.

The default Vivid mode gives you the typical GoPro’eque rich vibrant colours.

The Standard profile is for more realistic colours.

And if you want to try and eek out the most dynamic range from your footage you can use the flat LOG profile and they very thoughtfully provide a colour grading LUT that you can apply in post right from the mobile app, if you don’t want to colour grade manually.

Most of the time I used the default Vivid mode.
Here in the UK I’m happy to see PAL based 50fps in most of the video modes, but if you’re in the NTSC based US, 60fps would be preferable and 50fps might not mix well with your other cameras. You can use the 30fps option, but that’s too slow for any fast moving action and would mess up my 25fps workflow. [Update 16/04/21 – with the latest firmware just released you now have 24fps and 25fps options – but until the next smartphone app update, these can only be set using the charge case.]
You are limited to 10 minute clips if you enable FlowState stabilization – this increases to 15 minutes with basic stabilisation.

You can see for yourselves the video and photo quality in the various modes in the accompanying video. I tested the camera mountain biking, road cycling, running and walking. I even attached it to the roof of an RC car to really test the image stabilisation. I mainly used the magnetic pendant mount which is the most convenient mount I’ve tried with any action camera. And the chest mounted position usually provides the most immersive camera view for a lot of activities, although for cycling there’s a little too much ground in the footage. It’s surprisingly secure too – you’re more likely to brush it off the mount with your arm than anything else.
But I also used the GoPro mount in my dual camera chest mount setup to compare the GO 2 to my GoPro and also attached to my mountain bike helmet.
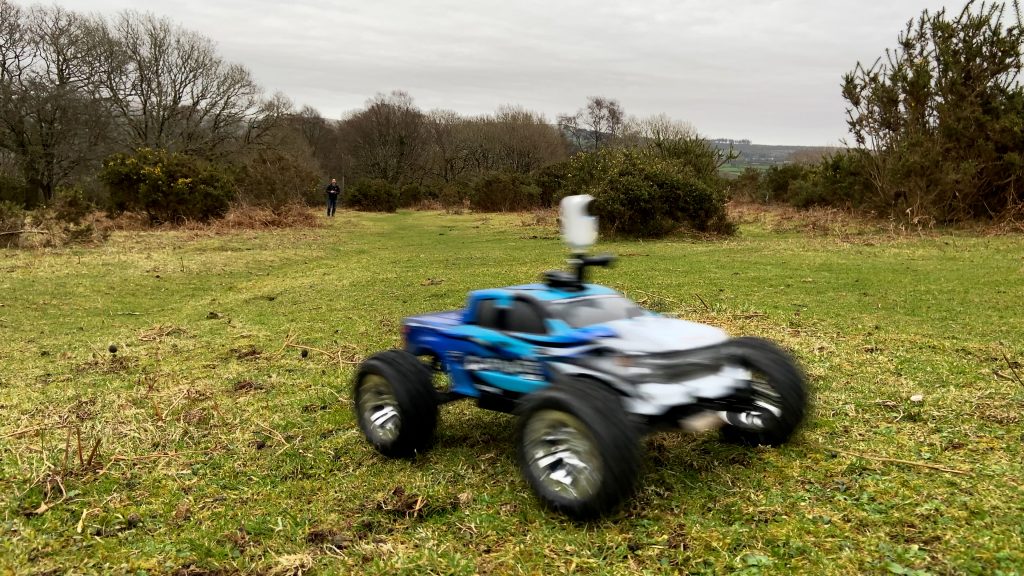
And I used this mount with an RC car, which proved a bit too much detaching itself several times, luckily into soft grass and with no harm done. For extreme situations, the magnetic mounting system the camera uses is nowhere near as secure as the tried and tested GoPro bolt and buckle based system, but it is far more convenient. It’s so easy to detach the camera to record your surroundings or a selfie.

For the GoPro Hero 9 comparison footage I’ll also show how it compares to the GoPro Hero 9 both with and without the additional Max Lens Mod lens which gives it similar capabilities to the GO 2. If you want to skip ahead feel free to use the video chapters in the timeline.
Overall the footage from the camera looks good and the image stabilization is very effective. If you compare it directly to a GoPro, the GoPro’s footage looks better to me – crisper with richer colours, and its Hypersmooth image stabilisation is hard to beat. But the GO 2 is a lot closer in quality than you might expect.

Like all these small sensor cameras, they do struggle in low light and and footage gets very noisy as light levels decrease. There is a “Remove Grain” or noise reduction option when you export your footage, but this makes the footage look very processed in most cases.
Microphone quality was ok – better when mounted on your chest with the magnetic pendant. You can hear how the mic sounds and how it compares to the GoPro Hero 9 which is noticeable better, again in the accompanying video.

I got between 25 and 30 minutes of battery life before having to top it up in its case. It’s not much but it’s enough if you get used to recording shorter clips. And this actually makes your footage much more manageable when it comes to editing.

Unfortunately it doesn’t give you any warning that it’s going to run out. It just turns off when the battery gets lower than around 10%. I’d really like to see the front front LED start flashing red when the battery is at around 25% or so, perhaps accompanied by a vibration. Ideally you’d be able to enable an audible warning.
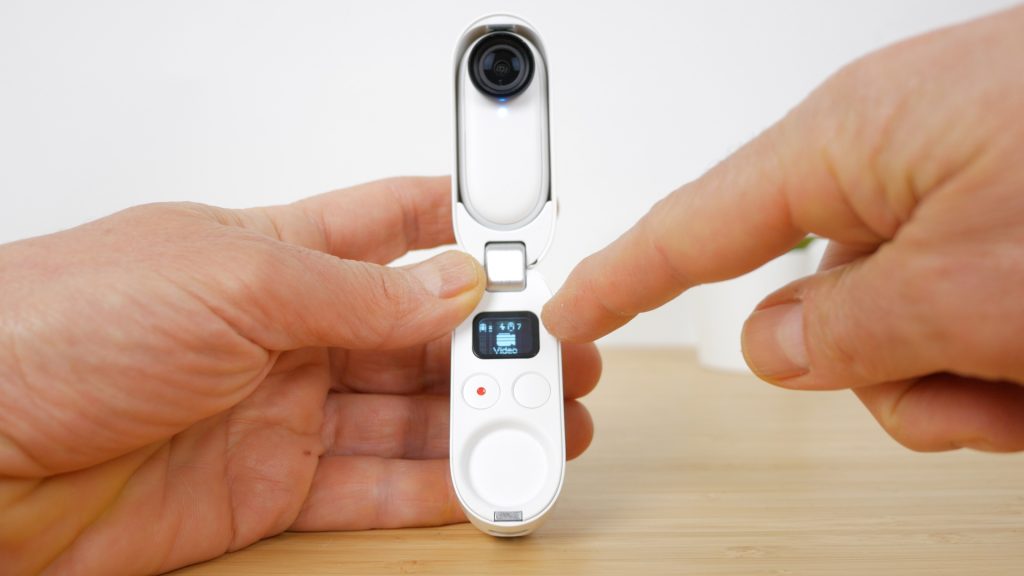
The charging case displays battery remaining, but I didn’t have this to hand most of the time.
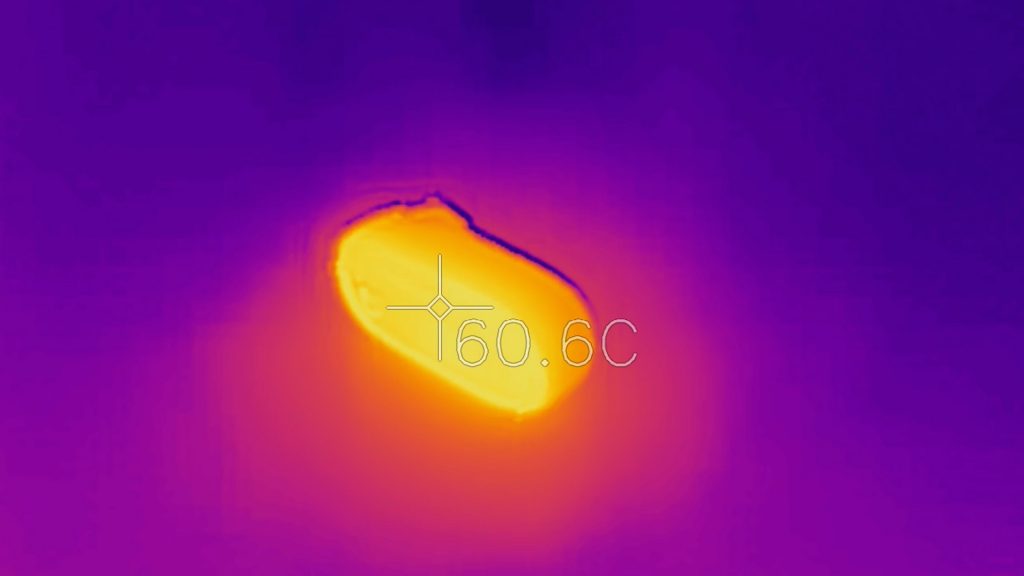
The camera does get quite hot when recording for longer periods of time. I checked with a Flir thermal imaging camera and found when the back of the camera reached a pretty warm to the touch 60 degrees Celsius after 5 minutes or so it would stop recording. In typical use, with air flowing around the camera and a mount to help dissipate heat this wasn’t usually a problem.

You do need to be a little careful with the charging case since it’s not waterproof. On several occasions when out in wet, muddy Dartmoor weather, I had to remove my gloves and find something to clean the camera with before putting it back in its case to charge. It’s a bit of a faff, but the convenience of such a light tiny camera with its discrete magnetic pendant mount means I had it with me when I often wouldn’t have bothered taking a bigger action camera.
Insta360 App

The camera uses 802.11ac WiFi for wireless transfer to the Insta360 mobile app, or you can use the USB cable with the camera in its case for faster transfers.

Unfortunately even though there’s a USB Type-C port on the charging case, file transfers are slow at only USB 2 speeds of just over 30MB/s. And with the limited 32GB of storage you have to remember to transfer the footage off the camera regularly.
Wireless transfer speeds are pretty good – I got around 10MB/s with a 1GB file taking under two minutes to transfer to my iPhone 11.

When you open the app you’ll be guided through connecting to your camera. This generally works ok but like I find with the GoPro app sometimes you have to try a few times to get it to connect. Once it connects the connection is reliable.
As I alluded to earlier you have a lot of control over your footage in the app. Tap on Album and then the Camera tab, to see footage on your camera.
The camera has a lower resolution file that it can stream to the mobile app which makes previewing footage you’ve recorded pretty snappy and a better experience than with the GoPro camera with its accompanying app – especially for longer clips.

You can change the aspect ratio, adjust the field of view, grab a snapshot, and adjust exposure and colours. All without having to download the clip. Scrubbing the footage is about as responsive as I’ve seen with any camera and you can even use their AI Trim to intelligently trim your footage and mix in music tracks provided in the app.

All these edits are non-destructive – you can reset the edits by tapping on the 3 dots at the top right of the screen. There you can also turn off Horizon Lock or FlowState Stabilization. And beside the 3 dots you can export the whole clip, or the multiple clips if you applied AI Trim.

If you tap on Custom you can configure your export options before the clip is saved to your camera roll ready for sharing.

In the app you can tap on Settings | Button Settings to configure the action button single and double tap functions – both when the camera is off and when it’s turned on. I’d recommend changing single press mode to activate Pro Video mode in both these modes. You can also choose capture time length from 15s to 30 minutes bearing in mind the clip length limitations I mentioned earlier.

Tap the camera icon to control your camera remotely with a pretty responsive live preview. You can choose between Video and Photo mode and if you tap the settings cog you can adjust settings in either mode. I won’t go through all these settings since they’re fairly self explanatory but you can see the various options on screen.
As I’ve mentioned if you choose Pro Video mode you don’t really need to worry too much about aspect ratio and field of view since you can adjust these afterwards.

If you tap on Stories you can choose a Theme and let Flashcut automatically edit a video with cuts and music for you using their AI algorithms.

Or you can tap on Create a Story and choose Standard Editing to manually edit your footage. It’s a very capable and fairly easy to use app.

Insta360 also provides their desktop app Insta360 Studio which gives you basic editing controls and installs a plug-in for Adobe Premiere Pro.

If you look at the raw Pro Video footage, software that doesn’t recognise the footage will display the raw fisheye footage without any software image stabilisation applied. I hope they develop the desktop app further – GoPro have completely abandoned their Quik desktop app and their newer GoPro Player app only works with their 360 GoPro Max camera.
Unfortunately there’s no way at the moment to upload all your footage to the cloud like you can with GoPro.
Conclusions
The Insta360 GO 2 is one of the best action cameras I’ve tested. Not because it takes better quality footage than other cameras I have, but because of its small size and convenient mounting options. So I have it with me and use it more often.

The magnetic pendant mount gives similar immersive footage to the GoPro chest mount but that mount is cumbersome and a bit too serious for the more casual footage most of us take. It’s nowhere near as secure as the GoPro mount and you can’t adjust the angle, but it never came off in my testing and you do have some flexibility reframing shots if you shoot in Pro Video mode. And there’s still the option of using it with a chest mount for a more secure fit and better angles.
My biggest gripes with the camera are probably battery life and useability which sort of go hand in hand. Most of the time I used the action button to control recordings and since you can’t usually see the status LED and there’s no audible beep, you have to rely on the camera’s vibration to confirm you’ve started or stopped a recording. But this is easy to miss and I still found myself awkwardly trying to check the front LED only to find out the camera had been recording the whole time when I thought I’d stopped it or vice versa. And again with no audible low battery warning, it had often run out of battery. This is less of a problem the more you get used to the camera.
The camera is also quite expensive, but at least it comes with a useful selection of mounts.
I also had the issue with the faulty OLED display on the charging case – but hopefully that was just bad luck.
For the next version I’d love to see audible beeps, wireless charging, a more rugged case and perhaps even voice control.

But overall the Insta360 GO 2 takes quality footage with good image stabilization in an impressively lightweight package. And I love all the post-processing options available. While GoPros seem to be getting bigger and bigger with endless mounts and accessories and more and more features, I found myself grabbing this little camera with the simple magnetic pendant more often than not.
Don’t forget to take a look at my YouTube video at the top of the page, and subscribe to my YouTube channel where I’m releasing videos every week on the latest technology and how to get the most out of it. If you tap the bell icon when you subscribe you’ll get a notification as soon as I release a video, and there’ll be a link to my site here for the written article. YouTube is also the best place to leave a comment. I read all of them and respond to as many as I can!
Insta360 GO 2: https://www.insta360.com/product/insta360-go2 or Amazon
GoPro Hero 9: https://amzn.to/30ffpCe
GoPro Max Lens Mod: https://amzn.to/3t0VpQd
Leave a Reply