(Please see my video above for a detailed walk through of this repair)
Cleaning out the attic I stumbled across my old Nintendo Game Boy with its 4MHz processor and 8kB of RAM – which has to be around 25 years old! I switched it on and amazingly it immediately sprung to life, with the nostalgic sounds of Tetris.
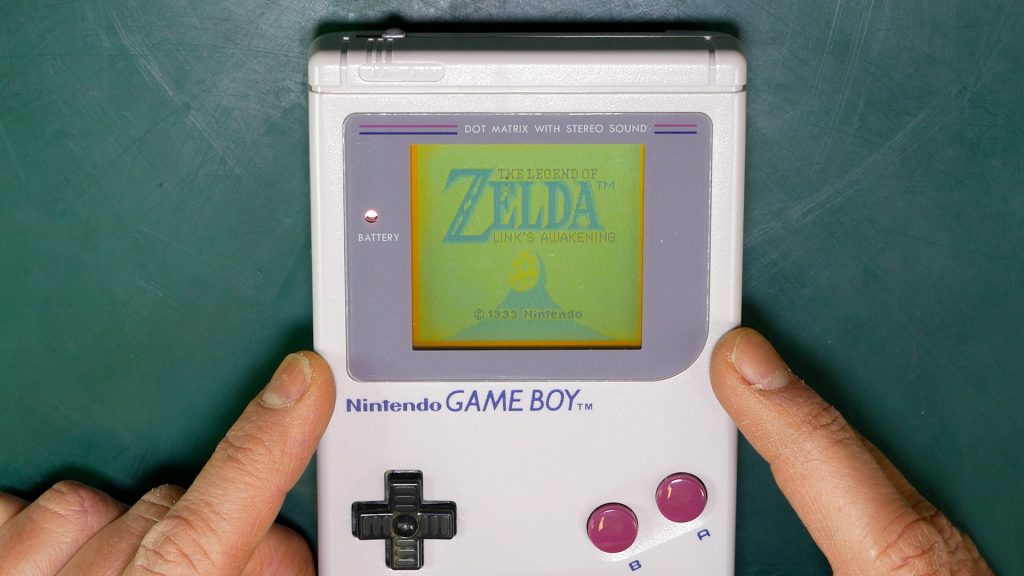
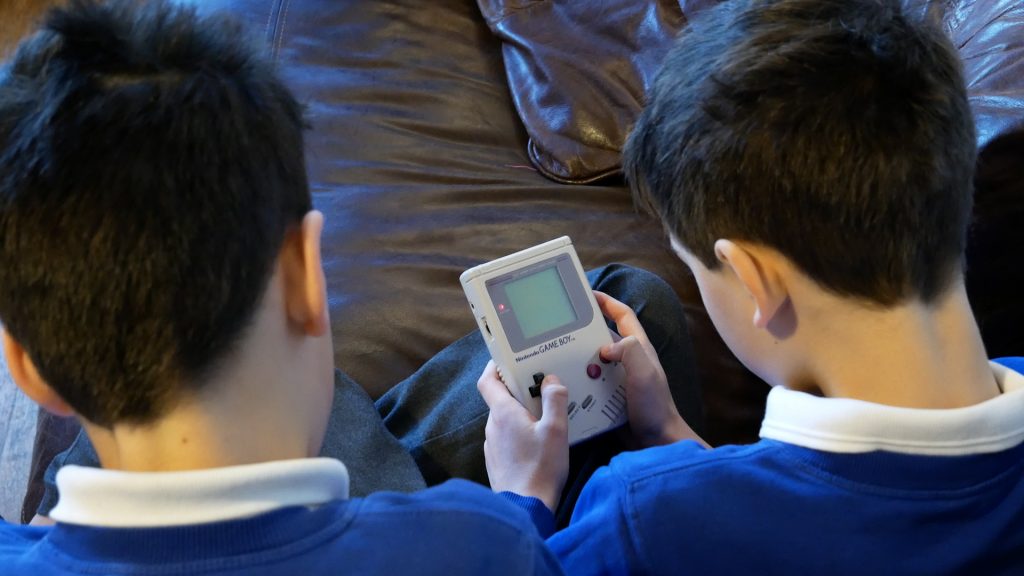
The only issue was that the screen was missing vertical lines on both side. But this is relatively easy to fix and my children are now working their way through my collection of classic games including Super Mario Land, Donkey Kong, Tetris and my favourite back then: Zelda. Although I’m not sure they are as excited as me in bringing these timeless games back to life.
What you’ll need
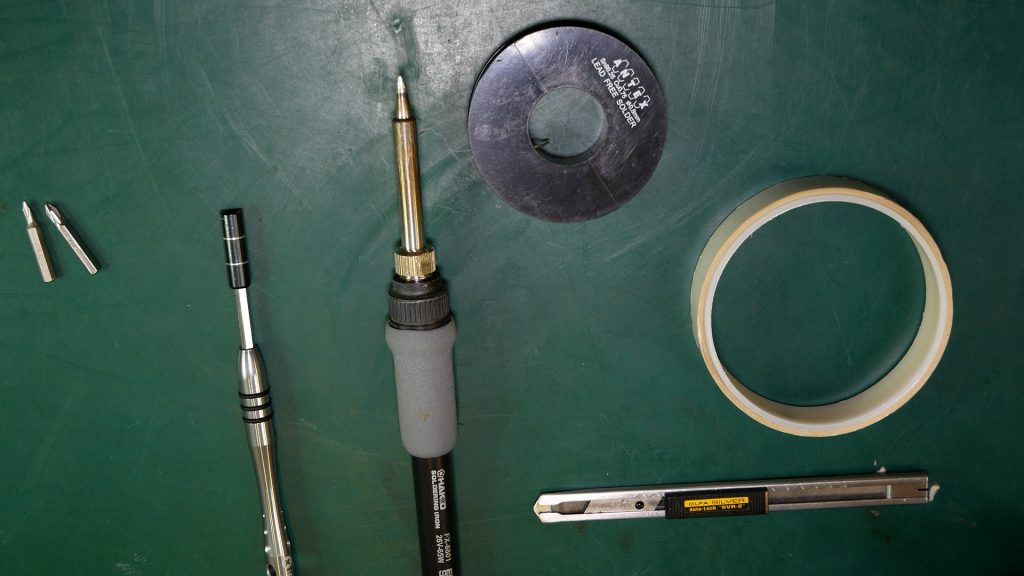
It’s a fairly simple repair, but you will need a few tools, namely a soldering iron with some solder, a screwdriver with a tri-wing and Philips bit (both size 0 or 1), and some double sided tape.
Any soldering iron will do, but a soldering station where you can set the temperature is best. I’m using a Hakko FX-888D but I’m sure something far cheaper would do the same job in this case. I didn’t try it, but you could also try using a rework station which is basically a controllable hot air gun with a fine tip.
Carrying out the repair
The cause of the issue is that the ribbon cable that attaches to the screen and displays the vertical lines, has become separated over time. We need to apply heat to this cable where the lines are missing, to re-melt the solder and re-establish the connection.
Taking the Game Boy apart
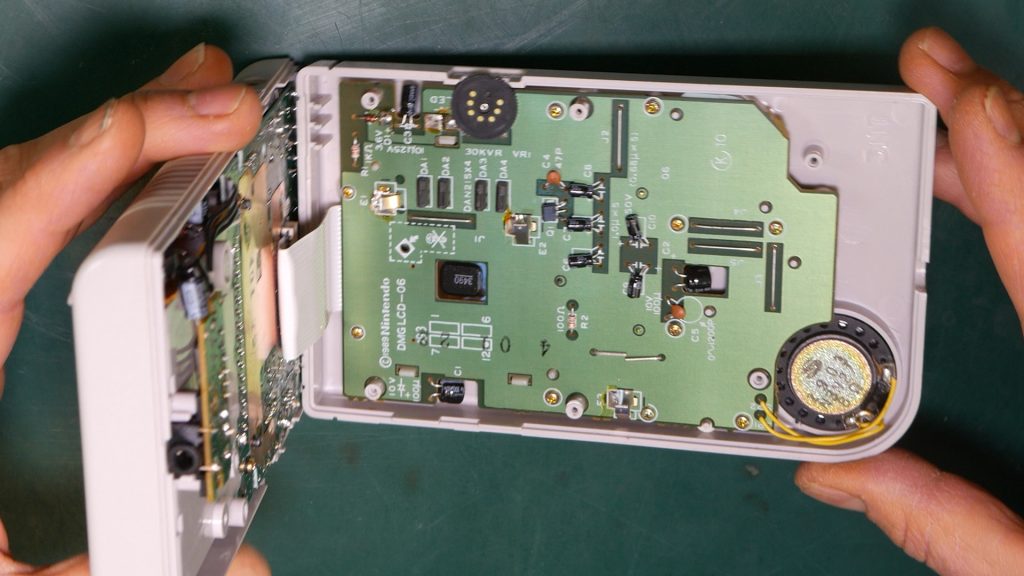
- Remove the batteries and cartridge and remove the 6 tri-wings screws from the case
- With the screen face down, carefully pull apart the case, being aware of the cable holding the two sections together
- Remove all the screws from the circuit board with the screen attached using the Philips head
- Gently pull up on the board – there’s some adhesive holding it in place. Put the front cover with its buttons to one side
- Find something to keep the two parts isolated from each other – I’ve used some foam that came with a new PC motherboard
- Next, put the batteries back in and switch on the unit, turning the display again to its darkest setting
- Now carefully remove the strip of black rubber below the screen and then remove the strip of adhesive
Using a soldering iron to remelt the solder
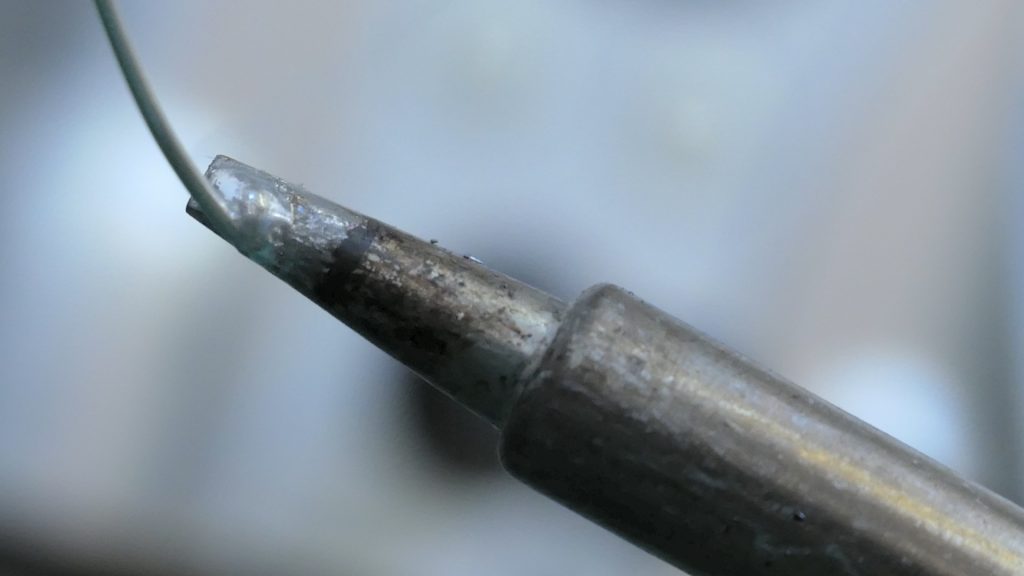
I tried this a few ways, with and without tinning the soldering iron and at different temperatures, but had more luck at 400 degrees Centigrade (about 750 degrees Fahrenheit) and tinning the soldering iron which just means applying some solder to the tip. We have to use lead free solder here in the UK at least, which has a higher melting point than solder with lead in it and requires that sort of temperature, so if you can get away with a lower temperature, I’d recommend trying that first.
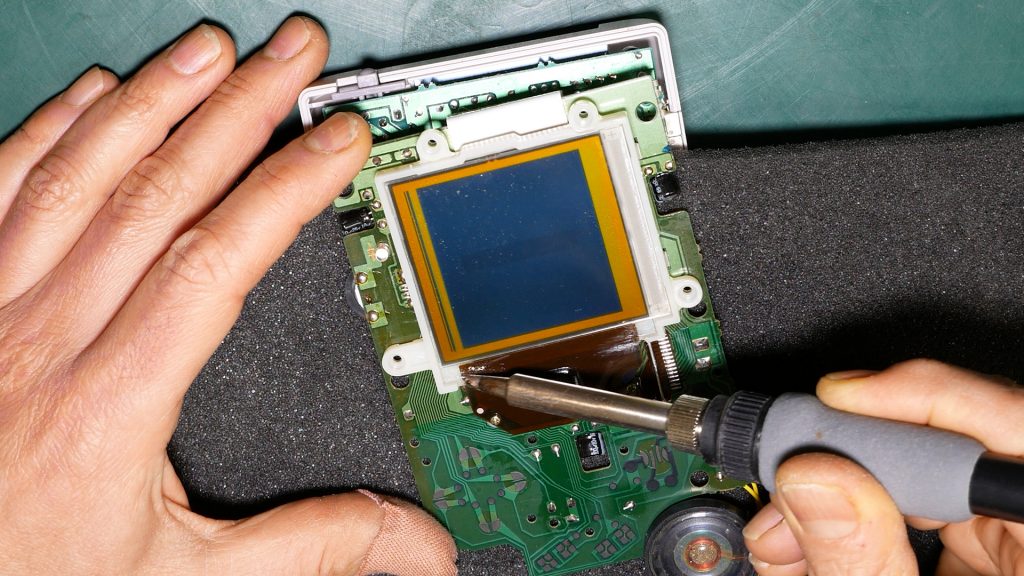
With the soldering iron up to temperature and a little solder applied to the tip, you just need to apply gentle pressure to where the ribbon cable attaches to the screen, only where the vertical display lines are missing. Keep moving the soldering iron and do one section at a time. When an area is complete, let it cool down, and move to the next area. It took me about 15 minutes in total on my Game Boy, and almost half of that was just one stubborn display line.
Finishing off the repair and putting it all back together again
The black rubber strip needs to be put back in place. I used some double sided sticky tap to reattach it. I also used some of this tape for the front case screen which had become loose.
Give everything a good clean to rid of any dust and smears and you’re ready to put it back together again, which is a straightforward process. Just make sure you put the buttons back in correctly which is not difficult since they are keyed.
That’s it – the Game Boy is (almost) as good as new and ready for the next generation :).
If you have found this article useful please consider clicking on the links below. You pay the exact same price and it’ll enable me to keep these articles coming!
Any questions, please ask away in the comments section below.
Tools I used for this repair:
Hakko FX-888D soldering station (UK Amazon link, US Amazon link)
iFixit Pro Tech Toolkit (UK Amazon link, US Amazon link)
Lead free solder (UK Amazon link, US Amazon link)
Great tutorial and video. Absolutely spot on. Game Boy now up and running, good as new.
Thanks
Great! Thanks for your comment.
Your style is so unique in comparison to other people I’ve read
stuff from. Thanks for posting when you hav the opportunity,
Guess I will just bookmark this page.