In this article I want to help you find the perfect flashlight for everyday carry (EDC). That something that ideally fits in your trouser pocket but sometimes jacket pocket – something you can take with you everywhere. I’ll be calling them torches though, because that’s what we call them here in the UK.
It needs to be compact, lightweight and powerful and all my top ten choices weigh 120g or less and are shorter than 120mm. With maximum outputs ranging from 750 lumens all the way up to 4000 lumens.

To put that in context, that old Mini Maglite you have in your drawer weighs over 100g, is almost 15cm long and has an output of around 15 lumens, similar output to your smartphone torch but with a longer range!
My first article and video in this series covered even smaller keychain torches. And also introduced a few technical terms – so it’s worth a read / watch if anything I cover in this video needs further explanation.

I’ve thoroughly tested over 20 torches, taking multiple torches on my morning walk every day over the last 4 weeks to see how they fare in real life use. And I’ve again tested them quantitatively in my homemade, self-calibrated lumen testing enclosure to check manufacturers’ sometimes wild claims on just how bright these torches are.
I ran every torch in its brightest mode since this is the headline figure manufacturers like to quote. And I ran them for at least 10 minutes in the testing enclosure. I wanted to see not just how bright they are when you turn them, but how bright they are after they’ve been on for a while, since that’s how most people use them. They just turn them on at full brightness and leave them at that setting.

I’ve also measured their colour temperature and accuracy with a spectrometer – if you’re using a torch for longer periods of time the quality of light is also important. Note all beam shots were shot with the exposure fixed and at 5000K colour temperature.
With difficulty I’ve whittled down all those torches to my 10 favourite torches. I’ll have a roundup of head torches coming very soon – incredibly useful for jobs around the house, DIY and I use them for running too. If you subscribe to my YouTube channel, you’ll get a notification when it’s out.
Without further ado let’s start with the lightest torch in the roundup and work up from there.
Wurkoss TS10
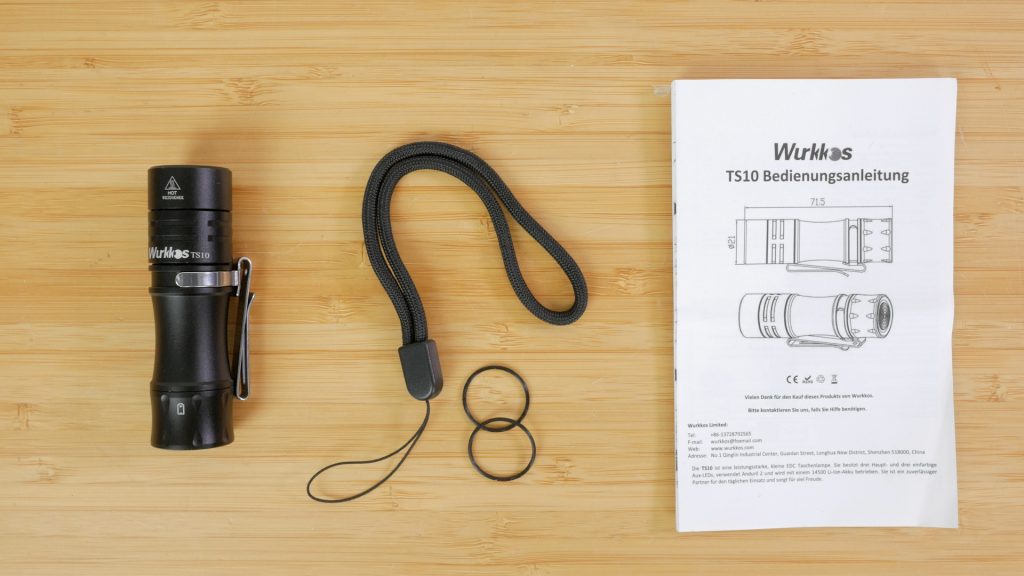
The Wurkkos TS10 comes in a plain box with a lanyard, spare o-rings and a user manual. This is an AA style torch but will only take 3.6V Li-ion 14500s – it needs at least 3V and won’t work with standard 1.5V AA Alkaline or NiMH batteries unfortunately.
Mine came with a Wurkkos branded unprotected battery but you can save a tiny amount if you order without one. I guess to keep the size and weight down, there’s no way to charge the battery in the torch – you’ll need an external charger.

And some longer batteries with protection circuits won’t fit, for example this Keeppower one. But I did find this Lumintop 14500 with built-in USB-C charging fits – I would have preferred Wurkkos included a battery like this with the torch – it would be far more convenient for newcomers to these higher performance torches. The torch weighs just 51.9g (1.83 oz).
You should unscrew the head to remove the battery, not the tailcap. If you do remove the tailcap which is lightly glued in place, be careful you don’t lose its loose components.
Wurkkos is a lesser known brand, but the build quality is very good with a slender scalloped design. It’s made of a aerospace grade 6061 aluminium alloy, with type III hard anodised finish and has an IPX8 waterproof rating. Nearly all the torches in this roundup specify this type of aluminium alloy and anodised finish so I’ll just shorten it to aluminium from now on.
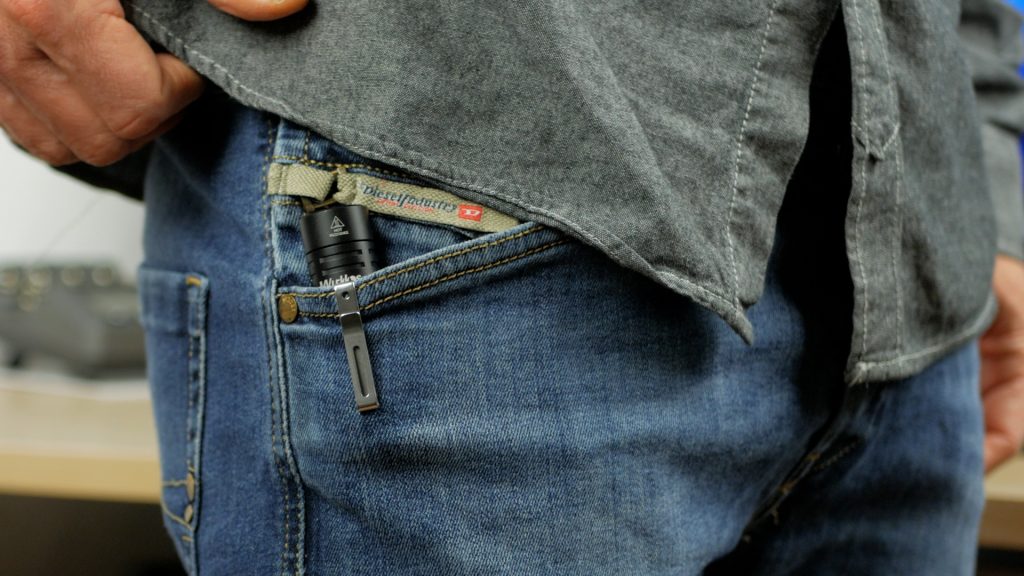
It measures 71.5mm x 21mm (2.81” x 0.83”) – all measurements are length x head diameter. It has a slightly short two way pocket clip which leaves a little too much of the head sticking out of your pocket in normal use for my liking.
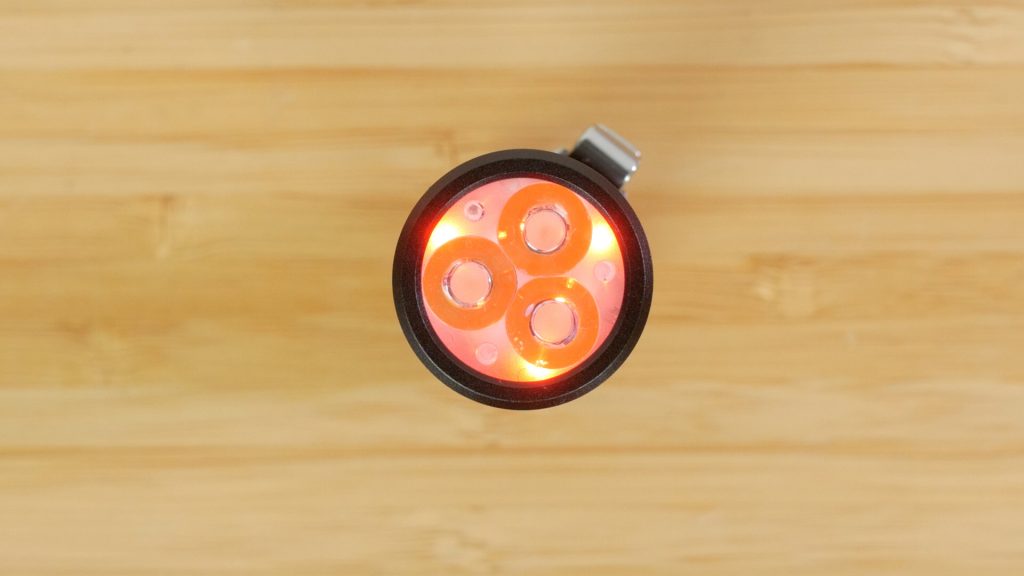
My TS10 has a smooth black finish, and comes with three 4000K high CRI CSP LEDs. But the TS10 is also available in red, silver and green. And with orange, blue and green auxiliary LEDs as well as red that I got with mine. If that’s not enough customisation for you there’s also a cooler 6000K option for the main LEDs.
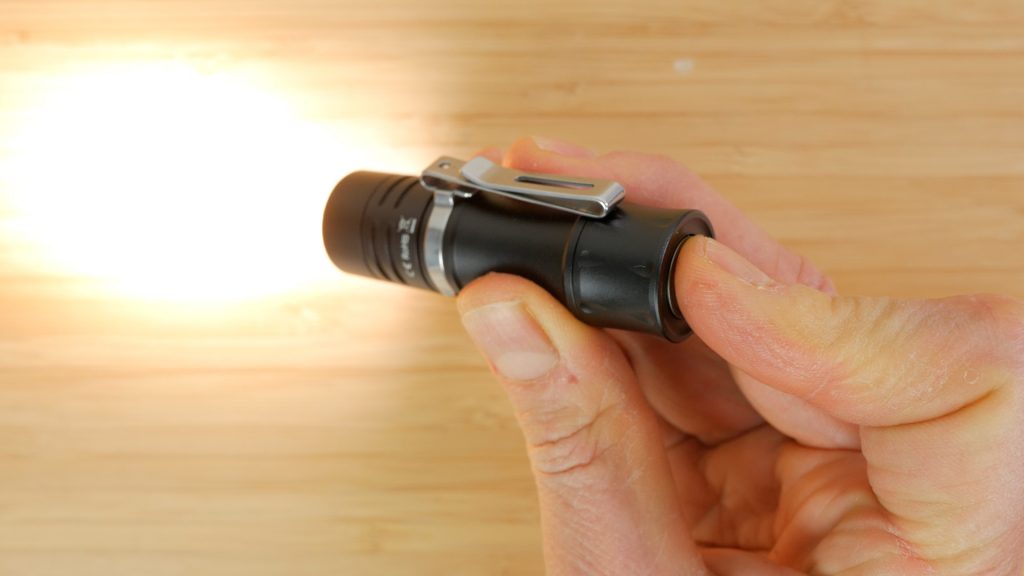
Rather unusually for a torch this size, the TS10 has a tail switch to turn it on and operate all its functions. Personally I’d prefer a side switch on a torch this size – I found I had to hold the torch like a pen to operate it which felt odd. Unfortunately the tailcap is not magnetic which is very useful for hands free operation and a feature I look for in these pocket torches.
A single press turns it on and off. Hold the button down to gradually increase the brightness. Let go and then quickly press and hold the button again to decrease brightness. The current brightness will be remembered after the torch has been turned off. With the torch off, press and hold the tail switch to turn on in the 1 lumen moonlight mode. Double click with the torch on to get the full power supposed 1400 lumen turbo mode. A double click with the torch off will take you to high brightness. You can double click again to get to turbo. Double click and hold the second click with the torch off to get momentary turbo whilst the button is depressed – this is really handy.
This is the default operation of the torch, but the TS10 runs Anduril 2, an open-source firmware for torches. Anduril is completely configurable but quite complex – I could fill an entire video covering all its options. You shouldn’t let that put you off, the default operation is pretty close to my perfect user interface anyway. But if you like fiddling, I’d highly suggest reading the manual that I’ll link to down below. If you get to grips with Anduril, you can have the same setup with every Anduril torch you own.
I will very quickly cover a couple of features that I like to customise. Feel free to use the timeline chapters to skip ahead if you’re not interested.
With the torch on, tap the switch 3 times quickly to change how the brightness levels change. From smooth, to stepped with 7 levels, and then back again to the default smooth infinite ramping. The stepped brightness levels are convenient if you want a better idea of how long the torch will run for.
I like to set a custom brightness that the torch will always come on at – which is more repeatable in the stepped modes. By default most lights come in Simple UI mode with limited features and you can’t configure this custom brightness. With the torch off click 10 times holding the 10th click to change to Advanced UI. Now choose your desired default brightness and click 10 times to set this default brightness. If you want to go back to Simple UI this setting will still be remembered – just click 10 times with the torch off.
Finally, 3 quick clicks with the torch off will flash the battery voltage. So 4.2V for a full battery would be 4 blinks, pause, 2 blinks.
Since this torch has the auxiliary red LEDs you can also change their brightness level, turn them off, or have them blinking. Click 7 times with the torch off to cycle these options.
4 clicks with the torch off will lockout the torch so it can’t accidentally be turned on. And another 4 clicks will disable lockout. You can still use moonlight mode in lockout mode, just while you have the button depressed.
You can configure the auxiliary LEDs for both normal and lockout modes. I have them at full brightness in normal mode, and low brightness when in lockout. I find that convenient if you use the torch on your bedside table since the full brightness is too bright. And also bear in mind if you’re not going to use the torch very much, having the auxiliary LEDs at full brightness will slowly drain the battery.

I measured 4180K for the LEDs with a pretty neutral tint and a very high 95 CRI. They’re behind a TIR or Total Internal Reflection lens and I measured a throw of 104m with a beam intensity of 2700 candela. It’s less than what’s quoted in the manual but still a useful throw for a small torch like this. Again if you’re unfamiliar with any of these terms, I explain them in detail in my previous video.

It appears the manual is based on the brighter 6000K version – but even with that version I doubt you’ll get the outputs in the manual, which is a little misleading. The manual states 1400 lumens of output based on the ANSI FL1 standard which is measured 30 seconds after switching the torch on.

I measured 1240 lumens in turbo but that dropped to just over 1000 lumens in 10 seconds and 250 lumens at 30 seconds – far lower than spec’d. At 5 minutes it was at 138 lumens and at 10 minutes it was 102 lumens which it held for a couple of hours. That output when you turn it on is still pretty bright for a tiny torch even if it is just for a short time. And you can even increase the step down temperatures in Anduril which can increase runtimes slightly in the higher modes. I’ll discuss this briefly later. Also if you’re using these torches outside in cooler temperatures, you’ll also get better runtimes in the brighter modes.
Despite the exaggerated outputs this is a great little torch with bright high CRI LEDs, good build quality and all the flexibility of its Anduril 2 firmware.
Fenix E18R V2.0
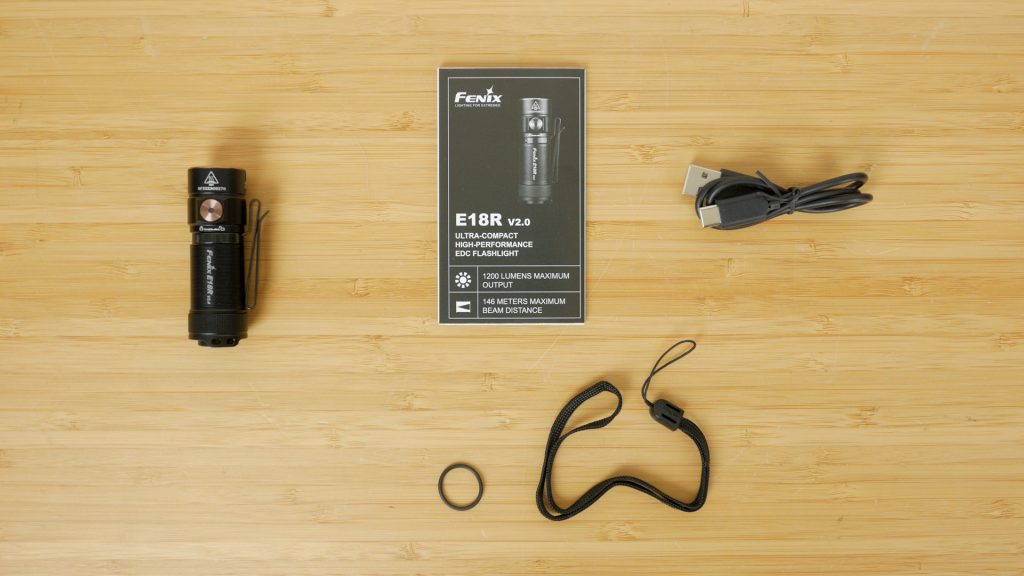
The Fenix E18R V2.0 comes nicely packaged with a USB-C to USB-A charging cable, a spare o-ring, a lanyard and a user manual.
Like most Fenix torches it feels very well made and has a black finish and an attractive copper coloured button and bezel. It’s made of aluminium and has an IP68 waterproof rating.

It comes with a Fenix branded protected 700 mAh 16340 battery, but will also accept 3V non-rechargeable standard CR123A batteries that you can pick up in the supermarket, which is very convenient and could be useful in an emergency.
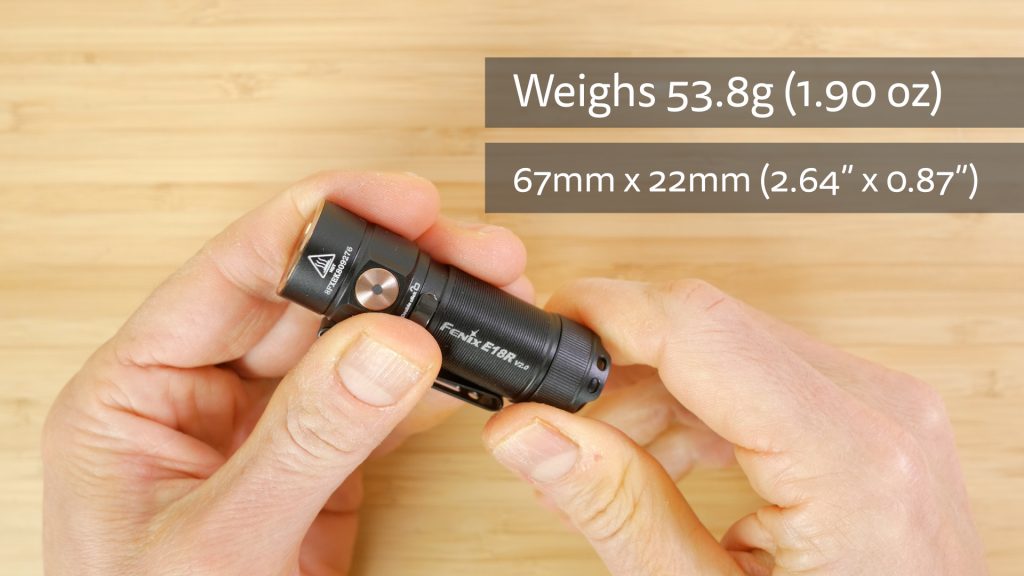
It weighs just 53.8g and 49.7g without the pocket clip if you wanted to use it on a keyring. Initially I was looking at all these torches as a replacement for my battered 10 year old Fenix E15 which is still going strong.

This has been fine on my keys, but does weigh 10g less albeit with a fraction of the performance and no USB charging. I think you could still get away with this on your keyring in a pinch even though that’s not its intended purpose.

A rubber flap covers the USB-C charging port and it charges the supplied battery in around 80 minutes. All my top ten torches that have USB-C charging charge with both a USB-C to USB-A and USB-C to USB-C cable so I won’t specifically mention this from now on.
The charging light turns from red to green when it’s fully charged. You can use the moonlight, low and medium modes whilst it’s charging.

The 2-way pocket clip that’s already installed allows for a fairly deep carry bezel up in your pocket.

The E18R also has a magnetic tailcap which will hold it fairly securely in most orientations.
The user interface is pretty simple – press and hold the side switch to turn it on and off. A single click then changes the mode from a 200 hour 1 lumen moonlight, to a 15 hour 30 lumen low, a 2 hour 30 minute 150 lumen medium, a 1 hour 20 minute 350 lumen high and a 1200 lumen turbo mode. Hold the side switch with the torch on or off for strobe. The last mode used is memorised – except turbo and strobe. You can lock and unlock the torch with a double click.
The switch has a battery indicator light that comes on with a single press when the torch is off, or for a few seconds when you turn the torch on. Solid green and the torch has over 85% charge, flashing green 50-85%, red 25-50% and flashing red if it’s less than 25% charge remaining. This is handy but only works with the supplied Fenix battery – the ARB-L16-700P.

Fenix are well known for their well regulated constant outputs and the E18R V2.0 is no exception – all the modes up to high were pretty much spot and with a constant output. I measured turbo at 1279 lumens at turn on, 1230 at 10 seconds, 1182 at 30 seconds, 563 at 5 minutes and 415 lumens at 10 minutes.

The torch head got warm to the touch at around 46°C. The moonlight mode I measured at 2 lumens which is a bit bright for a moonlight mode but not too bad.

The torch has a Luminus SST-40 LED behind a TIR lens and has a decent maximum throw of around 146 metres, or 5397 candela.

It has a colour temperature of 5553K with a slightly green tint and a below average CRI of 64.

Like most Fenix torches I’ve tested there’s no way to get straight to moonlight or turbo mode – something most other torches offer in one way or another. And I’d prefer a slightly warmer, higher CRI LED with a more neutral tint. But the size, build quality, magnetic tail cap, well regulated outputs and Fenix reliability I’ve had first hand experience with for many years with numerous torches, makes this a very tempting offering.
Baton 3 Premium Edition

The Olight Baton 3 comes nicely packed like most Olight torches. It’s available in various colours, with and without a charging case. I have the black premium version with the charging case. This case works like an wireless earpods case to charge the Baton 3 up to 3.7 times with its built-in 3500 mAh 18650 battery. This premium version also comes with the USB-C to USB-A charging cable, a microfibre cleaning cloth and a user manual. The standard version will come without the case and Olight’s proprietary magnetic charging cable instead of the standard USB-C cable. For daily use I’d say the magnetic charging cable is arguably more convenient. But the case is great for travel. You don’t get spare o-rings with Olight torches in my experience.
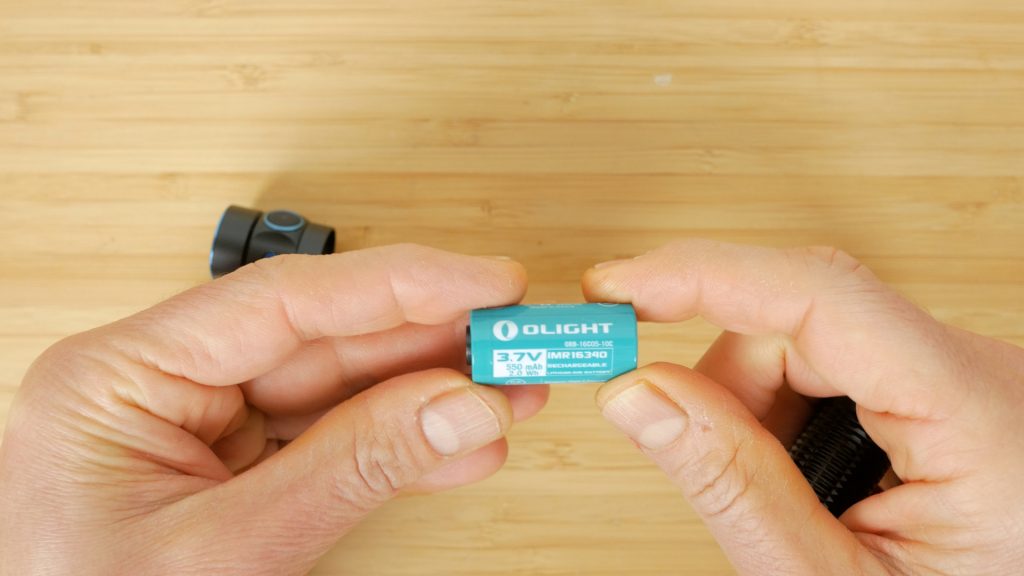
The build quality of the Baton 3 is excellent with an aluminium construction and an IPX8 waterproof rating. The case has an IPX2 rating. The Baton 3 runs off a proprietary protected 550 mAh 16340 battery. It is possible to charge the battery in a standard charger, but it’s not recommended. It’s the only torch that we’ve looked at so far that has springs both in the head and tailcap. This makes it a little more robust, should you drop or knock the torch.

It’s lightweight at 54g and just slightly smaller than even the Fenix E18R V2.0.

The Olight blue reversible pocket clip that’s already installed is very good and allows for deep carry bezel up.

It has a magnetic tail cap which is useful for hands free operation, but also snaps very positively to the Olight magnetic charger if you have one, or into the charging case.

A red charging LED underneath the lid comes on when you insert the torch and turns green when the torch is fully charged.

There’s also a status LED above the USB-C charging port of the case, that indicates the case’s battery level when you open the case and also turns green when the case is fully charged. You can use the supplied charging cable or a USB-C to USB-C charging cable.
The Baton 3 has a straightforward user interface. A single click of the side switch turns the light on and off. The button has a battery level indicator that comes on with the torch. Green for over 60% charge, orange with 10-60% charging remaining, red 5-10% and flashing red with less than 5% charge remaining. I’d have really preferred an extra battery level indication between 10 and 60%.

With the torch on, hold the button down to cycle through the 33 hour 12 lumen low mode, 7.5 hour 60 lumen medium mode and the 95 minute 300 lumen high mode. These modes are remembered after you turn the torch off. Double click the side button with the torch on or off to access the turbo mode that runs for 1.5 minutes at 1200 lumens and then drops to 300 lumens for 75 minutes. With the torch off press and hold the side button for the 20 day 0.5 lumen moonlight mode. Hold the button a little longer to lock out the torch to avoid accidental activation. Another long press will unlock the torch and take you back to moonlight mode. With the torch on or off, triple click the switch for strobe.

Finally there’s a timer mode – the torch will stay on for 3 or 9 minutes and then automatically switch off. Choose the brightness level you want and and double click the switch, holding down the second click to enable this mode. You’ll get a single blink for 3 minute mode, and a double blink for 9 minute mode. Double click and hold the second click again to change between the 3 minute and 9 minute timer. This works great as a bedside lamp and for camping.

Like the Fenix E18R V2.0 these modes are very well regulated and my measurements confirmed Olight’s specs with constant outputs up to the 300 lumen high mode. Turbo turned on at an impressive 1310 lumens, was still at 1299 lumens after 10 seconds, 1282 lumens at 30 seconds, and pretty much as spec’d dropped to 290 lumens after 90 seconds where it remained at 5 and 10 minutes and for as long as I measured its output.

The torch head didn’t get much above 34°C and you can double click the switch to re-enter turbo if you want once it’s cooled down. It’s a fairly big drop down to 300 lumens – I’d have preferred around 500 lumens – but at least it can still maintain this still decent output for another hour or so.

Olight doesn’t specify the LED used but I measured a colour temperature of a fairly cool 5989K, a very slight green tint and a CRI of 68.

The LED sits behind a TIR optic and has a respectable throw of 166 metres with an intensity of 6889 candela.
This is a near perfect compact torch and like the Fenix E18R V2.0 you could just about get away with it on your keyring. It has a nice design and build, the turbo mode is impressively bright, the user interface is excellent, the outputs up to high are perfectly regulated and it has decent runtimes for such a small torch with an excellent moonlight mode.
It does have a rather cool colour temperature, a very slight green tint, and an average CRI but I didn’t find this much of a problem in real use. I like the magnetic charging, either with the case or the magnetic cable but some might prefer more standard USB-C charging. It is quite expensive though, especially with the charging case, but check the links down below. Olight often has sales with some quite decent reductions.
Skilhunt M150 V3

The Skilhunt M150 V3 comes with a pocket clip, spare o-rings, a lanyard, a magnetic charging cable, and the user manual.
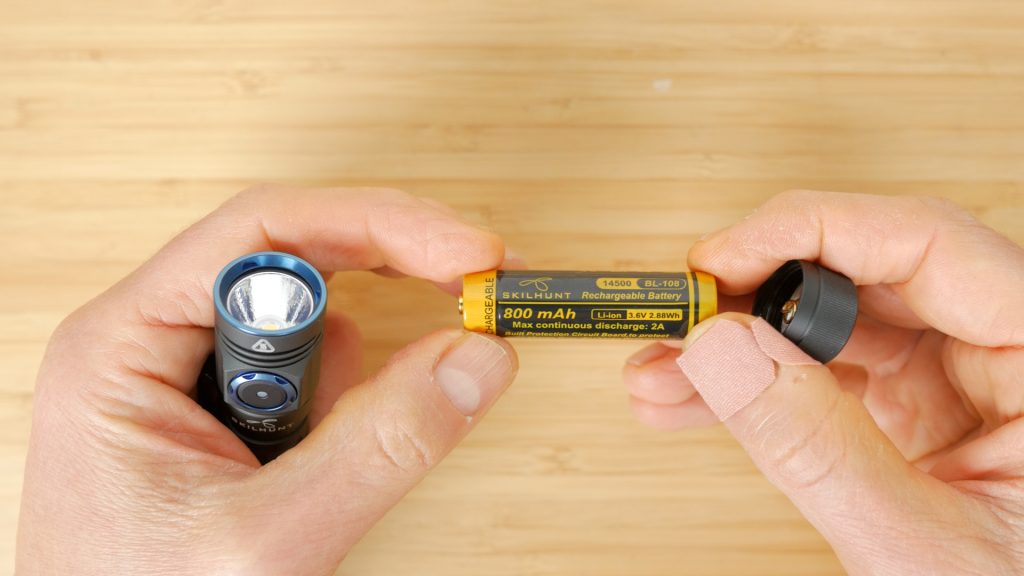
It runs on AA sized batteries and includes a 800mAh 14500 protected Skilhunt branded battery. This battery can be charged inside the torch using the supplied magnetic charging cable. Unlike Olight, this magnetic charger will work with any 14500 battery. Additionally slightly shorter non-protected batteries also fit and even better you can use Alkaline and NiMH batteries, albeit with much reduced outputs. And you have to be careful not to try and charge either of these batteries with the magnetic charging cable.

The magnetic charging cable snaps onto the port on the opposite side of the switch. There’s a red LED that changes to blue when the battery is fully charged. You can use all the torches modes whilst it’s charging.

It’s fairly large for an AA or 14500 torch but still pretty light at 58.8g including the battery. It has a rather unusual design, partly to accommodate the magnetic charging port. But it’s well built with an aluminium body – mine comes with a nice matt grey finish. It has an IPX8 waterproof rating.

There’s a reversible pocket clip which can be attached to either end of the torch. It works better with the bezel down and allows for very deep carry, with barely any of the torch visible.
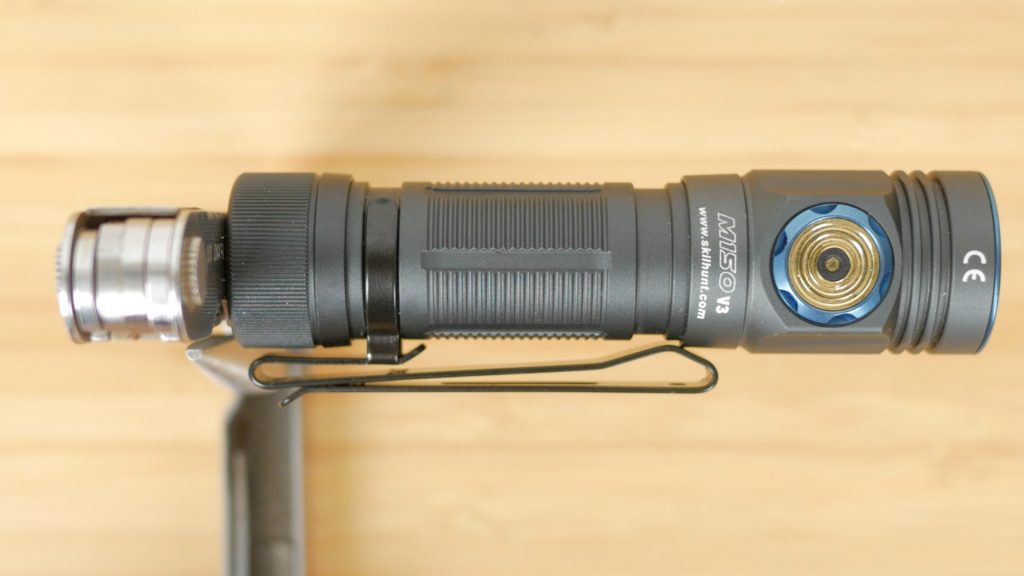
There’s also a nice strong magnetic tail cap for hands free use.
The torch has a fairly complex user interface which took me a while to understand, but it’s very comprehensive.
It’s easy to confuse the side button for the charging port, especially in the dark. I like to install my pocket clips at 3 o’clock looking at the torch head on. That way as I curl my fingers around the torch resting underneath the clip, my thumb naturally sits right on the side switch.
A single click turns the torch on and off. The switch has a status LED to indicate charge. Constant blue for over 80%, flashing blue for 50-80%, constant red for 20-50% and flashing red for less than 20% charge remaining.

Holding down the button cycles through 25 hour 15 lumen medium 2 mode, 2.5 hour 100 lumen medium 1 mode, and 30 minute 340 lumen high mode. This mode is memorised after you’ve turned the torch off. A double click from on or off takes you to turbo mode with a high and low mode. Hold down the button to switch between these two turbo modes which will also be remembered. Turbo mode 1 is 750 lumens and turbo mode 2 is 480 lumens. I’ll come back to this shortly. A triple click with the torch off or on in any mode except moonlight takes you to strobe and 2 clicks cycles through the 3 strobe modes which will also be remembered. A single click always turns the torch off.
Holding down the switch with the torch off accesses low mode with 2 sub-modes. Press and hold the switch to cycle between them. Low mode 1 is 1.5 lumens for 100 hours and low mode 2 is about the dimmest moonlight mode I’ve seen – 0.2 lumens that can last for up to 50 days!
Finally 4 clicks with the torch off locks out the torch. 2 clicks in lockout mode turns the flashing red LED on the switch on and off. 4 clicks will disable lockout mode and take you to low moonlight mode.
It sounds complicated but you only really need to set up the sub modes once so it’s not too bad.
The torch is well regulated in the lower modes. It does drop very slowly in the high mode over time. The outputs in the manual were way off from my measurements, but after checking with Skilhunt the manual is based on the CREE XP-L2 6500K LED. My version has the high CRI 4500K Nichia 519A with much lower output. The manual and website really should specify runtimes for all the LED options.

In the highest turbo mode I measured 465 lumens at turn on, 462 lumens after 10 seconds, 458 after 30 seconds, and dropped to around 220 lumens after 2 minutes where it remained for the rest of my measurements.

The head got to around 37°C.
With a Eneloop NiMH battery I measured a pretty constant 150 lumens in the highest turbo mode.

The Nichia 519A LED sits inside a slightly mottled reflector and there is a noticeable hotspot, but with a fairly low output I still only measured 82 metres of throw with 1682 candela of intensity.

But what you lose in output you make up for in the light quality. I measured a warm 4243K colour temperature, with barely any tint and a high CRI of 95 and an equally impressive R9 of 91.
The Skilhunt M150 V3 has convenient magnetic charging, a magnetic tail cap, a deep carry pocket clip, can run on multiple battery types and best of all it has a very high CRI natural white emitter.
Its output is rather unimpressive though and it’s a little on the large side for an AA or 14500 light. And I can’t help feeling the interface is unnecessarily complex. If Skilhunt could improve the output and perhaps use Anduril 2 firmware instead if they want a customisable torch, I think they could be onto a winner.
Thrunite T1S

The Thrunite T1S comes in a plain box with a lanyard, spare o-rings and spare rubber flaps for the USB charging port, a USB-A to USB-C charging cable and a user manual.

The T1S uses the slightly less common 18350 battery – it’s the same diameter as an 18650 just shorter. As an aside the first two digits of these battery types refer to the diameter, and the second two digits the length – both in mm.
It makes the torch a little more chunky than 16340 torches, but it does have a slightly bigger 1100 mAh capacity. It is a slightly longer protected button top cell, but there’s a decent sized spring in the tailcap and the head contact sits proud and I found a flat top shorter unprotected battery also worked fine in the torch.
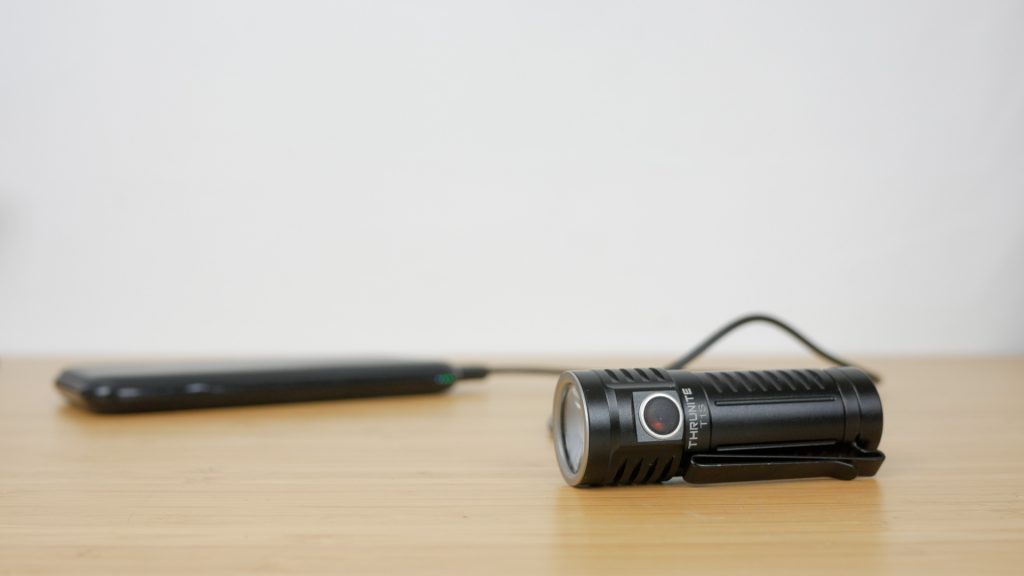
There’s a USB-C charging port behind a rubber flap opposite the side switch. The LED behind the switch changes from red to blue when the battery is fully charged.

It’s again made of aluminium with a matt black finish and an IPX8 waterproof rating. It looks plain like most Thrunite torches I’ve had, but I quite like its simple design and it has a magnetic tail cap for hands free use.

There’s also a reversible deep carry pocket clip – the torch pretty much disappears in your pocket bezel down. Although its extra thickness is noticeable, and together with its 69.4g weight this is definitely too big for your keychain in my opinion.

The user interface is very simple. A single click turns it on and off. The switch glows blue with 21-100% charge, red with 11-20% charge and flashing red when just 1-10% charge is remaining. Thrunite really needs some indication between 20% and 100% and the way the LED glows through the switch looks like something is not lined up properly and cheapens the look.
With the torch on, press and hold the side switch to cycle from a 44 hour 7 lumen low mode, to a 5.5 hour 94 lumen medium mode to an 80 minute 407 lumen high mode. Double click from any mode and off for the 1212 lumen turbo mode. Triple click from any mode and off for strobe. Long press from off for 0.5 lumen moonlight or firefly mode as Thrunite refers to it. The last mode used is memorised when you turn the torch on, except firefly, turbo and strobe.
It’s a great user interface with quick access to all the important modes.

The torch came on at 1271 lumens in turbo, dropped to 1245 lumens after 10 seconds, 1206 lumens after 30 seconds – pretty much exactly its spec’d 1212 lumens. It slowly dropped to 487 lumens at 5 minutes and then slowly dropped to 327 lumens, where it remained constant for the remainder of my measurements. This is impressive performance for such a small torch – almost 2 minutes at over 1000 lumens.

It does get hot through – I measured 51°C at the head and the body got pretty warm too.

The T1S uses a Luminus SST-40 LED behind a TIR lens and has pretty good throw for a tiny torch with a noticeable hotspot – around 184 metres or 8460 candela in turbo mode.

I measured a colour temperature of 5612K with a slight green tint and a CRI of 66. That doesn’t sound hugely impressive but for its size and intended use I didn’t have any issues with it.

The T1S is pretty good value for a no-frills but powerful compact torch with regulated outputs, good build quality and an excellent user interface. It would be nice to see Thrunite offer some higher CRI, warmer LED options though and it is a bit larger than similar offerings from Olight and Fenix.
Fenix PD25R

The Fenix PD25R comes with a USB-C to USB-A charging cable, spare o-rings, a lanyard, a user manual, and rather surprisingly a little mini pouch for your belt.

This is another quality torch from Fenix. It has the usual aluminium construction with a black finish and a long reversible pocket clip but no magnetic tail cap. Instead there’s a tail switch to turn the light on. And this switch sits slightly proud of the base so it won’t tail stand which is a bit disappointing.

The torch runs off an included 700 mAh protected 16340 battery – the same Fenix ARB-L16-700P in the Fenix E18R V2.0.

But this torch is bigger and heavier at 78.2g – starting to approach the size of compact 18650 torches like this Olight Baton 3 Pro.

If you take a look at the head you can see the size of the deep smooth reflector behind a toughened glass lens, which together with the tail switch accounts for its extra length. Like the E18R V2.0 this torch also accepts non-rechargeable CR123A lithium batteries. I was surprised to see no spring in the head of the torch for additional protection against a drop or knock.

Bezel down in your pocket there’s still half of the tail cap exposed but even with its extra length it’s still a very compact torch and very pocketable for EDC.

Unscrew the ring below the head to reveal the USB-C charging port. Everything is perfectly machined and there’s an o-ring to maintain its IP68 waterproof rating.
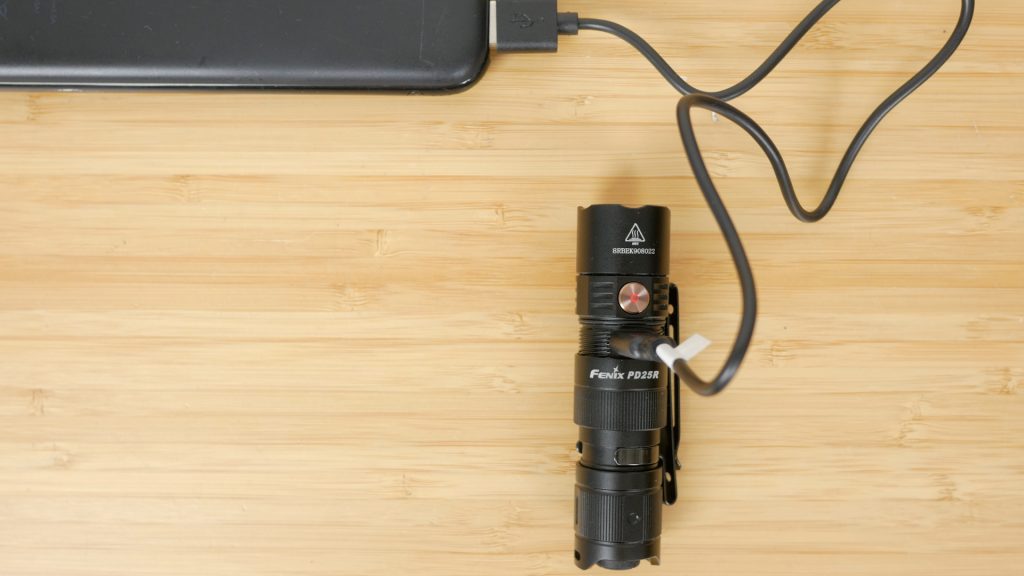
A full charge takes around 2 hours and the side switch status LED will change from red to green. Only the lowest eco mode is available whilst charging – with a long press of the side switch.

The PD25R is very simple to operate. The tail switch turns it on and off and the side switch cycles through the brightness levels. From a 70 hour 5 lumen eco mode, to a 16 hour 30 lumen low mode, a 2 hour 50 minute 150 lumen medium mode, 1 hour 30 minute 350 lumen high mode and a 800 lumen turbo mode that will operate for up to 45 minutes but will step down in brightness as the torch heats up. The side switch LED will indicate the battery remaining just like the E18R when the torch is on.
With the torch on holding the side switch turns on strobe, a single press turns it off. All modes are memorised – and you can tap the tail switch to momentarily turn the light on until you let go.
It would be great if you can access at least the low mode with the side switch when the torch is off which bizarrely you can do when the torch is charging. If you have turbo as your memorised mode, you have to turn the light on and then quickly change down to eco mode. That’s going to disturb anyone around you albeit briefly, and mess up your night vision.

In its brightest turbo mode I measured 822 lumens at turn, 808 lumens after 10 seconds, 788 lumens after 30 seconds, and 642 lumens after 5 minutes – very impressive for a small torch like this. And then 356 lumens after around 8 minutes which it held constant for the remainder of my measurements.

The head got pretty warm – I measured around 49°C.
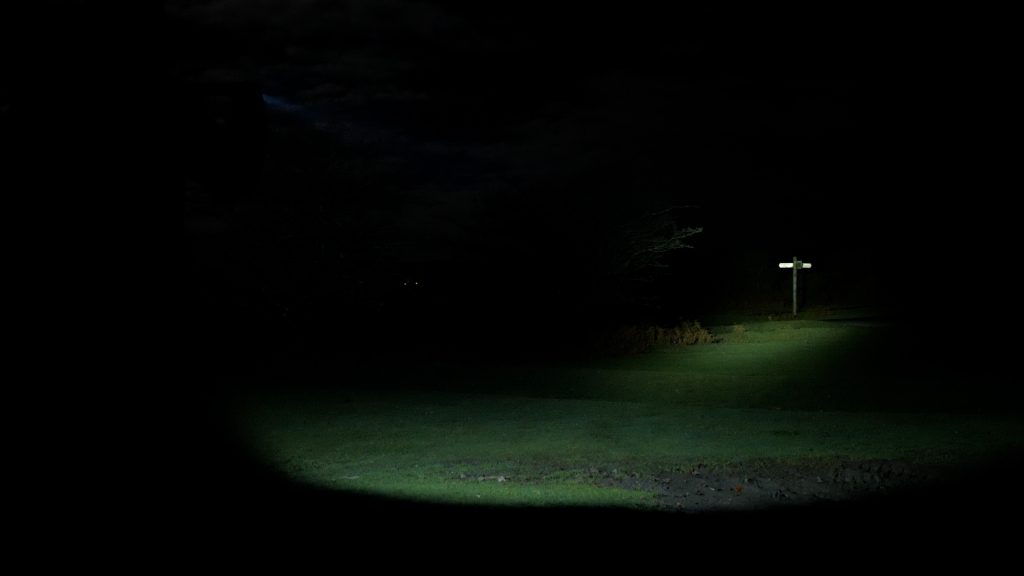
Probably the most impressive feature of this torch for its size is its beam profile. It has 250 metres of throw or 15530 candela of intensity. But even with the tight hotspot from that deep smooth reflector, there’s still enough spill for it to be useful as an EDC torch.

The Luminus SST20 LED I measured at 5682K with a slightly green tint and a CRI of 65. This is in turbo – in the lower modes the green tint is quite noticeable and won’t be to everyones’ tastes.
The Fenix PD25R is an excellent EDC torch with a great combination of throw and spill and superb build quality. Ideally I would have liked to see quick access to both turbo and low modes and with its tiny battery considering its size, runtimes aren’t spectacular.
Nitecore T4K

The Nitecore T4K comes very nicely packaged with a USB-C to USB-A charging cable, a key ring clasp and a manual. This is the only torch in this roundup with an integrated non-replaceable 1000 mAh Li-ion battery.

It’s actually in Nitecore’s keychain torch lineup – I looked at the two smaller torches in this lineup in my last article – the Tiki and Tini 2. It’s a bit of a stretch calling this a keychain torch, but it does come with a keychain attachment, unlike any other torch I’m looking at today.
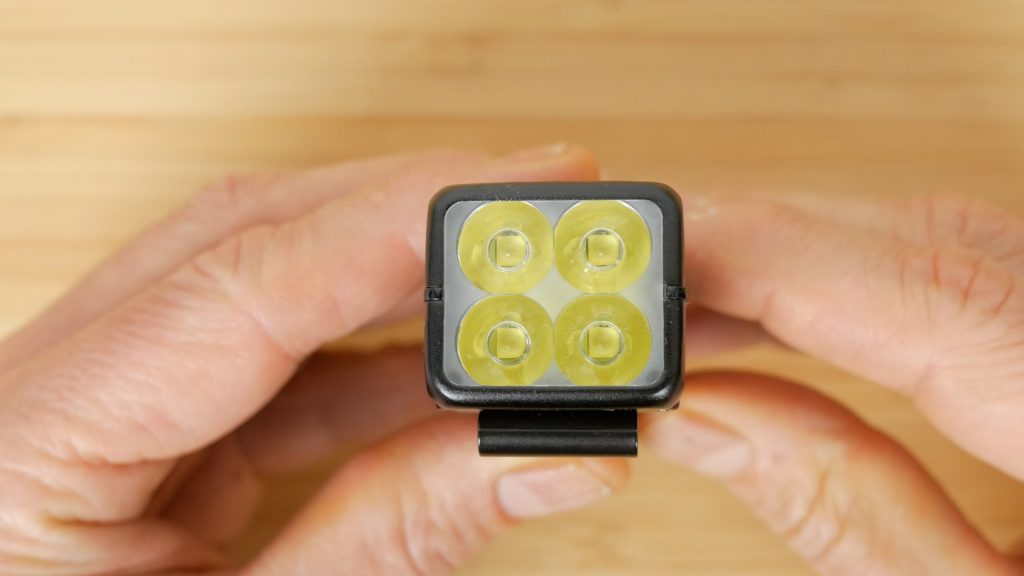
It’s an unusual design with an almost square head with four CREE XP-L2 V6 LED’s and it has a full length non-reversible pocket clip which allows for deep carry bezel up.

The belt clip is held on with screws and can be removed, as can the quick release keyring buckle.
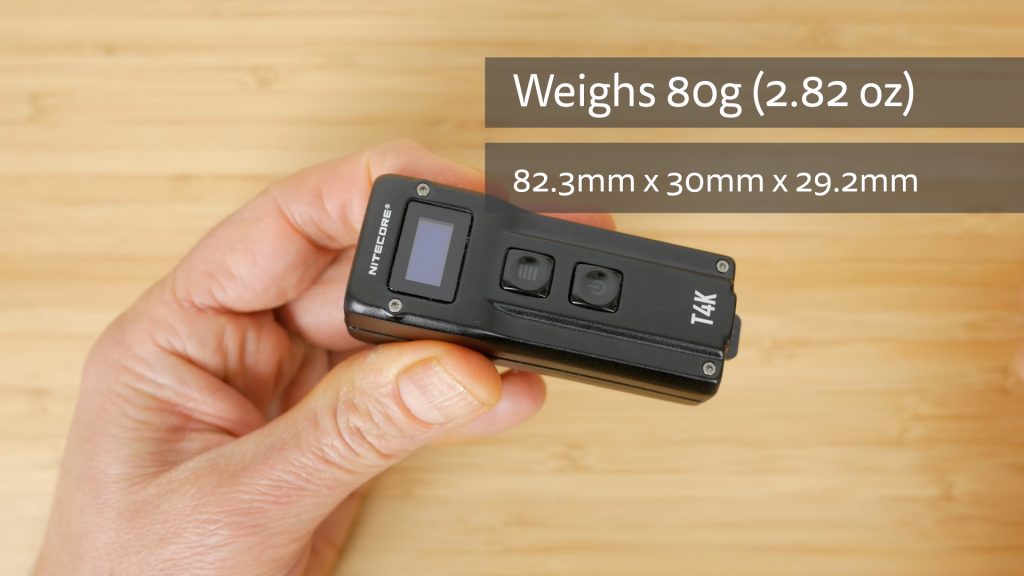
It weighs 80g with the keyring buckle and clip and just 68.2g without.
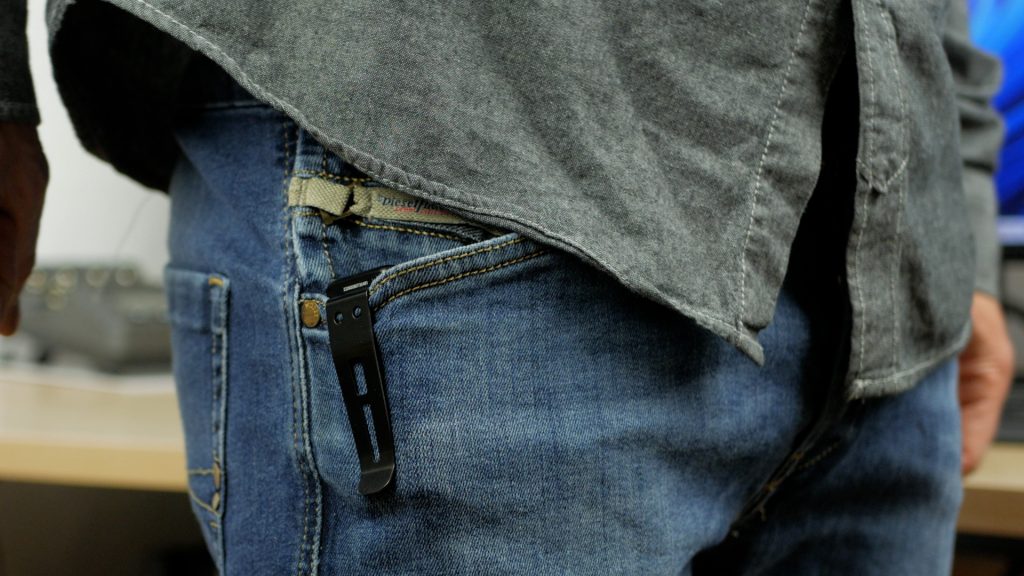
I find it a little thick to stash in my trouser pockets, but I’ve attached it to the waist of my running shorts before and with its wide pocket clip I barely noticed it whilst running. And it’s plenty small and light enough for a jacket pocket.

It has a metal construction with a black finish but only an IP54 weatherproof rating – partly due I guess to the uncovered USB-C charging port.

All the brightness levels are available whilst charging except turbo, although there’s no way to tail stand the torch, and no magnets to be found. I did find some USB-C cables a tight fit without removing the quick release buckle.
The torch has a small OLED screen for real-time display of lumens and runtime. Below the screen are the power and mode buttons. For some reason it arrives in demo mode. Press and hold the power and mode buttons to switch to daily mode.
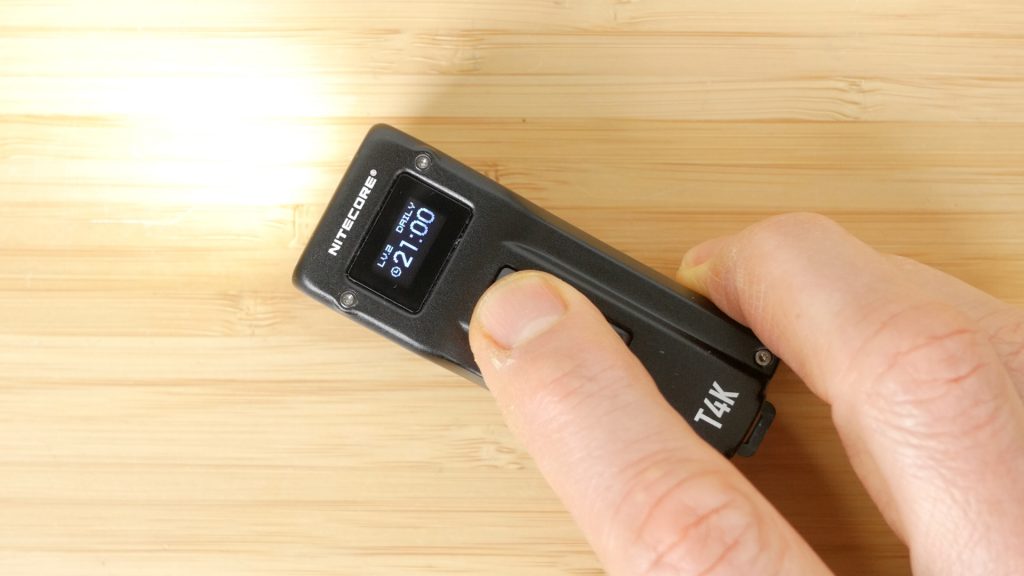
The interface is very easy to use. Press the power button to turn it on and then the mode button to cycle from ultralow 67 hour 1 lumen mode, to 21 hour 15 lumen low mode, 7 hour 65 lumen mid mode and the 2 hour 45 minute 200 lumen high mode. Press and hold the mode button with the torch on or off for the headline grabbing 4000 lumen turbo mode which is insanely bright for any torch let alone one this size. Press and hold the power button with the torch off to access ultralow mode. There’s no strobe function. The display shows the brightness level and time remaining for each mode. In turbo there’s a countdown progress bar that lasts up to 10 seconds depending on the temperature of the torch. You can keep pressing it but the torch gets very hot and the turbo lasts a progressively shorter time.
With the torch off pressing the mode button shows the battery level of the torch with a graphical icon and its voltage. It’s fully charged at 4.2V.
The buttons are very easy to accidentally press but fortunately there are two lockout modes. Press and hold the power button with the torch on until Lockout 1 icon appears or a bit longer for Lockout 2. In Lockout 1 you still have turbo mode with a press and hold of the mode button. In Lockout 2 both buttons are disabled. Short press and then quickly long press the power button to disable the lockout mode.

I measured an unbelievable 4855 lumens at turn on, 4659 lumens after 10 seconds – just, and then a dramatic drop off to 232 lumens for the remainder of my measurements.

The torch got pretty warm in places at over 50°C.
I can’t see Nitecore mention ANSI anywhere which makes sense since the brightness after 30 seconds is more than an order of magnitude lower than at turn on so they wouldn’t be able to advertise 4000 lumens. As long as you are clear that the turbo only lasts up to 10 seconds it’s still very impressive, and all the lower modes are perfectly regulated. I just wish the high mode was at least 500 lumens even if it lasted under an hour. 200 lumens from over 4000 lumens is just too big a jump.

The 4 LEDs sit behind a TIR lens and the beam is floody, but with the huge amount of output the throw is still 209 metres with an intensity of 10900 candela. Although this is still less than the Fenix PD25R with only 800 lumens of output – which it can also hold for a lot longer. It really does depend on what you want.

I measured the colour temperature as a cool 6507K but with a very neutral tint and a decent CRI of 70.
This could be the gadget lover’s perfect torch. It’s pretty small and lightweight, has an insane amount of brightness, and the OLED screen makes it a joy to use. But it’s quite pricey, it has a non replaceable battery, the turbo mode is very brief, and the lower modes although well regulated are less than you get on some much smaller true keyring torches.
I’d really like to see a 1 hour 400-500 lumen high mode to make it a more versatile torch that I might grab for my morning walk. In some ways it is best suited as a keyring torch, if you’re ok with the bulk, and it’ll certainly impress your friends!
Sofirn SC31 Pro

The Sofirn SC31 Pro comes in a no frills box with a USB-A to USB-C charging cable, a lanyard, spare o-rings and a user manual.
Sofirn is a budget brand, especially if you order directly from China. The prices are bumped up considerably on Amazon and not as attractive.
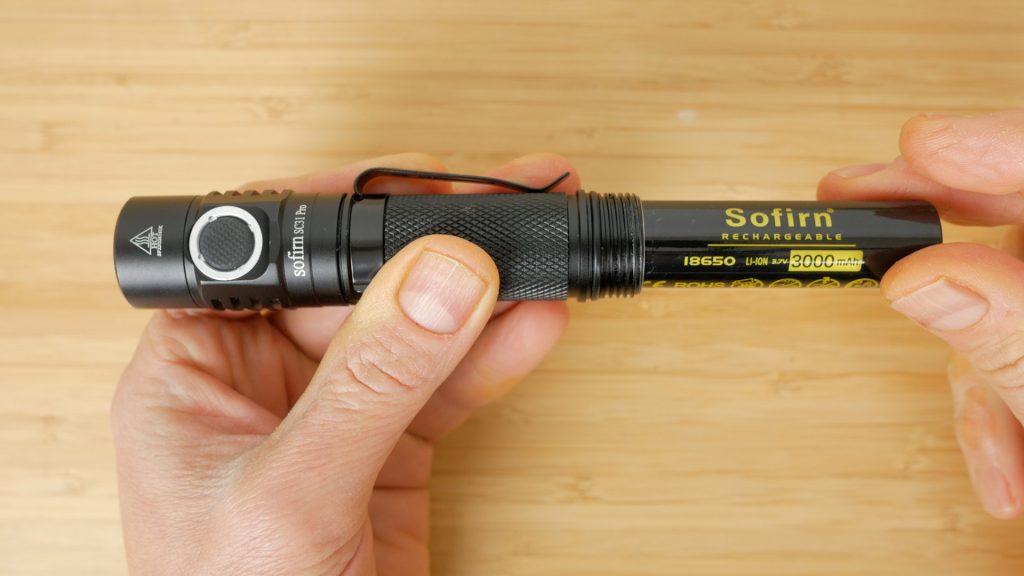
It runs off the included 3000 mAh unprotected 18650 battery but with spring contacts top and bottom every battery I tried worked fine. And again the spring contacts protect against drops and knocks.

The SC31 Pro is made from aluminium with a black finish and an IPX8 waterproof rating. It feels well made but does have a slightly budget look to it. The pocket clip is a very basic affair. It’s short and non reversible, but you can flip the main body tube to have it the other way around.

The tail cap isn’t magnetic – but this is an option for a few pounds extra if you order direct. I chose this option – but it does extend the length a bit.
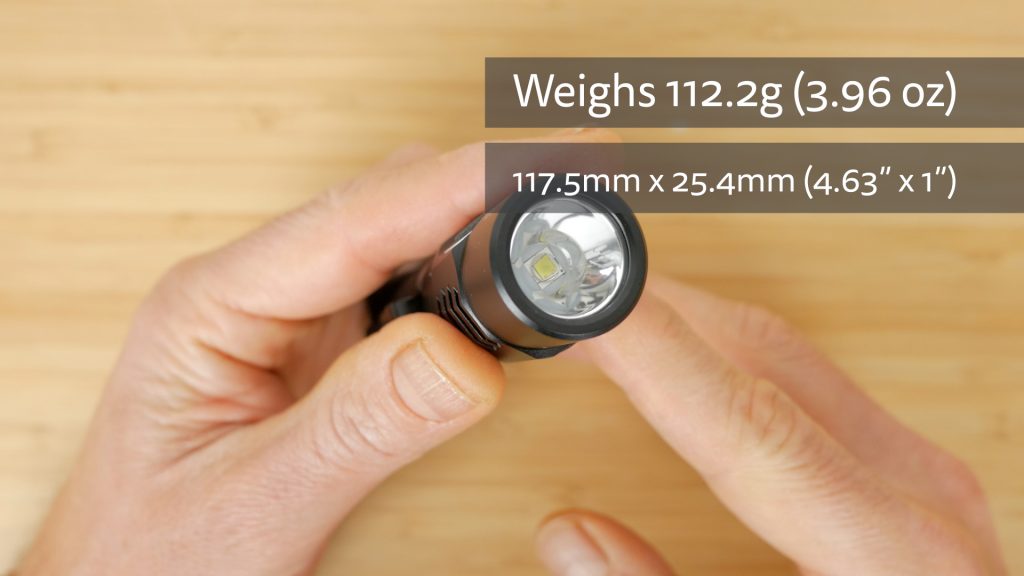
It’s fairly lightweight for a 18650 torch at 112.2g, although a little longer than some with its deeper smooth reflector which we’ll come back to.

It’s about the same length as the Olight Warrior Mini 2 we’ll look at next – but fatter.

The torch has built-in USB-C charging behind a rubber flap. All modes including turbo are available whilst charging. The side switch glows red when charging and green when fully charged.
The torch runs Anduril 2 like the TS10 so it works in exactly the same way, except with this side switch instead of the tail switch. This side switch glows green when the torch is on and can be configured just like the front red auxiliary LEDs on the TS10. I have it set to low brightness in lockout and full brightness when unlocked. I won’t cover its user interface since it’s the exact same as any Anduril 2 torch – just refer back to the earlier Wurkkos TS10 chapter using the timeline markers if need be.

This torch has a Luminus SST40 LED and the manual simply lists runtimes as “the lower the brightness the longer the runtime, with a range from 1 lumen to 2000 lumens” This is one issue I have with a lot of Anduril torches. You often don’t know the exact runtime of any particular mode – and with the default smooth ramped brightness it’s very easy to have a higher brightness than you need, with very short runtimes as a consequence. And to complicate matters further it’s possible to manually configure temperature step down with Anduril firmware – which will alter brightness levels and runtimes considerably.

Check the Anduril manual for how to do this – but I’ve made sure to accurately calibrate the ambient temperature and configured the step down temperature limit to 45°C which is the Anduril default with all the Anduril torches I tested. I’ve tried up to 60°C but you’ll barely be able to hold the torch – and might over stress the electronics.

Still output is impressive for a relatively compact torch. I measured 1991 lumens at turn on, 1943 lumens after 10 seconds and 1867 lumens after 30 seconds. There was a fairly sharp drop off around 2 minutes in, to 1000 lumens and then a gradual drop to around 650 lumens after 5 minutes, which continued to drop but more gradually for the remainder of my tests. This isn’t too bad, but the output is not regulated above around 125 lumens so is dependent on battery voltage. So again you don’t know exactly what you’re going to get except at the very low levels.
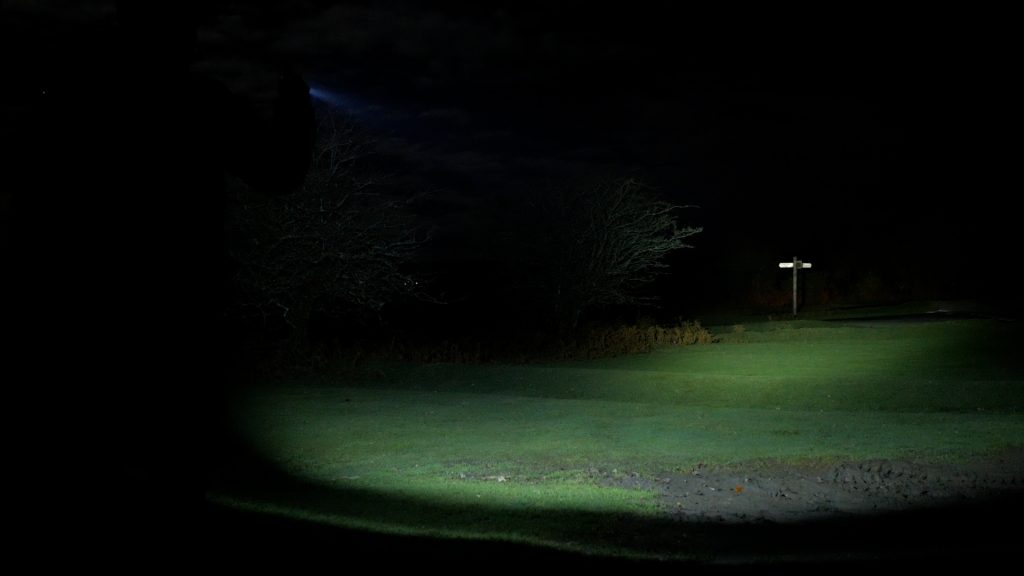
With the deeper smooth deflector the SC31 Pro has a decent throw. I measured 190 metres with an intensity of 9060 candela. That’s pretty close to what Sofirn lists as 10,000 candela and there’s still useful spill for seeing what’s right in front of you too.

I have the 6500K version which is measured at a slightly warmer 5855K without too much tint and a CRI of 65.
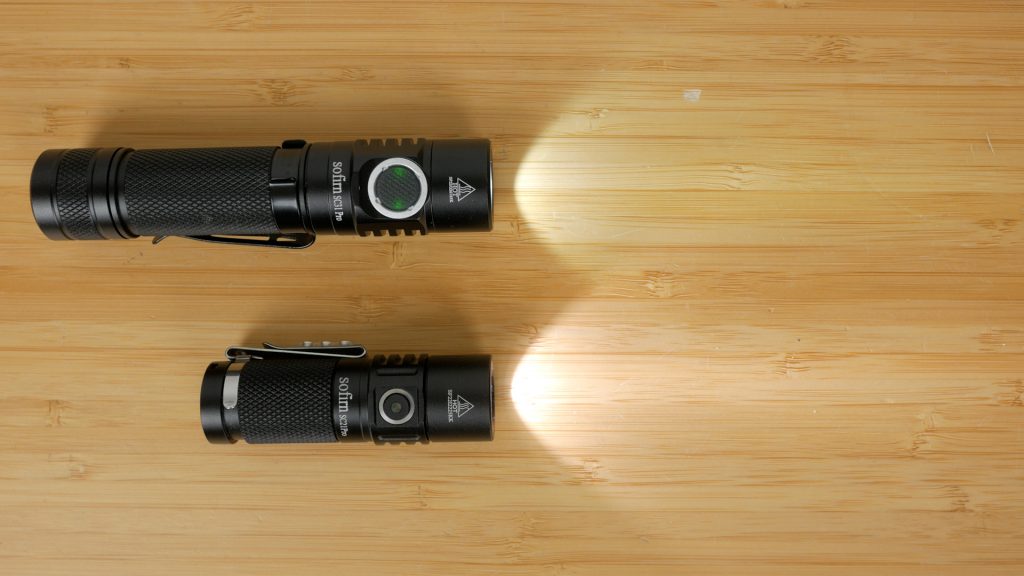
I also have the SC21 Pro from Sofirn which is very similar but almost half the size and weight, running off a 16340 battery. And it has the option of a higher CRI, warmer LED which I do slightly prefer.

If you purchase directly from China the SC31 Pro is a great budget option. It’s bright, with a decent throw and is hugely configurable running Anduril 2. If you want a simpler interface without Anduril 2, Sofirn have the even cheaper SC18 which is slightly more compact and has a more modern design. There’s also the Anduril 2 Wurkkos FC13 with slightly higher output, also a more modern design, a multi-coloured side switch and a useful emergency power bank mode. Wurkkos is manufactured by Sofirn. But I only got half its rated output with the included battery – switching to a high discharge Samsung 30Q battery I did get almost 3000 lumens at turn on.
Olight Warrior Mini 2 (WM2)

The Olight Warrior Mini 2 comes nicely packaged with a USB magnetic charging cable, a silicone lanyard, a karabiner-style ring and the user manual. Again no spare o-rings.

It comes with a reversible pocket clip already installed, and a removable keyring for the karabiner that can be used in place of a lanyard.

I removed this clip since I prefer to use the pocket clip, which I installed in its place to allow for bezel down deep carry.
It’s a very nicely built torch made of aluminium with an IPX8 waterproof rating. I have the black finish but lots of colours are available.

It runs off a customised 3500 mAh 18650 battery and has both a tail switch and side switch, but is still fairly compact and slender and weighs 120g with the battery and pocket clip.

The magnetic charging cable snaps onto the magnetic tailcap of the torch with a full charge taking up to 3.5 hours. The LED on the charging cable changes from red to green when fully charged. I did find this often turned green a little early – but it still continued to charge slowly.

You can’t use third party batteries in the Warrior Mini 2 but I was able to charge the battery in my external charger, although it’s not recommended since the positive and negative terminals of the battery are next to each other, separated by a thin insulator. If you’re not careful you might short the battery.
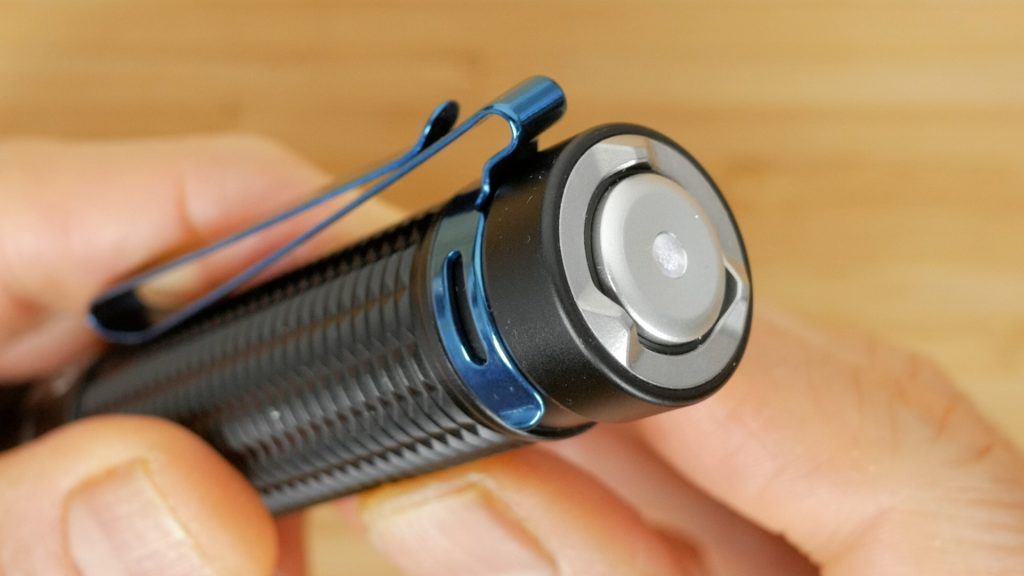
Cleverly the tail switch still sits flush to the base so the torch can still tail stand.
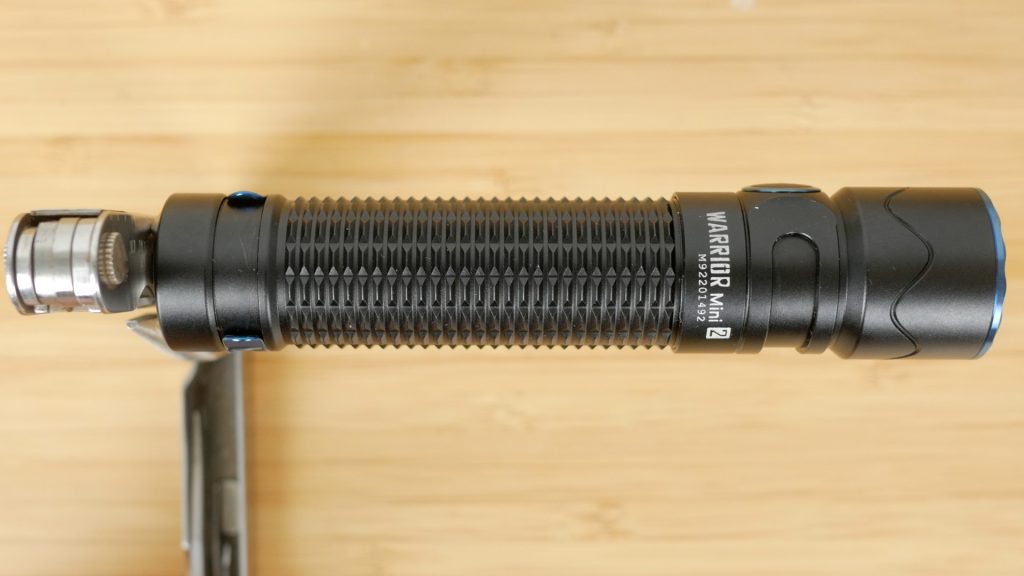
And the magnetic tail cap, mostly intended for snapping to the charger, is also just about strong enough to hold the torch in any orientation for hands free operation.

You can operate the torch with the side switch or tail switch or both together, which is one of my favourite features of this torch. The side switch works in exactly the same way as on the Baton 3 we looked at earlier so I’ll just cover the main modes – refer to the Baton 3 chapter for strobe, lockout, timer and battery level indicator. A single press turns the torch on and off. Hold down the button to change brightness from the 164 hour 15 lumen low mode, to a 19 hour 120 lumen medium mode to a 218 minute 500 lumen high mode. These modes are memorised after you’ve turned the torch off. Double click for the 1750 lumen turbo and long press from off for the 1 lumen moonlight.

A half press and release of the tail switch turns on medium brightness, and a full press and release switches on turbo. If you press and hold either the half or full press you get momentary medium or turbo brightness until you release the switch.
If you do a full press and hold of the tail switch and a single press of the side switch at the same time you’ll switch to the second tail switch configuration. A half press for turbo, and a full press for strobe. This only operates in momentary mode – when you release the button the torch turns off.

If you look at the front of the torch you’ll see a half moon shaped proximity sensor. In turbo and high mode when you get close to an object – around 12cm away – the brightness will automatically drop. After 60 seconds the torch will turn off if the blockage continues, to prevent burning a hole in your pocket if you accidentally leave it on. I found this proximity sensor worked as expected and didn’t cause any issues. I did manage to disable it temporarily so it didn’t interfere with my output measurements.

I measured 1778 lumens at turn on, 1765 after 10 seconds and 1727 lumens after 30 seconds. Almost exactly the spec’d 1750 lumens. It held over 1000 lumens for a couple of minutes before dropping to around 466 lumens after 4 minutes which is maintained for the remainder of my tests. And again pretty much as spec’d.

The torch head got to a pretty warm 50°C

Olight doesn’t specify the LED used but it sits behind a TIR optic and the beam has a good mixture of throw and spill for an EDC torch. There’s a noticeable hotspot with 220 metres of throw and 12300 candela of intensity in turbo mode.

I measured a colour temperature of 5846K with a very slight green tint that wasn’t really noticeable in most cases and a CRI of 65.
The Olight Warrior Mini 2 has a lot going for it. A tail switch and side switch with a simple user interface and quick access to all its modes. A useful general purpose beam with both throw and spill and decent output with good runtimes with excellent regulated constant outputs in the lower modes.
You’ll barely notice it on a belt or in your jacket pocket but although it’s slender it might be a little long for your jeans pocket. The LED is also rather mediocre, with warmer, more neutral and higher CRI options available from other brands. It’s also expensive – but again check the links down below, Olight often have tempting promotions.
Acebeam E70 Mini

The Acebeam E70 Mini comes with a short USB-C to USB-A cable, a lanyard, spare o-rings and a user manual.

A non reversible deep carry pocket clip is already installed for bezel down carry. It’s held on with screws and can be removed.

This is a solid, well built torch made of aluminium with a very matte black finish. The main body has spiralled slots with the blue inner tube showing through which does add a bit of style.

It runs off an Acebeam protected 18650 3100 mAh battery with built-in USB-C charging. This is quite a long battery, and a much shorter unprotected flat top battery rattles around in the tube – even with spring contacts top and bottom.

Adding a magnet as a conductive spacer to the top of this battery takes up the slack and works ok, but I think you’re better off using button top protected cells in this torch. This Thrunite battery works just fine.
It’s a little less convenient removing the battery to charge it, but you don’t have to worry about making sure any external ports are sealed.

And the torch does come with a better than average IP68 dust and waterproof rating like the two Fenix torches in this roundup. The battery’s red turns green when the battery is fully charged.

The torch weighs 121.2g – very close to the Olight WM2 but it’s a little shorter.

Although with its double tube build it’s quite thick for an 18650 torch which does make it more noticeable in a jeans pocket. With the wide pocket clip it’s well suited to a belt and it fits perfectly in a jacket pocket.

The E70 Mini has a tail switch and no side switch. The base isn’t magnetic, but it can tail stand.

The interface is fairly simple once you remember it’s a double click to turn the torch on. And that does help prevent accidentally turning it on even without enabling lockout. Press and hold the switch to cycle from 19 hour 60 lumen mode, to 7 hour 170 lumen mid 1 mode, 3 hour 15 minute 380 lumen mid 2 mode and 900 lumen high mode which drops to almost 2 hour 600 lumens after 2 minutes. Your last mode used will be memorised.
Double click the switch with the torch on to access the 2000 lumen turbo mode. Triple click with the torch on or off to access strobe. And press and hold the switch with the torch off for the 56 hour 20 lumen ultra-low mode. Which is the highest ultra-low mode in this roundup by some margin – although I actually measured it as 10 lumen. Press and hold the switch for 5 seconds with the torch off to enable lockout. A 3 second hold will unlock the torch and enter ultra-low mode.

In turbo I measured 1785 lumens at turn on, 1744 lumens after 10 seconds, 1673 lumens after 30 seconds and it dropped sharply to 520 lumens after 80 seconds. It held this constantly for the remainder of the test.

It does get quite hot – I measured over 50°C at the head but even the body gets quite warm in turbo mode. It does become a nice hand warmer though on a winter walk.
The lower modes are very well regulated with constant outputs, although I did find outputs a little lower than spec’d. Like the Nitecore T4K there’s no mention of the ANSI standard in the manual or online, but even so I didn’t see 2000 lumens in any of my tests even at turn on.

One of the big selling points of this torch are the 3 high CRI 5000K natural white Nichia 519A LEDs.

I measured 4932K with a neutral tint and a CRI of 94 and an R9 of 90 – all very impressive.

The LEDs behind the TIR optic provide a very floody beam with almost no hotspot – together with the natural colour temperature it’s a great torch for walks. With a slightly lower maximum output than spec’d I measured 116 metres of throw and 3383 candela – Acebeam quote 153 metres of throw and 5875 candela.
The Acebeam E70 Mini is a well built torch with a high CRI natural white floody beam, well regulated outputs up to around 500 lumens and a good well thought out user interface. It’s not the cheapest or most compact 18650 torch around, but it’s worth the asking price.
Honourable mentions

There’s a few torches that didn’t make this top ten but deserve a mention. The Olight Baton 3 Pro is the most compact 18650 torch I’ve tested and almost the perfect EDC torch.

1500 lumens of output, magnetic charging which is very convenient for daily use, a simple user interface with quick access to turbo and moonlight modes. And it’s available in loads of colours and with both a natural and cool white option. Unfortunately I received two units that had an overly sensitive proximity sensor, a fault that Olight have acknowledged. I hope to pick up a version with the proximity sensor disabled soon.

I also tested the Thrunite T2 which runs off the larger 21700 battery but is still very compact. Thrunite quote a 3757 lumen output although I measured a fair bit lower at just under 3000 lumens, still very powerful for its size.

I found it a little fat for jeans pocket carry, but it’s great in a jacket pocket and Thrunite’s user interface is so easy to use.

You’ll get better runtimes too with the larger battery.
The Wurkkos TS25 is another great option running off a 21700 battery – again better suited for jacket pocket use. It’s also spec’d at 4000 lumens but I measured just over 3000 lumens which dropped off quickly.

It has a nice design and good build quality and comes with a power bank feature so the USB-C charging port works both ways.

It also has multi-coloured front auxiliary LEDs that can also be configured as well as everything else with its Anduril 2 firmware.

There’s also the enthusiast’s favourite the Emisar D4V2 which you can configure however you like – front LEDs, switch LED, body colour etc.

This is a very compact 18650 torch with up to 4000 lumens that runs Anduril 2 and also has multi-coloured auxiliary LEDs.

You can even swap the 18650 tube for a 18350 tube for a tiny yet powerful torch if you like!

Lastly there’s the Lumintop GTA which was very close to making my top 10.

It runs off a single AA sized battery – anything from a 1.5V alkaline to a 3.7V 14500.
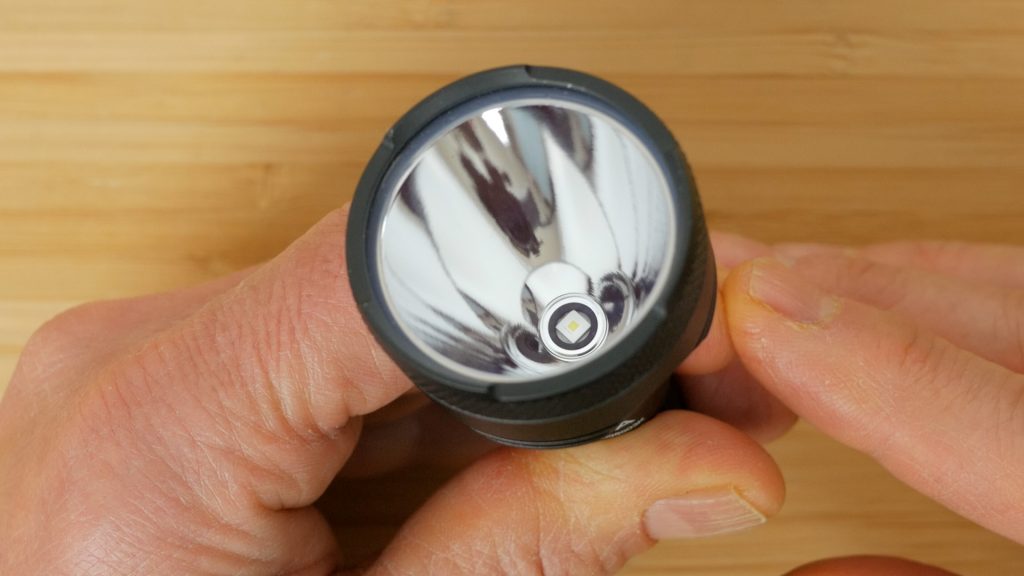
It’s pretty compact and lightweight at only 75g but its huge head and deep smooth reflector gives it a throw of a quite staggering 585 metres with an intensity of 85000 candela!
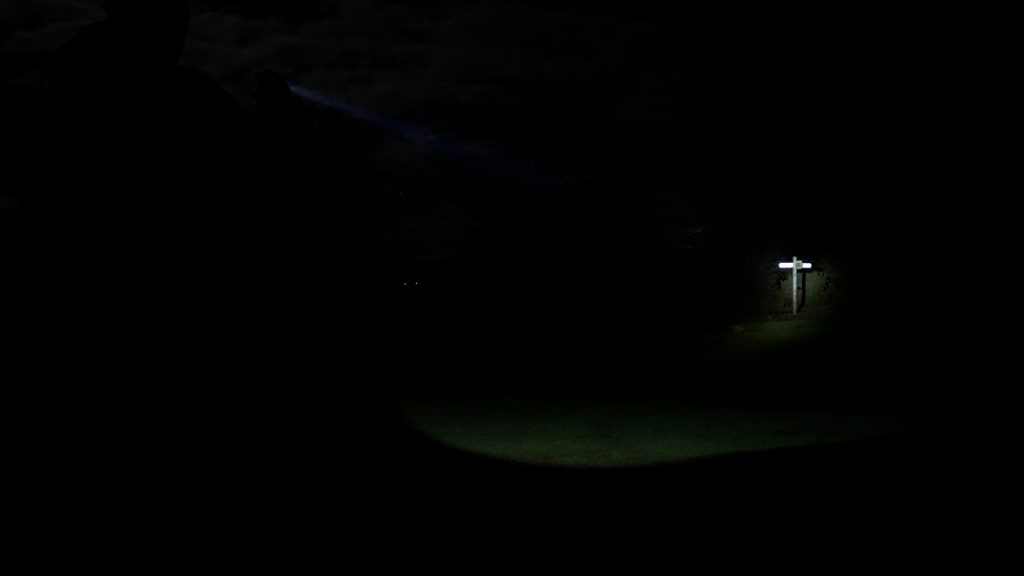
Very impressive for a torch that you barely notice in your pocket.
Conclusions

It’s hard to pick a winner since there are so many factors to consider. If I’m wearing a jacket I’ll normally carry at least an 18650 torch, often something bigger. I do like the Olight Warrior Mini 2 – it has a good combination of throw and flood and if you’re lazy charging your tech, the magnetic charging does make it so easy to make sure the torch is fully charged for your next outing.
The Acebeam E70 Mini also fits fine in a jacket pocket and like the Olight has excellent regulated outputs at the lower levels, so you know where you are with runtimes. It also has the high CRI, warmer LEDs which just make everything look better. You do need to remove the battery from the torch to charge it which is far less convenient – but no external charging mechanism does mean there’s one less thing to go wrong.
I’d only really consider the smaller torches for regular trouser pocket carry. The Fenix PD25R is similar in some ways to the larger Olight Warrior Mini 2. It’s more compact but with less output and runtime. Although with its focussed beam it actually has more reach than any other torch in this roundup – except the Lumintop GTA I briefly mentioned.

But for me it comes down to a toss up between the smaller still Fenix E18R V2 and Olight Baton 3 both with similar outputs, and I’d honestly grab either. I prefer the user interface on the Baton 3 and the charging case is great but I like the standard USB-C charging on the Fenix and the non-rechargeable CR123A battery support.

The torch I always have on me whatever, is still the RovyVon Aurora A8 I looked at in the keychain torch roundup.

And an arguably more useful torch for day to day jobs around the house, working on the car and DIY tasks – especially in the winter months is a head torch. I also use one for running sometimes three times a week at the moment with these short days. I’ve already started collecting the best options I can find for another roundup – that video and article should be out soon!
Don’t forget to take a look at my YouTube video at the top of the page, and subscribe to my YouTube channel where I’m releasing videos every week on the latest technology and how to get the most out of it. If you tap the bell icon when you subscribe you’ll get a notification as soon as I release a video, and there’ll be a link to my site here for the written article. YouTube is also the best place to leave a comment. I read all of them and respond to as many as I can!
I’ll include links to torches I’ve reviewed after publishing this article:
Olight Seeker 4 Mini, Olight Baton 3 Pro Max, Olight Seeker 4 Pro
Company offers (I’ll try and keep this updated):
Olight Store: https://geni.us/kjOSZK (choose from UK or US store)
If there’s no sale on you can get 10% off using my code TTM10 at checkout which helps support this site and my YouTube channel:
Olight Baton 3: UK: https://www.olightstore.uk/s/EC41TI US: https://www.olightstore.com/s/0WYFEX
Olight Warrior Mini 3 (new model): UK: https://www.olightstore.uk/s/DS85DL US: https://www.olightstore.com/s/6QEQ5S
Olight Baton 3 Pro: UK: https://www.olightstore.uk/s/4YA99W US: https://www.olightstore.com/s/F9GB34
As an Amazon affiliate, I get a small commission from purchases made via any of the international Amazon links below:
Olight Baton 3: https://amzn.to/3HEYW18 or with charging case: https://amzn.to/3UYWdCI
Olight Warrior Mini 3 (new model): https://amzn.to/3RrUo2V
Olight Baton 3 Pro: https://amzn.to/3YDzwHl
Fenix E18R V2.0: https://amzn.to/3FvGMMC
Fenix PD25R: https://amzn.to/3YsfAqI
Nitecore T4K: https://amzn.to/3BCQ4VW
Thrunite T1S: https://amzn.to/3j3SPck
Thrunite T2: https://amzn.to/3VZfntu
Acebeam E70 Mini: https://amzn.to/3PsNQxS
Skilhunt M150 V3: https://amzn.to/3BDebDH (can’t see this currently listed yet)
Sofirn SC31 Pro: https://amzn.to/3BD8be6
Sofirn SC21 Pro: https://amzn.to/3Yk93ON
Sofirn SC18: https://amzn.to/3Pwhq5z
Wurkkos TS10: https://amzn.to/3j7Fek6
Wurkkos FC13: https://amzn.to/3V2St2O (can’t see this currently listed yet)
Wurkkos TS25: https://amzn.to/3WhrfXo (can’t see this currently listed yet)
Lumintop GTA: https://amzn.to/3hrGiin
Emisar D4V2: https://intl-outdoor.com/emisar-d4v2-high-power-led-flashlight.html
Leave a Reply